Set Up an Email Inbox Monitoring Channel
Use a custom email address to create Cases.
Last Updated:What's in this article?
Configure a New Email Inbox Monitoring Channel
Note: This setup is only necessary (at this time) for individual Gmail accounts. Accounts associated to Google Workspace (i.g., @ovationcxm) do not need to follow these - as they will simply Enable Less Secure apps for the account
You can use an existing IMAP (Internet Message Access Protocol) email address to create an email channel in CXME. The email channel will create new Cases whenever an email gets sent to the address you choose. It's easy to set up a new email channel in the Channels section of the Settings view. Let's learn how.
Your ability to set up an email channel depends on your Role & Permissions.
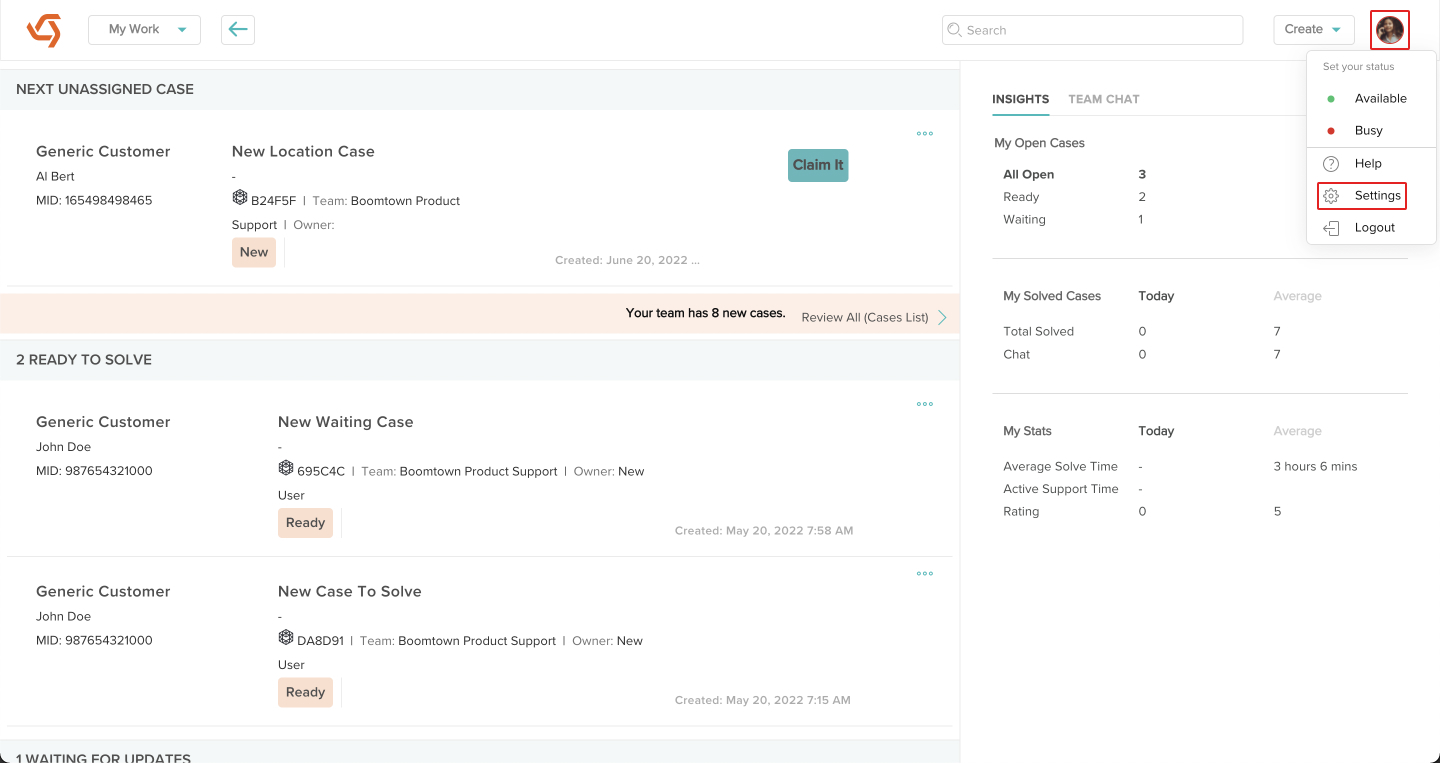
- Click on your avatar at the top right, then click on Settings.
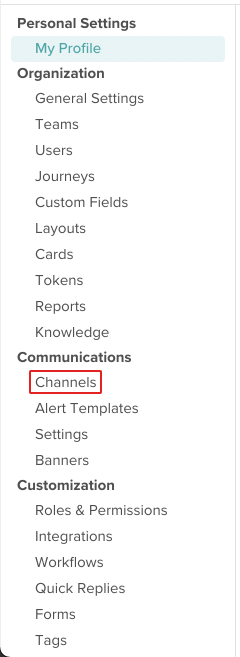
- Click on Channels under Communications.
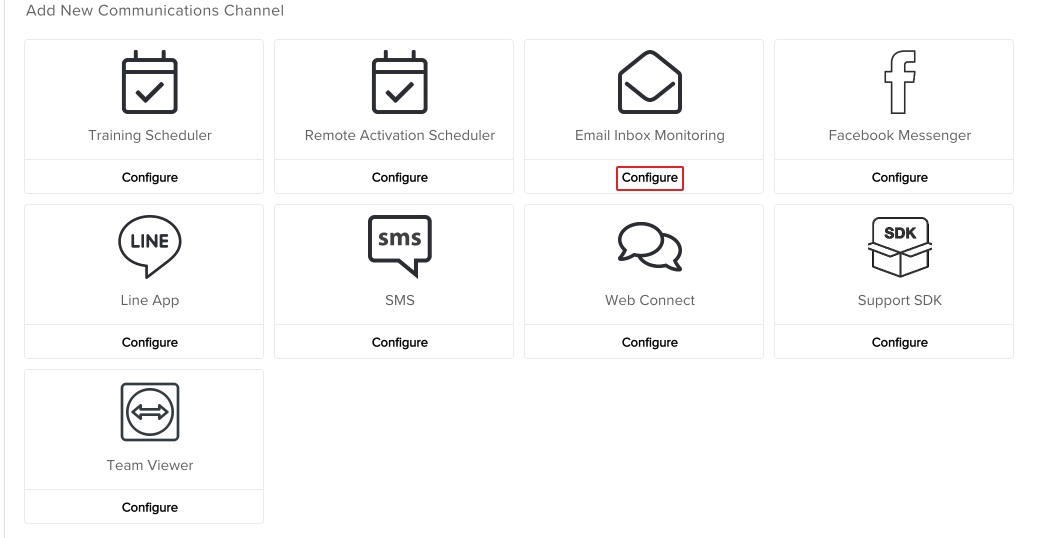
- Click on Configure under the Email Inbox Monitoring channel.
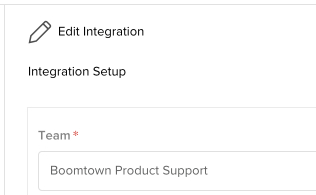
- Choose a Team from the picklist. This will be the Sponsor Team on Cases that get created.
- Optionally update the Name and Description fields. Set the Status to Enabled if you are ready to use this channel straight away.

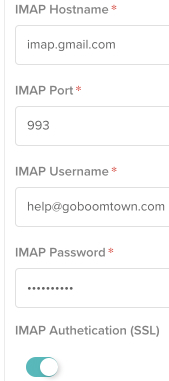
- Enter the IMAP Hostname, IMAP Port, IMAP Username, and IMAP Password. In most instances, IMAP Authentication (SSL) should be enabled and IMAP Validate Certificates should be disabled.
The IMAP Hostname and IMAP port will depend on the email client you use. (e.g. Gmail uses imap.gmail.com as the hostname and 993 as the port.) Contact your organization's systems administrator for assistance.
The IMAP Username will be the email address you wish to use for this channel. The IMAP Password will be the password you would use to log in to your email client with the same email address you entered under IMAP Username.
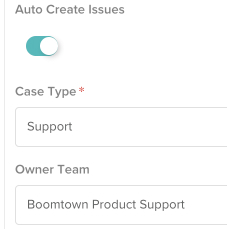
- Click on the toggle switch next to Auto Create Issues if you want new incoming emails to create new Cases. Choose a Case Type and an Owner Team for the Case that gets created.
The email channel will create Cases from any unread messages in the inbox of the email address you chose. The message will be marked as read, then deleted from the inbox after the Case gets created.
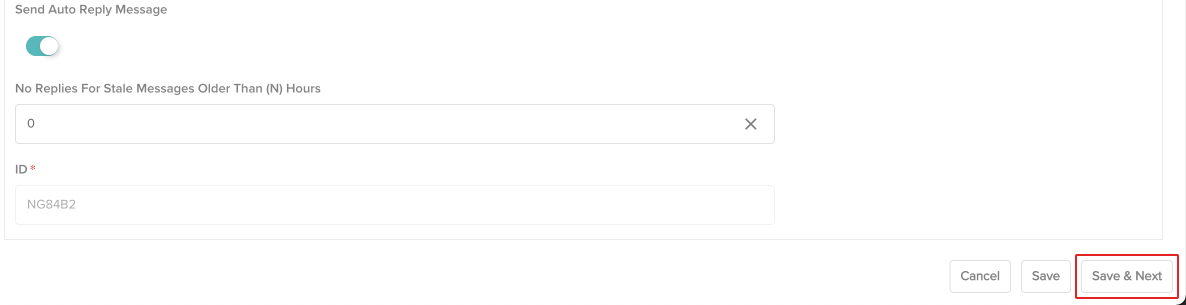
- Click on the toggle switch next to Send Auto Reply Message if you want an automated email sent from the Owner Team's alert templates as a response to the Customer's initial email. The No Replies For Stale Messages Older Than (N) Hours field can be utilized when enabling/disabling the channel. New Cases will get created for any unread messages in the inbox of the email address you chose but they will not receive auto-reply messages if they are older than the number of hours you enter into this field. When you are done, click the Save & Next button.
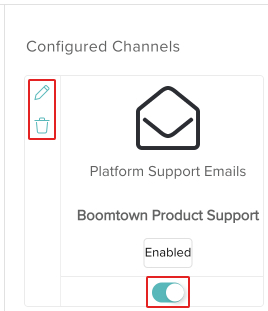
- Your Email Inbox Monitoring channel has been created! You can update the channel by clicking on the Edit icon or delete it by clicking on the Delete icon. You can also quickly enable or disable the channel using the toggle switch.