Set up a Customer feedback survey email
Last Updated:What's in this article?
What are Customer Feedback Surveys
Users can easily email feedback surveys to Customers after each Case interaction. These surveys are completely customizable and typically include fields such as NPS (Net Promoter Score), agent rating, and comments. The surveys and survey emails can be created and customized and enabled for different Teams within the Platform.
Within a Case, the User can choose which survey (if multiple are enabled for a Team and what Customer email to send the survey to from the Resolution section of a Case.
How do I set up the Survey Questions?
To create the survey form that you want your Customers to fill out:
- Go to System → Forms
- Click on the + Add Form button in the top left corner
- Fill out the following fields:
- Name your survey. NOTE: you can have multiple survey templates, so make the name clear to understand which one you're referring to. You can always change the name later.
- Under Type, select Customer Acceptance
- (Optional) - Under Team(s), select the Teams that should have the ability to send this Survey to Customers. This will allow you to limit the teams who see which Surveys
- Hit Save.

- Click on
 (Form Editor) on the left navigation bar of the Form modal
 - Click on + Add Form Field in the top left corner to add questions to your Customer survey
We recommend filling out the Form Field Details for the NPS, Agent Rating and Customer comments sections in the following way:
NPS:
- Click on + Add Form Field
- Field Label: "How likely are you to recommend us to a friend or colleague (1-10)?"
- Field Type: Select List
- Maps To: Issue Ratings
- Mapped field name: NPS Rating

- Select/Radio Options: (NOTE: hit the Save Form button above the Form Field Details to see the Select/Radio Options section)
- Click + Add Item
- Enter "1 (No Way)" into the Item Label field and "1" into the Value field
- Click + Add Item
- Enter "2" into the Item Label and Value fields
- Click + Add Item
- Repeat this process for each number until the Value is 10. Enter "10 (Definitely!)" into the Item Label field
- Click Save Item
- Click on the Save Form button above the Form Field Details.

Agent Rating:
- Click on + Add Form Field
- Field Label: "How would you rate the agent who helped you (1-5)?"
- Field Type: Select List
- Maps To: Issue Ratings
- Mapped field name: Tech Rating
- Select/Radio Options: (NOTE: you will need to hit the Save Formbutton above the Form Field Details to see the Select/Radio Options section)
- Click + Add Item
- Enter "1 (Terrible)" into the Item Label field and 1 into the Value field
- Click + Add Item
- Enter "2" into the Item Label and Value fields
- Click + Add Item
- Repeat this process for each number until the Value is 5. Enter "5 (Amazing!)" into the Item Label field
- Click Save Item
- Click Save Form
Customer Comments:
- Click on + Add Form Field
- Field Label: "Anything else to add?"
- Field Type: Text Area
- Maps To: Ratings
- Mapped field name: Customer Comments.
- Click Save Form
You can preview the form by clicking the Preview Form button in the top right corner of the Form modal.
How do I customize the email template for my Customer Surveys
- Go to Settings → Alert Templates
- Under Default Alert Templates locate the "How did we do?" card [Customer Support Survey (Private Labeled)]. This is the default template Customer Support Survey template you can use.
- Click on the + Create from template button to the right of the template title. This action will redirect you to the Custom Alert Templates tab.

- Click on
 (Pencil) next to the custom "How did we do?'" template to edit it.
 - (Optional) Under the Enabled for Teams field, select the teams that should use this template when sending outbound survey emails to Customers. This will allow you to customize the verbiage of the emails based on the team sending the survey email.
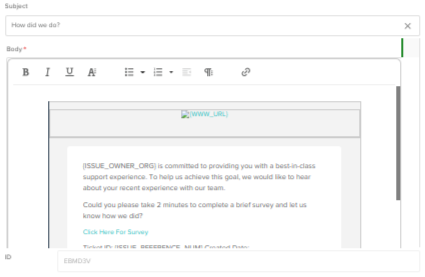
- Edit the Subject field to reflect the subject you want your Customer feedback survey emails to have.
- Edit the Body section to define how what the body of the Customer feedback survey emails hould say. email that will be sent to the customer.
- NOTE: When editing the body of the alert template, do not delete the "Click Here for Survey" link which allows the Customer to access the Form you set up previously. To edit the text of the link, click on the text and then click Edit Link. A pop-up will display where you can edit the Text field to change the text of the Survey form link.
- Click Save & Exit.