
Understand Case Views (Filtering & Saving Case Views)
Last Updated:What's in this article?
What are Case Views
Case Views are different saved filters to quickly pull up a subset of the Cases within the Boomtown Platform. The Case Views that have already been saved can be found in the Views picklist on the Cases activity.
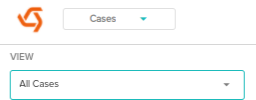
Selecting a Case View from this picklist will change the Cases viewable on the activity, as well as, the metrics Insights section on the right side of the Cases activity. By default, you'll always see the All Cases View when navigating to the Cases activity which allows you to see all Cases within the Boomtown Platform for your Organization. To choose a new View click the Views picklist and choose the Case View you would like to filter your Cases to (Example: All Unassigned Cases).
Saved Case Views
By default, each user will have access to the following set of Case Views -
- All Cases - This View shows all Cases in the Boomtown Platform
- Open Cases - This View shows all Cases that are not Resolved yet
- All Unassigned Cases - This View shows all Cases in the Boomtown Platform that aren't currently assigned to a User
- My Team's Unassigned Cases - This View shows all Cases that aren't currently assigned to a User for the teams you are on
When you select a Case View from the list, you'll be able to view the Filters associated with that Case View under the Filters section on the right side of the Cases activity. To show or hide the Filters section, you can click the Filters button in the top right.

Creating Custom Filtered Case Views
To create a custom Filtered Case View -
- Open the Filter section by clicking the Filter button
- Click the Add Filter button to add a new Filter
- On the Set your filter pop-up, select the Field you would like to Filter your Cases by (Example: Case Source)
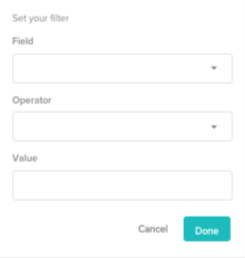
- Select the Operator you want to Filter this Field by (Example: is equal to)
- Select the Value you want to Filter to (Example: Email)
- Note: If the Field you are Filtering on is a defined picklist, the Value field will show all options. If the Field is not a defined picklist, you will be presented with an open text box to define the Value
- Click Done to add this Filter to your custom Filter View
- Repeat steps 2-6 to add all the Filters needed for the custom Case View
- Once all Filters have been defined, click Run Filter at the bottom of the Filters section. This will apply your Filters to the Cases on the left.
Saving Custom Filtered Case Views
You can save custom Filtered Case Views you create to easily reference in the future. These custom Case Views will show in the View picklist once saved. To save a Custom Filtered Case View -
- Click the down arrow next to the Run Filter button in the Filters section
- Select Create New View
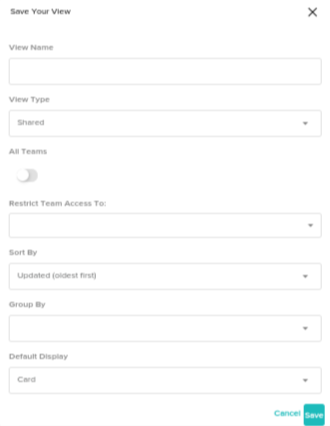
- Fill out the fields on the Save Your View pop-up
- View Name: The name that will display for this Case View in the View picklist
- View Type: Define if this view should be Private to you or Shared with other Teams
- Note: If you have the permission to create Shared Case Views, once you select Shared you can define if this Case View should be shared with All Teams under your organization or a subset of teams. Once Shared, this Case View will show in the View picklist for all Users assigned to those Teams
- Sort By: Define how the Cases in this Case View should be sorted. The Sort By options are -
- Updated (oldest first)
- Updated (newest first)
- Created (oldest first)
- Created (newest first)
- Alphabetical
- Group By: Define if the subset of Cases will be grouped and displayed by another criteria. The Group By options are -
- None
- Owner User
- Status
- Team
- Source
- Journey Stage
- Default Display: Define how these Cases under this View should be displayed. The options for Default Display are -
- Card
- Table
- Kanban
- Click Save to save this new Case View
- Once Saved, this Case View will begin showing in your View picklist.
Custom Views Best Practices
You have a lot of flexibility when it comes to creating custom Views for you and your teams. There are a few things to keep in mind when creating Views since complexity and size can impact load times and performance. Here are a few best practices for creating Views:
- Exclude Closed Cases if you are creating a View for only Cases you are actively working on. This will dramatically reduce the number of Cases that need to be loaded
- Only use the Group By function if critical. Group By queries can be slower to load and it is often a best practice to create separate Views for each group you want to see rather than putting them into one View and including a Group By filter
- Add filters to be very specific for the types of Cases you want to see. For example, you can filter by Source, Team, Status and more. This will help you create specific and targeted Views for your use cases.