
Cases: Filters & Custom Views
Use filters to create custom Case views for you and your Team.
Last Updated:What's in this article?
Add a Filter to a Case View
You can use filters on specific views to narrow down the Cases in your list. Let's try it out!
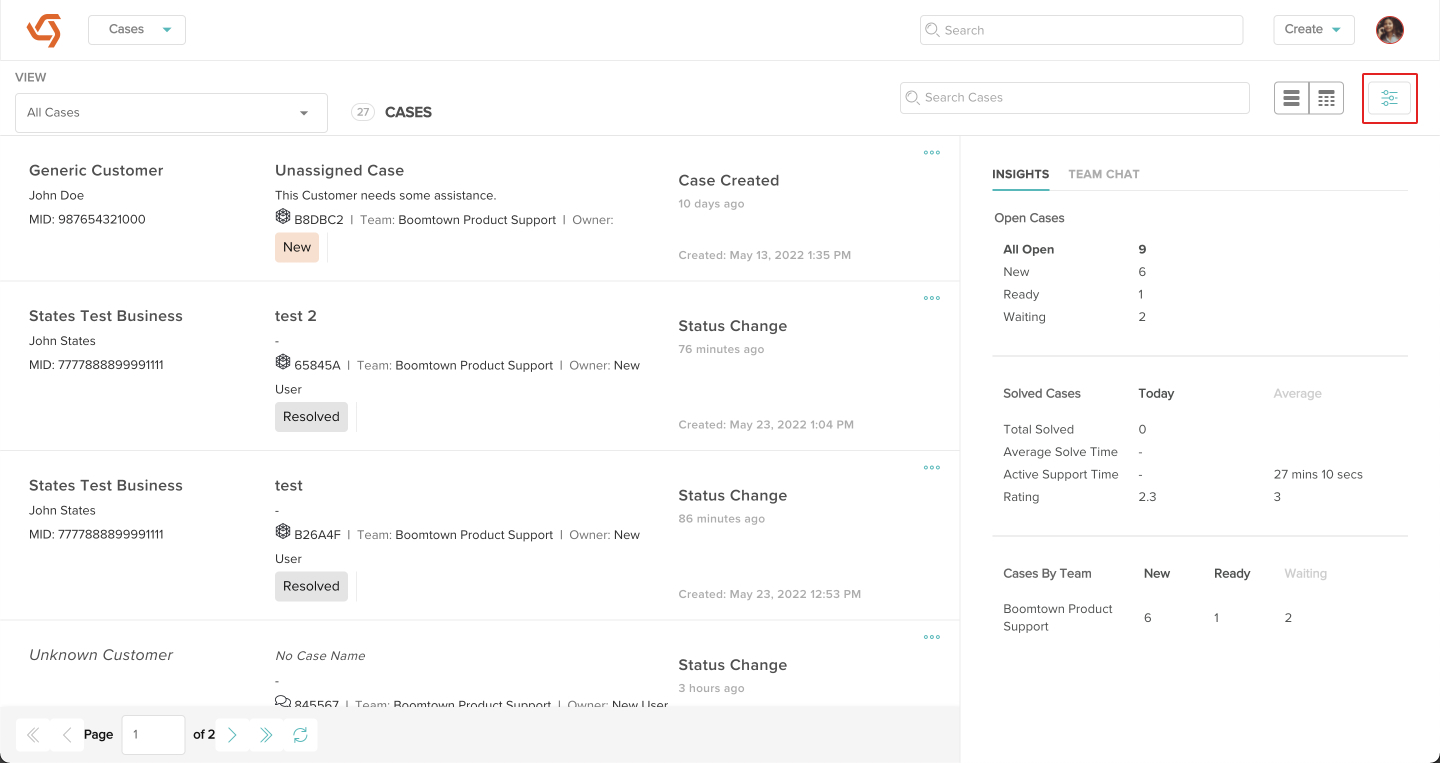
Make sure you are in the Cases view by selecting it from the navigation bar. You can apply filters to any Cases view but it is best to start with the All Cases view because it contains no filters.
- Click on the Filters button.
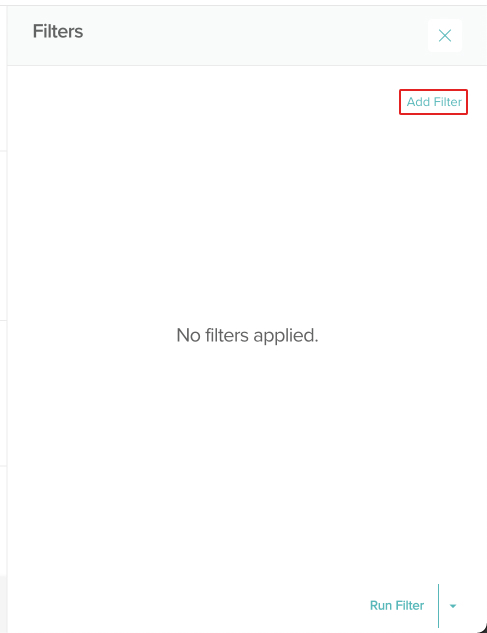
- Click on Add Filter.
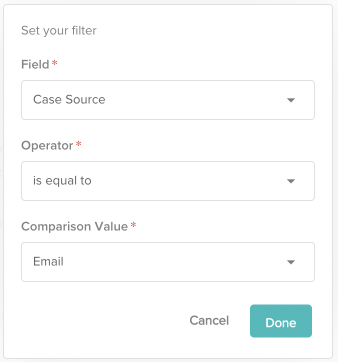
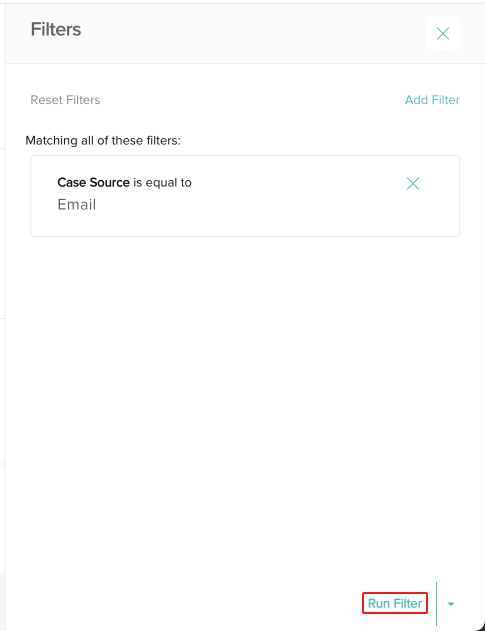
- Set the parameters for your filter. For example, let's say you only want to see Cases that were created via email. This is how you would set the parameters:
- Click on the Done button and you will see the filter you created added to the list.
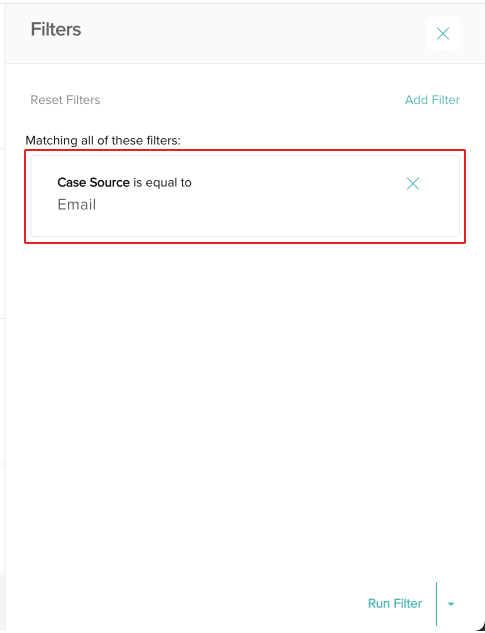
You can add more filters by repeating steps 2 through 4 above or remove a specific filter by clicking the X next to it. If you want to start fresh, you can click on Reset Filters to remove every filter in the list.
- Once you have added all of the filters you want, click on Run Filter.
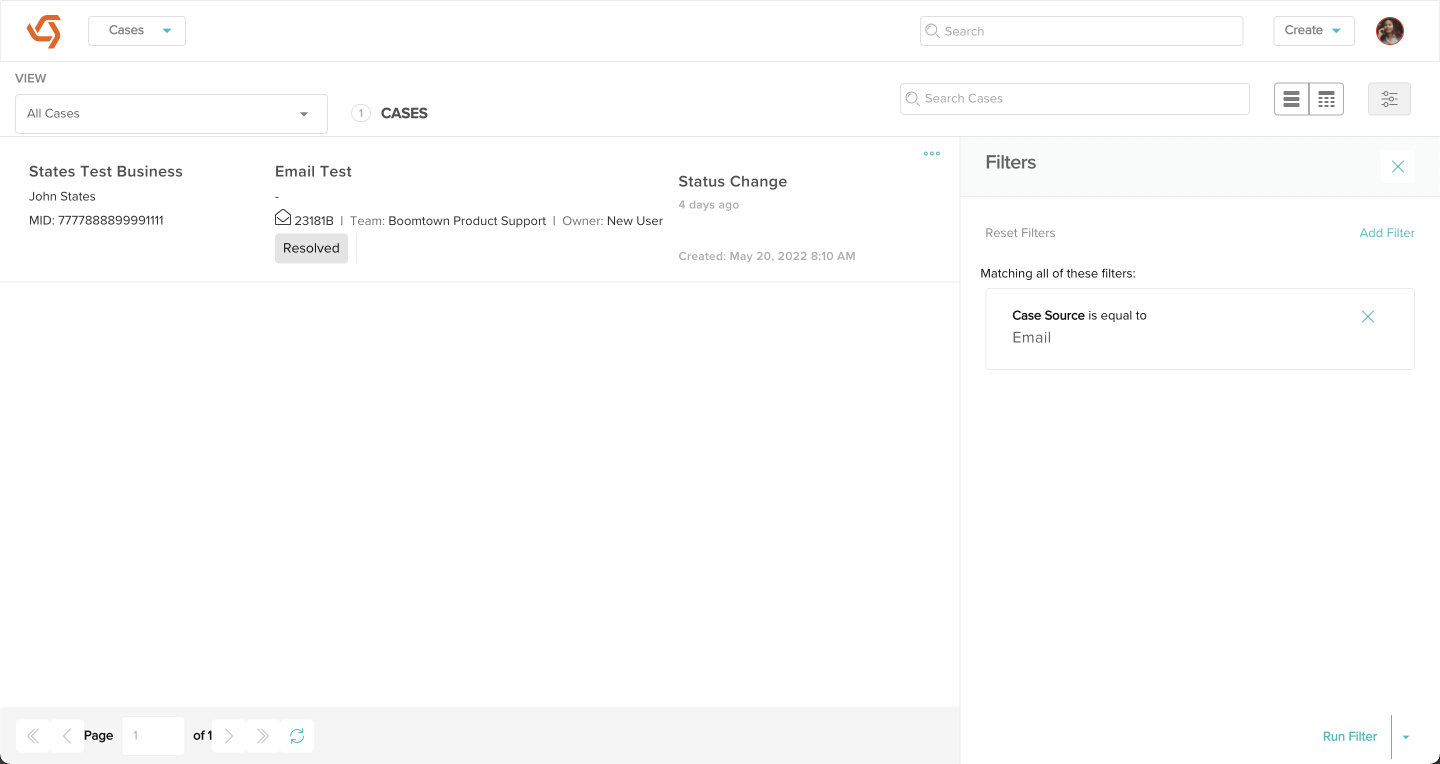
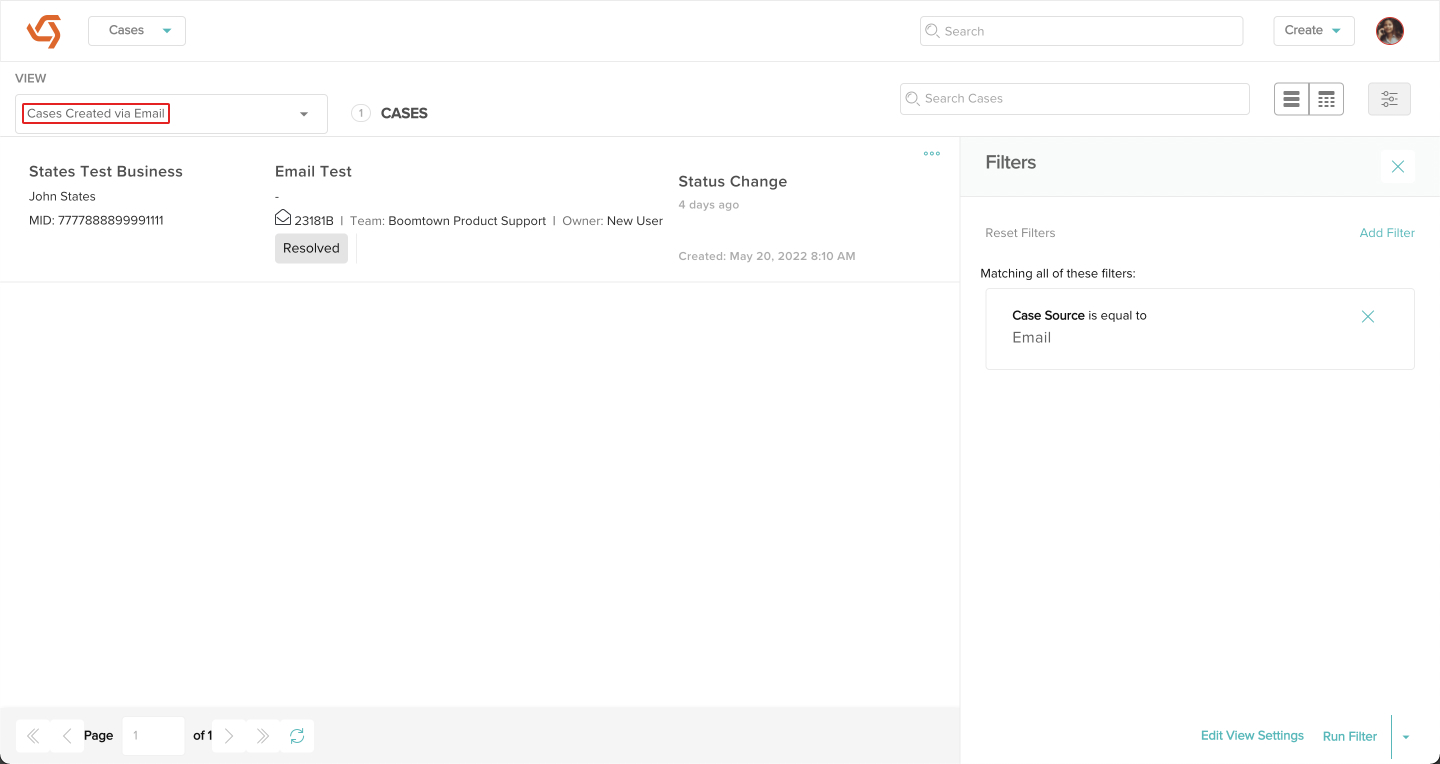
- Now only Cases that match the filters you applied will show up in your list.
Clicking the X at the top right of the filters list will simply remove the filters panel and bring back the Insights/Team Chat panel. Any filters you have added will be saved as long as you stay in the same view. Simply click on the Filters button again to bring that panel back.
When you run a set of filters on a view, they will not save. They will only stay in effect while you are in that specific view.
Create a Custom View
After you apply filters, you can create a custom view that saves those filters for you.
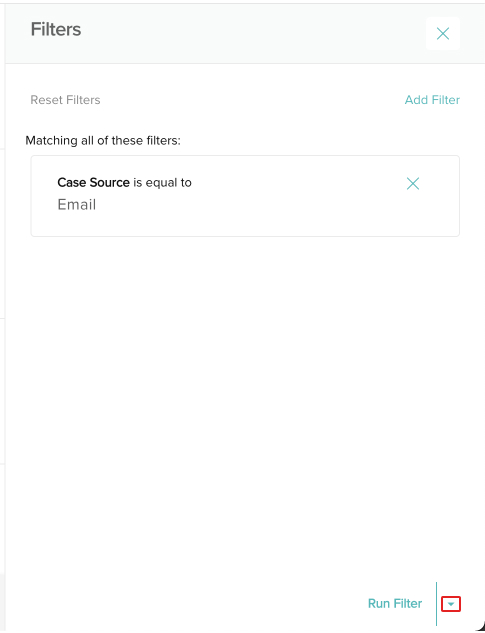
- Click on the triangle actions button in the bottom right of the filters list.
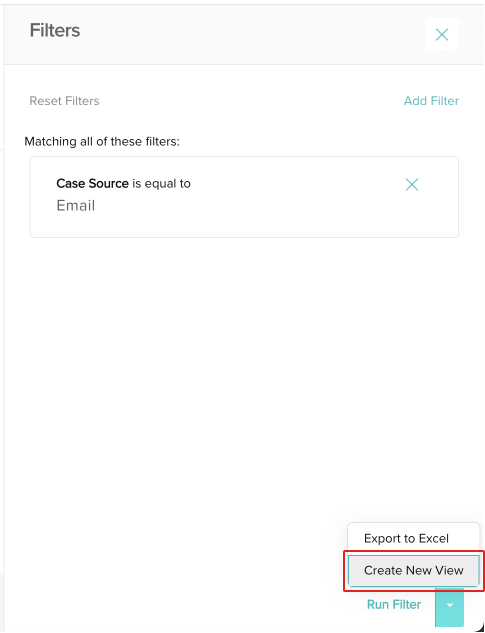
- Click on Create New View.
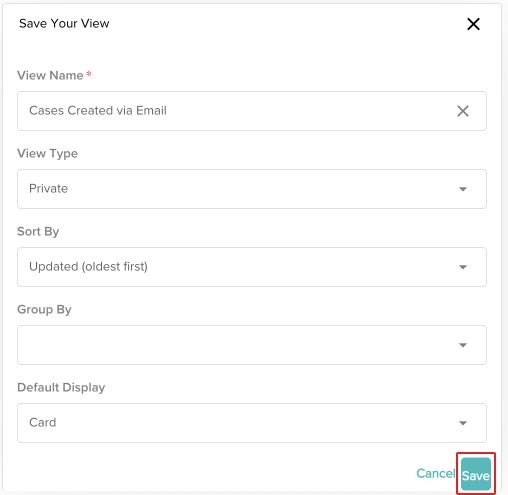
- Give your new custom view a name. You can also apply optional parameters such as whether you want to share your custom view with the rest of your organization, how you want the Cases sorted by default, if you would like them grouped a specific way, and how you would like them to be displayed. Once you are finished, click the Save button.
- The custom view you created will now be available in your view picklist.
Click on Edit View Settings if you need to change the name of the custom view or update any of the parameters.
If you ever add or remove any filters to your custom view, you will need to click the triangle picklist button at the bottom right, then select Save & Update.
Default Case Views
CXME comes with 4 default views (All Cases, Open Cases, All Unassigned Cases, and My Team's Unassigned Cases). Only the All Cases view can be edited to create a new custom view. The rest of the default views were created using filters. If you select any view and then click on the filters button, you will be able to see which filters are applied to that view.