
Adjust Access Controls on an Article
Change who can view Articles in your external Library.
Last Updated:What's in this article?
Access Controls
Some Articles may contain sensitive information that you may want to restrict access to. You can limit who can view an external Article by updating its Access Controls. They can be set when you are creating a new Article or updated at a later date. Any changes made to Access Controls will only be applied to the external Article after it has been published. Articles can be restricted to just Users in your organization, organizations in your ecosystem, specific Teams in your organization, or available to everyone. Let's take a closer look at each option!
Your ability to update Access Controls depends on your Role & Permissions.
Internal
You can restrict external Article access to just Users in your organization. You can optionally restrict access to specific Teams in your organization so only Users on those Teams can view the article in your external Library or add the Article to Cases. Users will need to be logged into CXME to access the external Article.
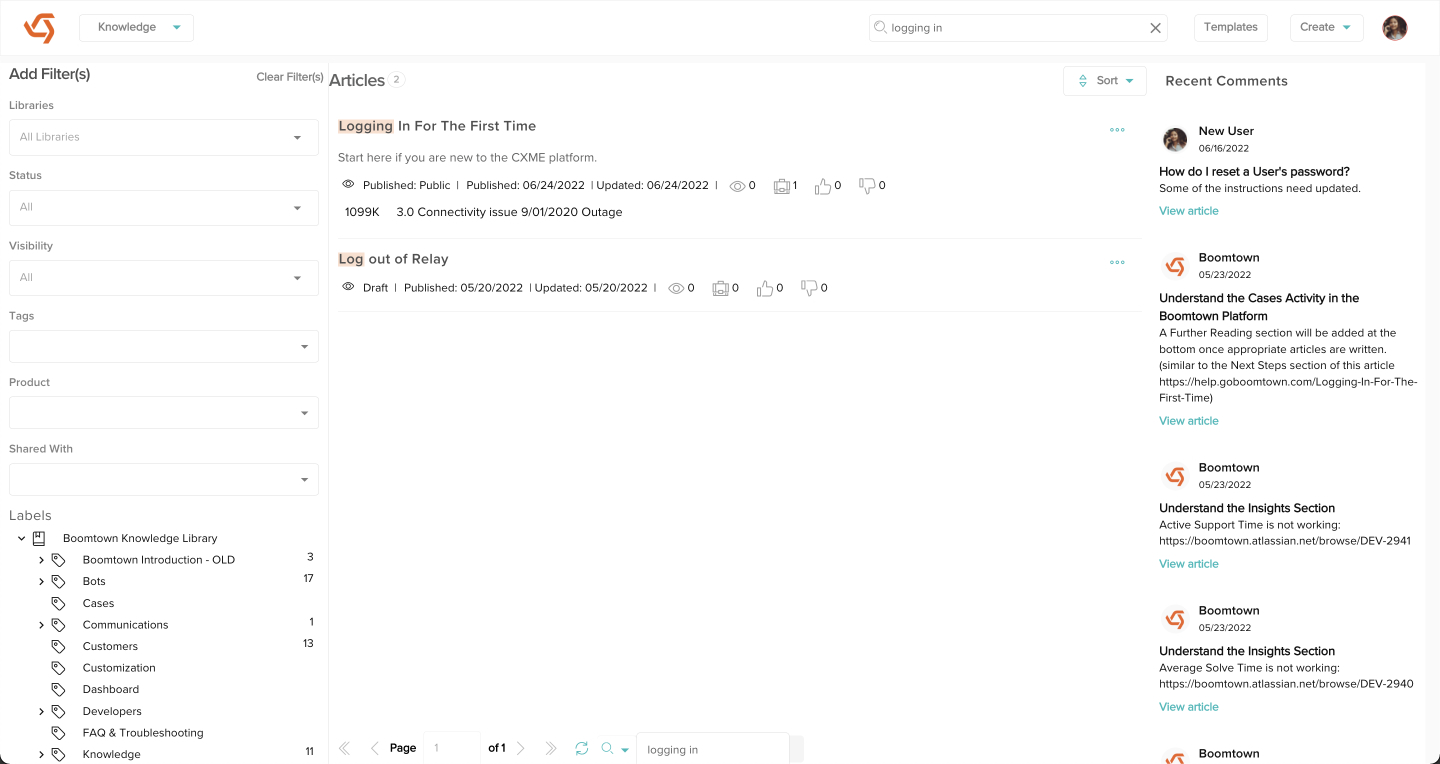
- Access the Article you wish to set to Internal. You can find Articles using the search bar at the top of the Knowledge view, the filters in the Add Filters section, or by clicking on specific Libraries or Labels in the Labels section.
- Click the Edit button.
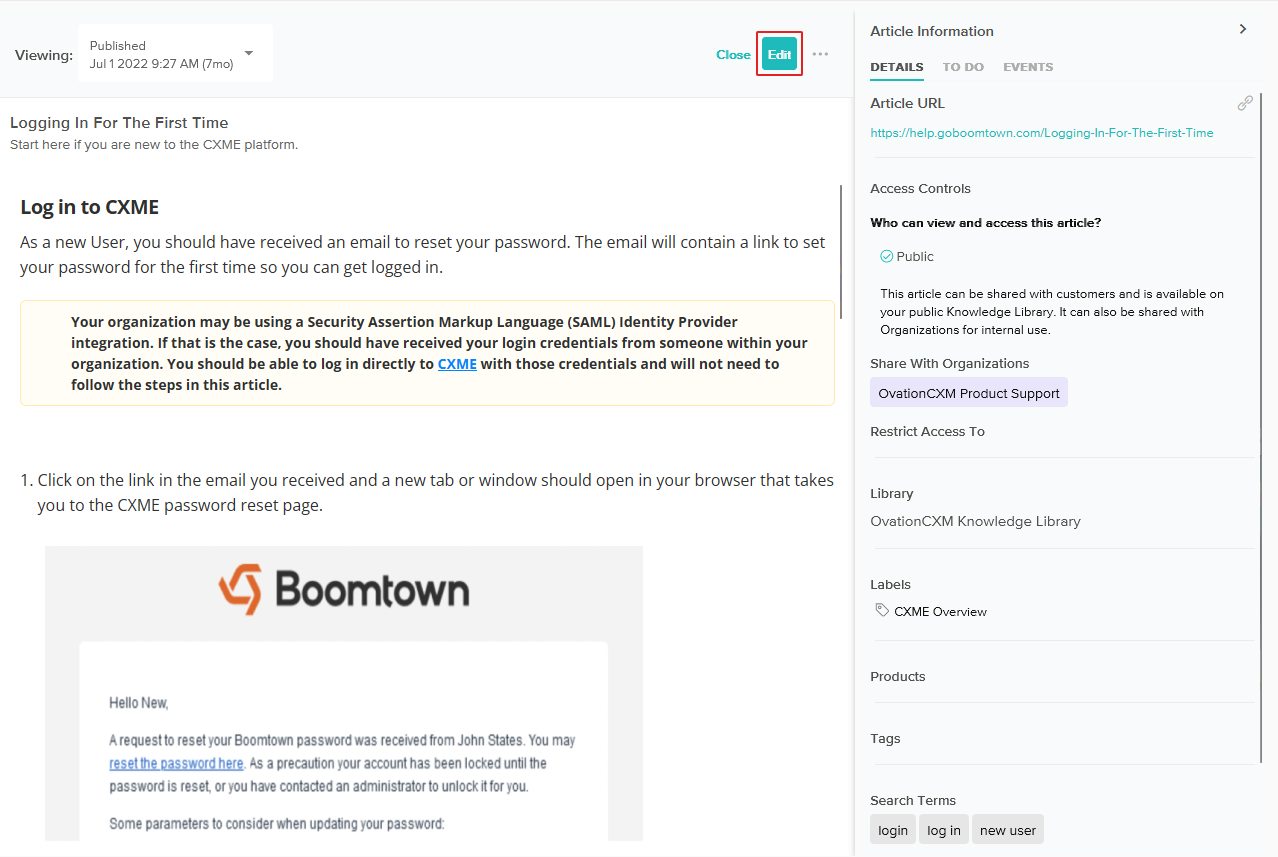
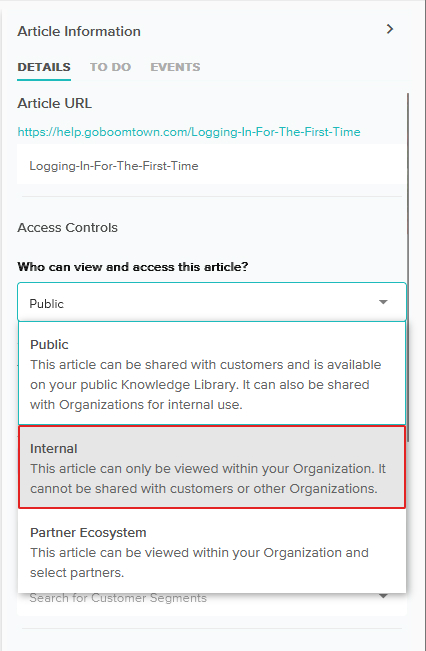
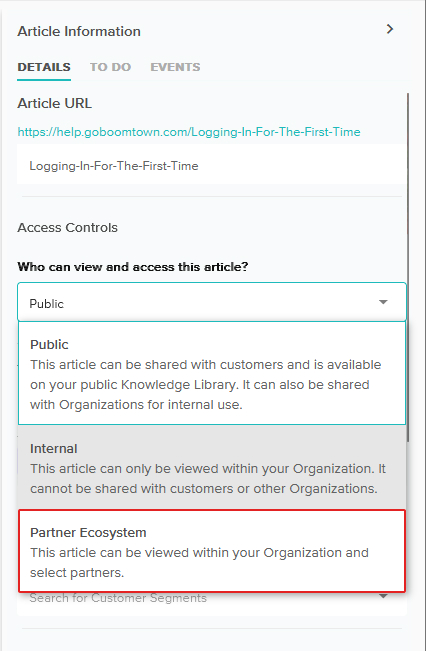
- In the Article Information panel, use the dropdown under Access Controls to select Internal.
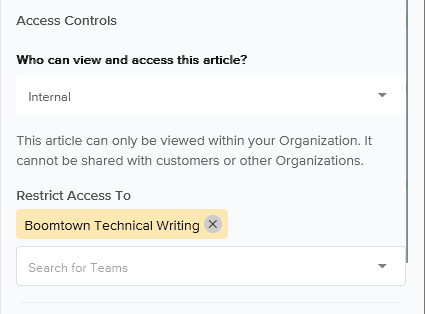
- Additionally, you can only allow certain Teams in your organization to access the external Article by clicking on Restrict Team Access, then select the Teams you wish to give access to from the dropdown. You can remove teams by clicking the X next to their name. Leaving this section blank will give access to everyone in your organization.
- When you are done, click the Save button and if you are ready to apply these changes, click the Publish button. Your external Article will now only be accessible to Users in your organization! Anyone outside of your organization that tries to access the Article will see this message:

Partner Ecosystem
You can grant external Article access to Users of other organizations in your ecosystem. This will allow them to not only view the published Article in your external Library but also add it to their Cases. They will also be able to access and comment on the published Article in their Knowledge view. Users in your organization will still have access and you can optionally restrict access to specific Teams in your organization. Users will need to be logged into CXME to access the external Article.
- Access the article you wish to set to Partner Ecosystem. You can find articles using the search bar at the top of the Knowledge view, the filters in the Add Filters section, or by clicking on specific libraries or labels in the Labels section.
- Click the Edit button.
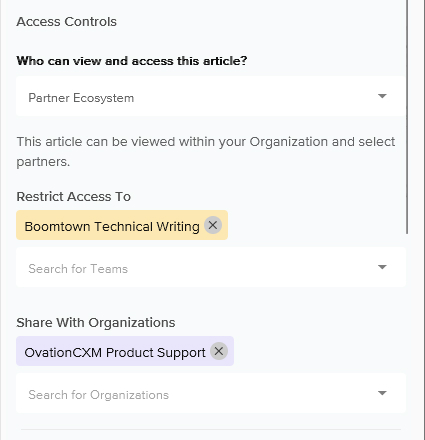
- In the Article Information panel, use the dropdown under Access Controls to select Partner Ecosystem.
- Select the organization you wish to grant access to from the dropdown. Your organization will always be listed. If someone accidentally removes your organization from the list, it will automatically get added back. Additionally, you can only allow certain Teams in your organization to access the external Article by selecting teams from the dropdown under Restrict Team Access. Leaving the dropdown blank will give access to everyone in your organization. You can remove Teams or organizations by clicking the X next to their name.
- When you are done, click the Save button and if you are ready to apply these changes, click the Publish button. Your external Article will now only be accessible to Users in your organization and Users in the organizations you selected! Anyone outside of your organization or the organizations you selected that tries to access the Article will see this message:
Public
Setting an Article to Public will allow anyone to access the external Article without having to be logged into CXME. You can optionally share the Article with organizations in your ecosystem. This will allow Users in the organizations you choose to access and comment on the published Article in their Knowledge view as well as add it to their Cases.
- Access the Article you wish to set to Public. You can find articles using the search bar at the top of the Knowledge view, the filters in the Add Filters section, or by clicking on specific libraries or labels in the Labels section.
- Click the Edit button.
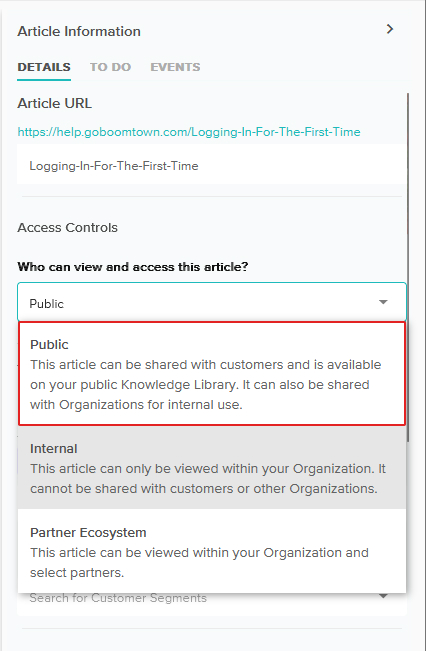
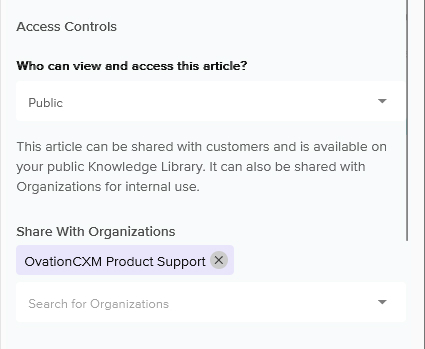
- In the Article Information panel, use the dropdown under Access Controls to select Public.
- Additionally, you can share the Article with other organizations in your ecosystem by clicking on Share with Organization, then select the organizations you wish to share the Article with from the dropdown. You can remove organizations by clicking the X next to their name. Your organization will always be listed. If someone accidentally removes your organization from the list, it will automatically get added back.
- When you are done, click the Save button and if you are ready to apply these changes, click the Publish button. Your Article is now available for anyone to see!