Additional results may be available to logged in users.
Make sure all words are spelled correctly.
Try different keywords.
Try more general keywords.
Try fewer keywords.
Add, Edit, or Delete a Label or Sub-Label
Use labels to organize articles in your Knowledge libraries.
Last Updated:August 22, 2022
What's in this article?
Labels & Sub-Labels
Labels are created directly under your Knowledge libraries. Both labels and sub-labels can be used to group similar articles together. Sub-labels can be created under labels or even other sub-labels to further organize your articles. You can add more than one label or sub-label to an article. When you or your readers access the external library, the labels and sub-labels you create will act like folders. Each label or sub-label can be clicked on to view the articles it contains. There are a couple of different ways to create labels and sub-labels in the Knowledge view. Let's check them out!
Labels are hidden from the external library homepage by default. They can be added to the homepage by accessing the Knowledge section of the Settings view. Sub-labels that contain no visible articles will be hidden from the external library.
Your ability to add, edit, or delete a label or sub-label depends on your Role & Permissions.
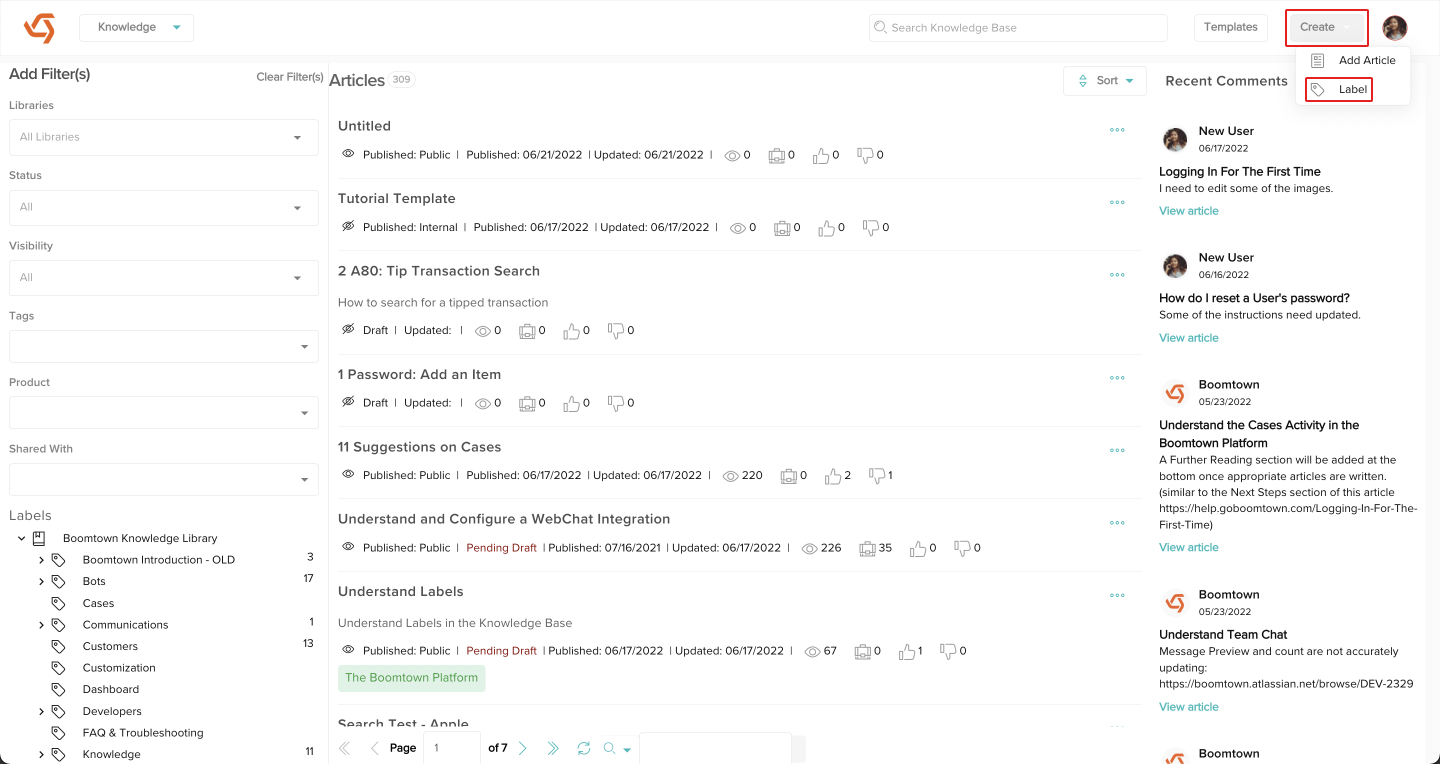
Create Button
You can create a new label or sub-label using the Create button at the top right as long as you are in the Knowledge view.
Click the Create button, then click on Label.
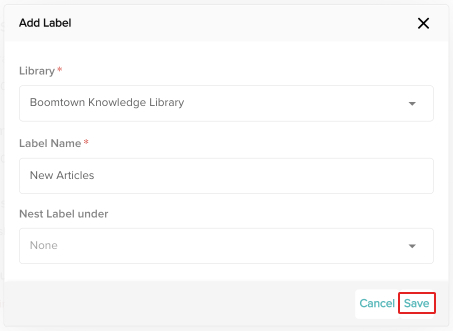
Select the library you wish to create the label under and give it a name. If you already have labels created, you can also choose to make this a sub-label by selecting an option from the Nest Label under picklist. If you leave that picklist blank, the label will be created directly under the library you chose. When you are done, click the Save button.
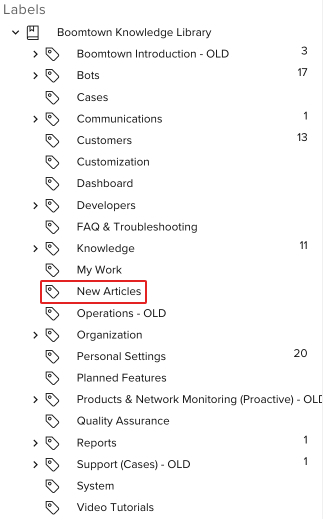
Your new label or sub-label has been created! It will now be listed in the Labels section. You can access sub-labels by clicking on the > next to a label or sub-label.
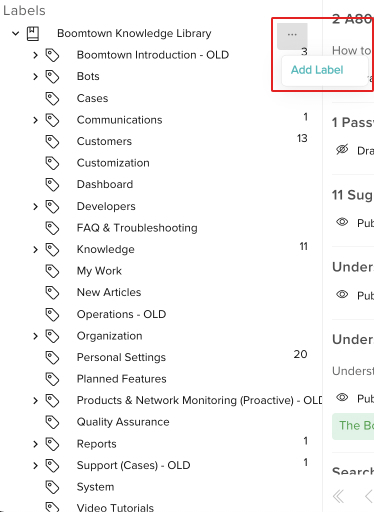
Create a Label or Sub-Label from the Labels Section
You can easily add labels or sub-labels using the Labels section of the Knowledge view.
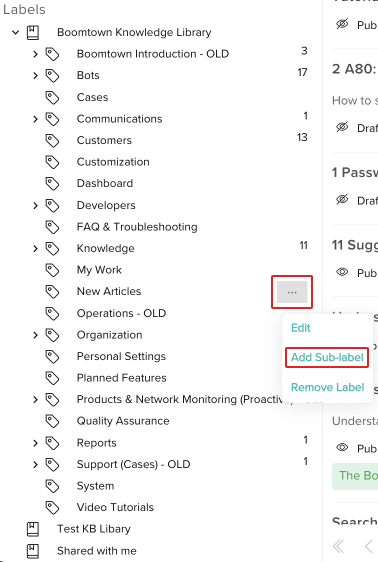
If you wish to create a label, click on the three dot menu next to one of your libraries, then click on Add Label.If you wish to create a sub-label, click on the three dot menu next to one of your labels or sub-labels, then click on Add Sub-Label.
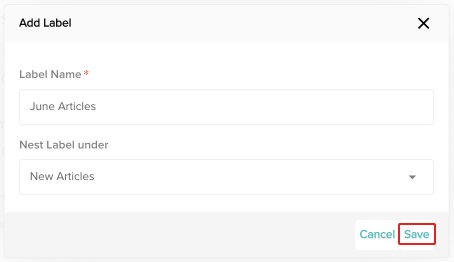
Give the label a name and make sure it is being nested under the appropriate label or sub-label. When you are done, click the Save button.
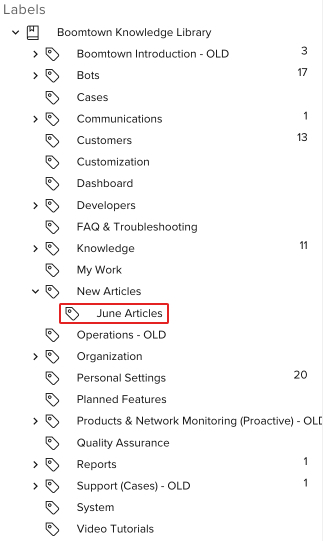
Your new label or sub-label has been created! It will now be listed in the Labels section. You can access sub-labels by clicking on the > next to a label or sub-label.
Edit a Label or Sub-Label
Now that you have some labels and sub-labels in your library, you can easily edit them using the Labels section of the Knowledge view.
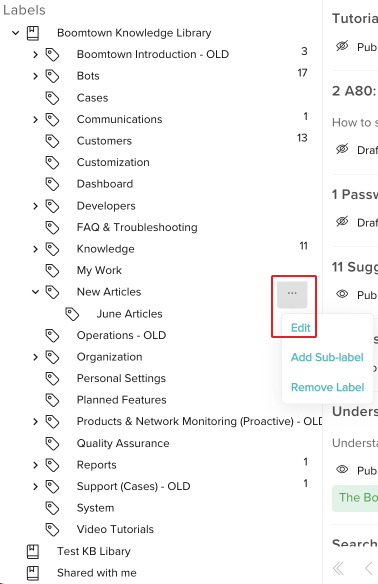
Click on the three dot menu next to the label or sub-label you wish to edit, then click on Edit.
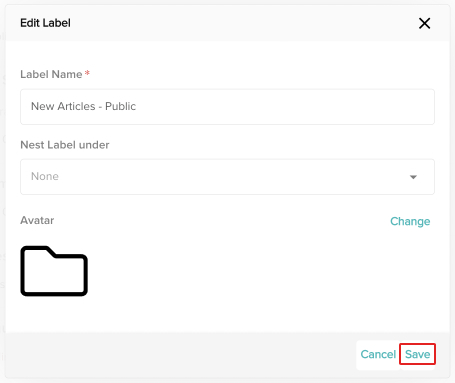
Now you can change the name or change where it is located. If it is a label, you can also update the avatar by uploading an image from your computer. This will customize the way the label looks in your external library. When you are done, click the Save button.
Your label or sub-label has been updated!
Delete a Label or Sub-Label
If a label or sub-label is no longer needed, you can easily remove them using the Labels section of the Knowledge view. Any articles under other labels or sub-labels will stay listed under them. If an article is only under the label or sub-label you are deleting, it will then be nested directly under the library itself.
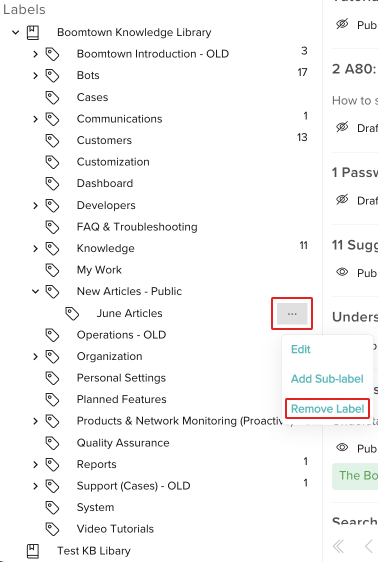
Click on the three dot menu next to the label or sub-label you wish to delete, then click on Remove Label.
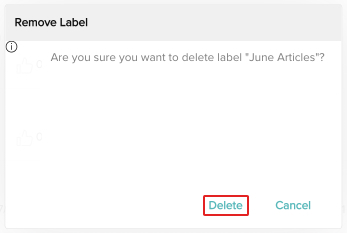
You will see a popup asking you for confirmation. Click on Delete to delete the label or sub-label.