Set up and use a Concierge Bot
Last Updated:What's in this article?
How can I use a Concierge Bot?
The Concierge (Welcome) Bot welcomes the user in Connect/webConnect. It can then route the user to the appropriate agent or Team, answer basic questions, search for information in Knowledge Bots, update Customer or Issue information, auto-resolve Issues, or hand off to a device-specific Knowledge Bot.
NOTE: you can only edit Concierge Bots if you have the Train Bots permission. Please email success@goboomtown.com if you wish to get the permission.
Learn about intelligent Issue routing here.
Learn about using the Concierge Bot search functionality here.
Learn how to update Customer and Issue information here.
Learn how to auto-resolve Issues with a Concierge Bot here.
Learn how to set up a Concierge to Knowledge Bot hand-off for Connect/webConnect here.
How do I set up a Concierge Bot?
NOTE: these instructions refer only to the basic Bot setup. To learn how to add topics to the Bot, click here.
- From the main navigation menu on the left, go to Bots > Bots.
- Click
 to add a new Bot.
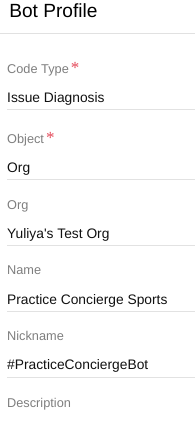
Bot Profile
In the Add Bot modal, go through the following fields:
- Code Type: select Issue Diagnosis (for Concierge Bot). This indicates the type of Bot you're building.
- Object: set to Org. Your Bot will only be accessible to specified Organizations.
- Object id/Org: specify what Organization(s) will be able to use the Bot.
- Name: choose a name for your Bot. This name will show up in chats with the user.
- Nickname: (auto-populated) populated based on the name.
- Description: (optional) describe the purpose of your Bot.
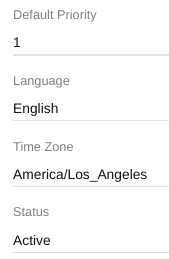
- Default Priority: set to 1. The Concierge Bot will appear ahead of other (Knowledge) Bots in the Connect/webConnect chat environment.
- Language: choose between English, Spanish, or Japanese.
- Time Zone: choose your time zone from the drop-down or type it in the form [Country/City].
- Status: choose between Active, Inactive, or Deleted. By default, a new Bot is Active.
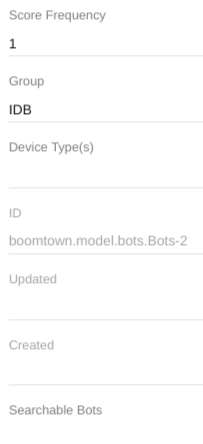
- Score Frequency: (optional) set to 1 to display thumbs up/down rating buttons after each Bot response.
- Group: select IDB for Concierge Bot.
- Searchable Bots: (optional) to learn about the Concierge Bot search functionality, click here.
Once you have filled out all the required fields on the Bot Profile, hit Save to continue the Bot setup.
Code Configuration
In the Add Bot modal, scroll down to Code Configuration. Fill out the following fields:
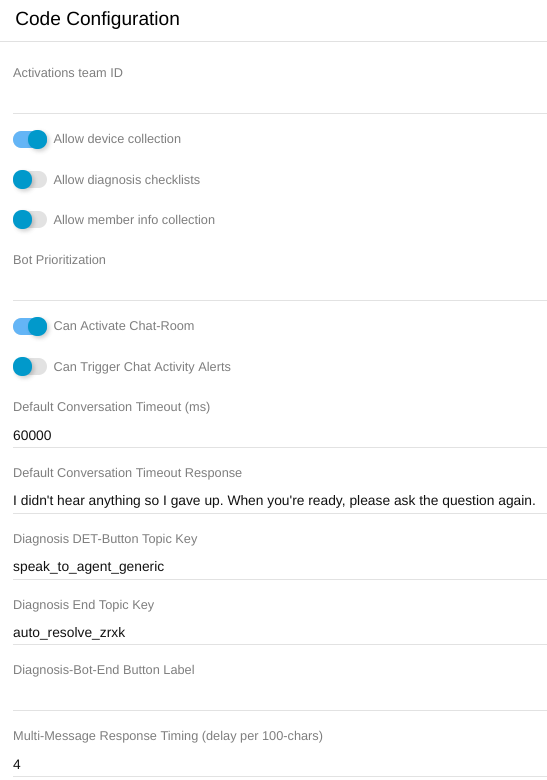
- Default Conversation Timeout: specify the number of milliseconds the Bot will wait before timing out.
- Default Conversation Timeout Response: type the statement that the Bot will display at timeout.
- Diagnosis DET-Button Topic Key: (optional) enter the key of the topic to invoke when the user clicks the Speak to Agent button. This topic is included with the Concierge Bot and will appear in the topics list after you fill out the Bot Profile.
- To find the topic key, go to
 (Topics) → search for “speak to agent” → select pencil icon`(Edit) or double-click on the topic to open it → copy the key at the top of the Bot Topics modal
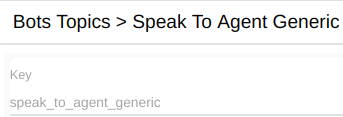
- To find the topic key, go to
- Diagnosis End Topic Key: (optional) enter the key of the topic that will confirm whether the Bot’s answer has resolved a user’s Issue. This topic will automatically appear after end topics (topics with no additional Responses or Buttons). NOTE: generally, you will include the key of the Auto-resolve topic in this field.
- Diagnosis-Bot-End Button Label: type the label you want to appear on the Speak to Agent button.
- Multi-Message Response Timing (delay per 100-chars): specify number of seconds between messages in a multi-message response. NOTE: to create a multi-message Bot response/topic, use the NEXT token.
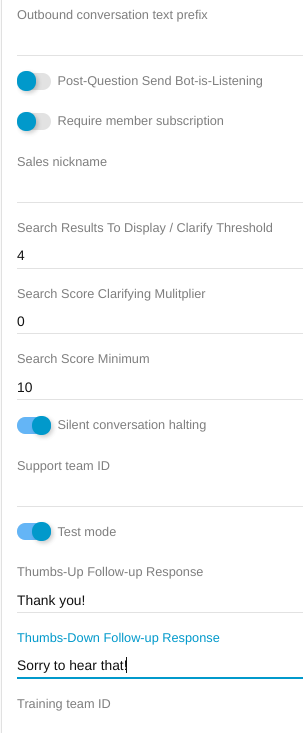
- Search Results to Display/Clarify Threshold: to learn about the Concierge Bot search functionality, click here.
- Search Score Clarifying Multiplier: to learn about the Concierge Bot search functionality, click here.
- Search Score Minimum: to learn about the Concierge Bot search functionality, click here.
- Silent conversation halting: toggle on/off to determine whether or not the bot will announce its departure from the conversation upon a support agent's arrival.
- Maximum Number of Classifications: specify the maximum number of topics the Bot can display based on a user's text input. The most relevant topic will be presented as the answer, and the other topics as related answers. If you do not want to display related answers, set this to 0. You can adjust how many related responses are shown by setting the Maximum Number of Classifications in the Bot Profile. For example, if you want 4 related responses to be displayed, set the Maximum Number of Classifications to 4. This is useful for when you have multiple topics with overlapping keywords (e.g. topics that all have “add” as a keyword).
- Outbound conversation text prefix: Set whether or not the bot addresses the user by their name at the beginning of each message. To have the bot address the user by their name input Screen Shot 2019-04-18 at 10.25.59 AM.png into this field.
- Thumbs-Up Follow-up Response: set a topic (formatted as topic:[topic key]) or a text response to display after a user has voted thumbs-up on a Bot response.
- Thumbs-Down Follow-up Response: set a topic (formatted as topic:[topic key]) or a text response to display after a user has voted thumbs-up on a Bot response.
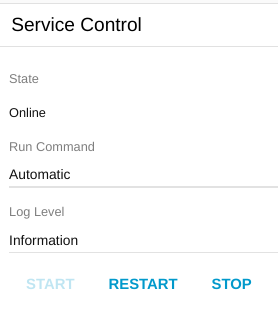
Service Control
Once you have filled out the Bot Profile, you can start your Bot. But first, look through the following fields:
- State: (auto-populated) changes to Online after you press START.
- Run Command: set to Automatic so the Bot will automatically attempt to restart itself when it unexpectedly crashes.
- Log Level: leave default setting.
Hard reset the Concierge Bot before testing:
Go to  (Bot Profile) on the left navigation bar of the Bot modal and scroll down to the Service Control section.
Hit STOP and START.
NOTE: Stop-Start before you test the Bot for the first time AND after each edit to see the changes appear in real-time in a chat conversation.
