
The Customers View at a Glance
All of your organization's Locations in one place.
Last Updated:What's in this article?
Let's take a look at the Customers view!
This view lets you customize the way you want to see all of the Locations in your organization.
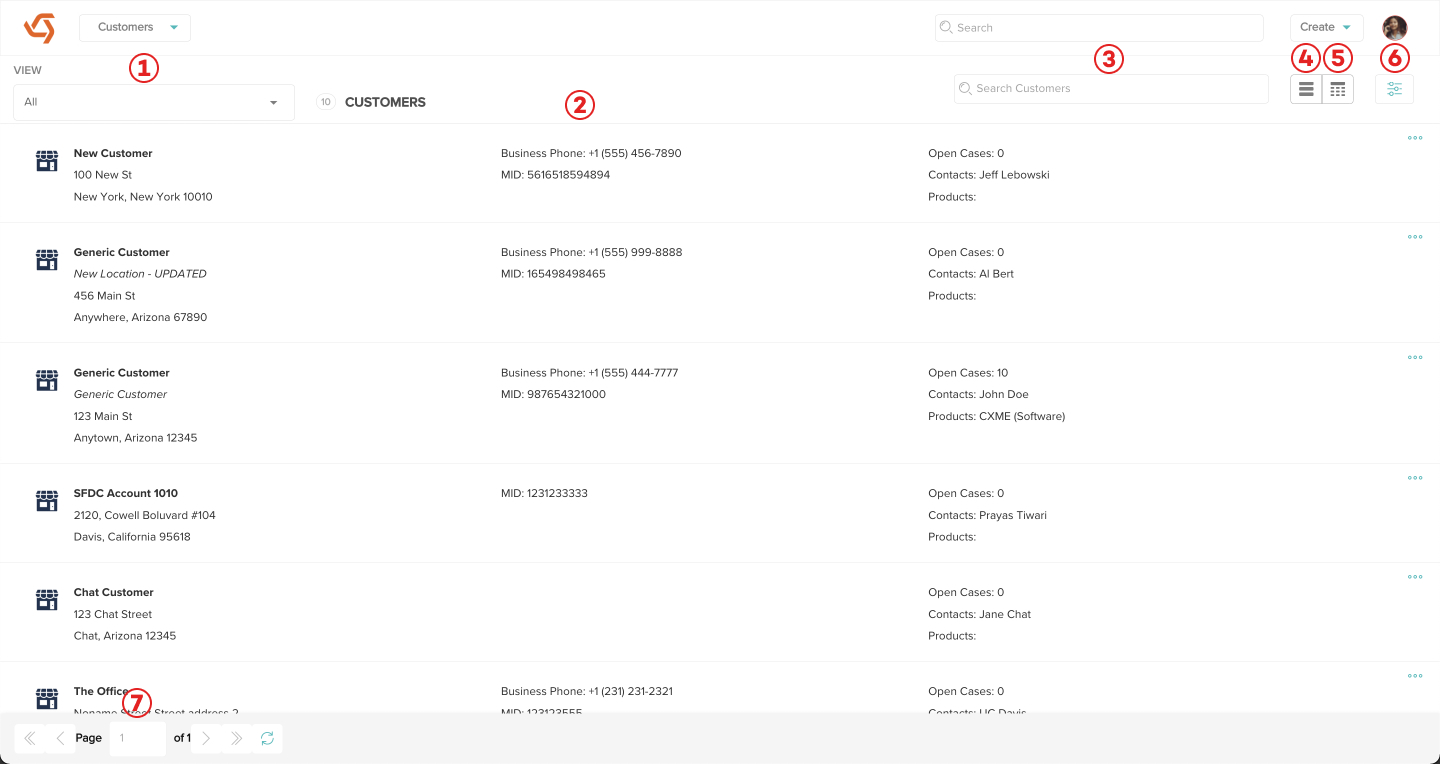
- Customers View Picklist - Choose from all Locations or custom views to see specific Locations. The total number of Locations in the view will be listed next to the picklist. This picklist will default to All Locations after every time you log in but will stay on whatever you select as long as you are logged in.
- Locations List - All of the Locations that match the view you select in the picklist or the filters you apply will be listed here. They are organized by newest updated at the top by default.
- Search Locations - Use this to specifically search the Customers view. The results will depend on the view you selected in the picklist or the filter you apply to the Locations list.
- Card Display Button - Click this button if you want the Locations list to show each Location as an individual card. Anytime you access the Customers view, it will default back to the card display unless you create a custom view that defaults to another display type.
- Table Display Button - Click this button if you want the Locations list to be displayed as a table with each Location on a separate row.
- Filter Button - Apply filters to specific views to narrow down the Locations in your list or create custom views for yourself or your Team members.
- Navigation - If there are more than 25 Locations in your list, you can use these handy navigation controls to skip to specific pages, the next page of results, the last page, or even refresh the results in your list.