
Set Up Roles & Permissions
Control the capabilities of your Users in CXME.
Last Updated:What's in this article?
Create a New Role
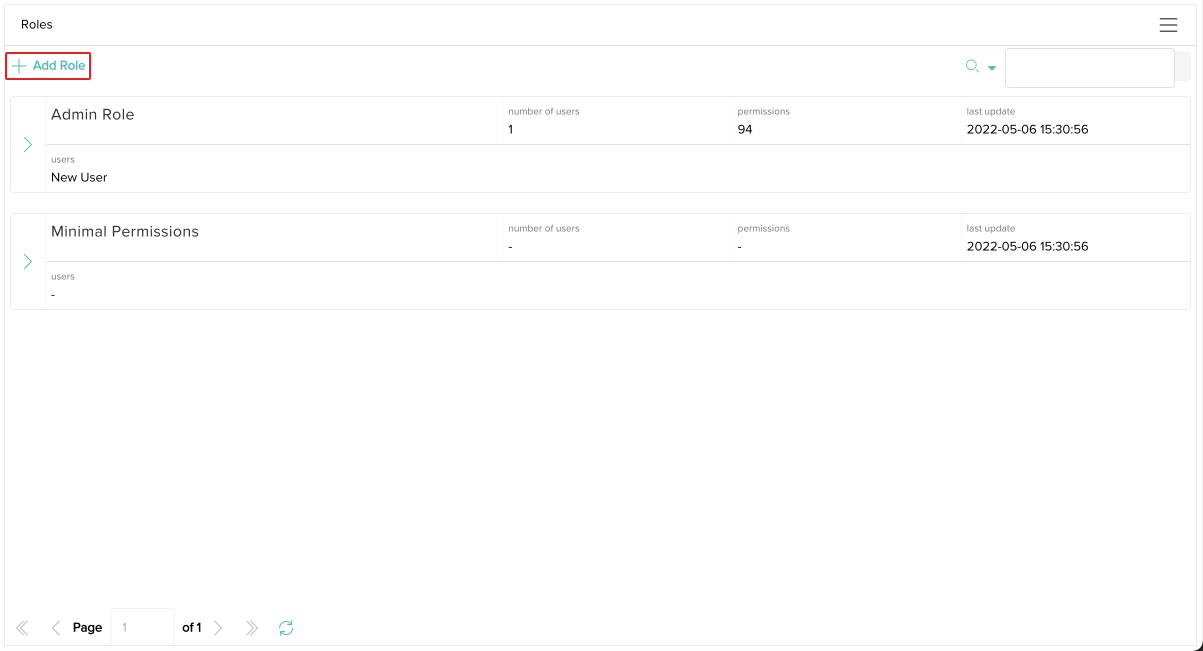
You can create roles with specific permissions to limit what Users in your organization have access to. CXME comes with 2 default roles that cannot be updated (Admin Role & Minimal Permissions). You can easily add roles in the Roles & Permissions section of the Settings view. Let's learn how!
Your ability to set up roles depends on your Role & Permissions.
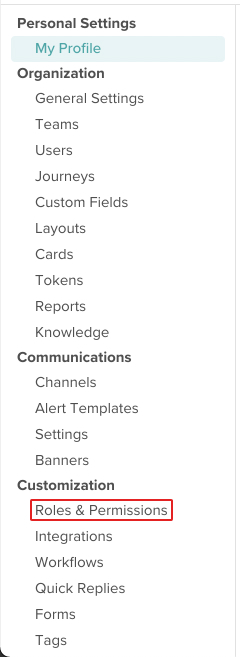
- Click on your avatar at the top right, then click on Settings.

- Click on Roles & Permissions under Customization.
- Click on Add Role.
- Give your role a name to differentiate it from others. You can also choose a start page from any of the views within CXME by copying the URL (Uniform Resource Locator) and pasting it into the field below Start Page (URL). (e.g. If you want Users under this role to start at the My Work view after logging in, you would go to the My Work view, copy the URL, and paste it in this field.)
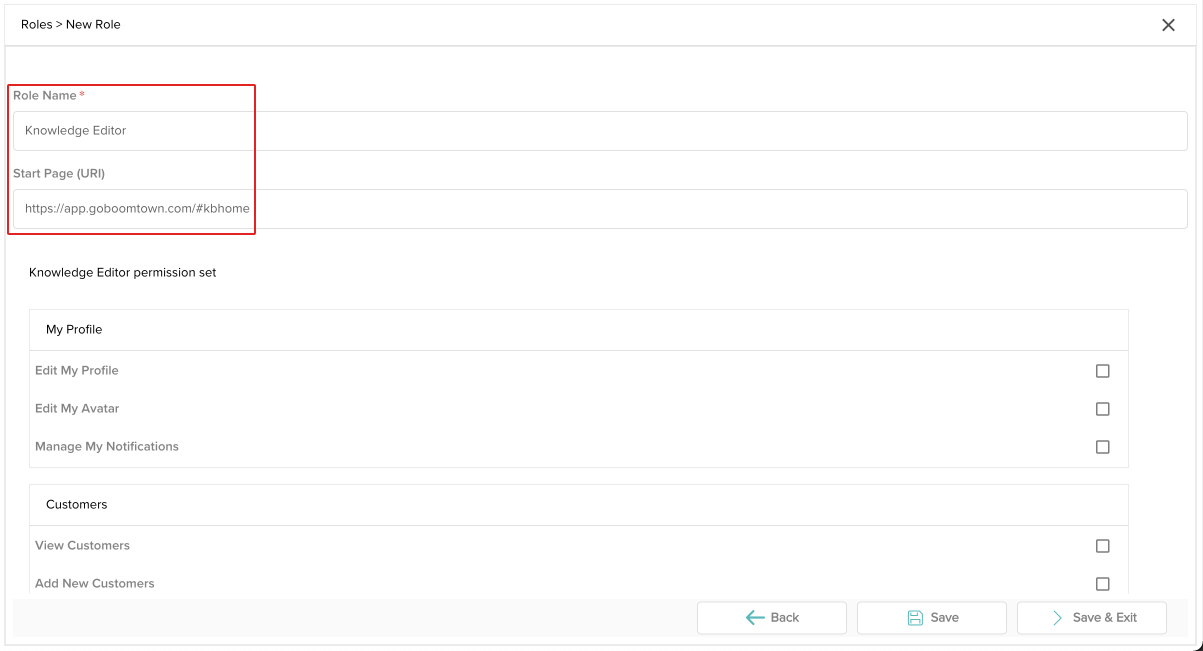
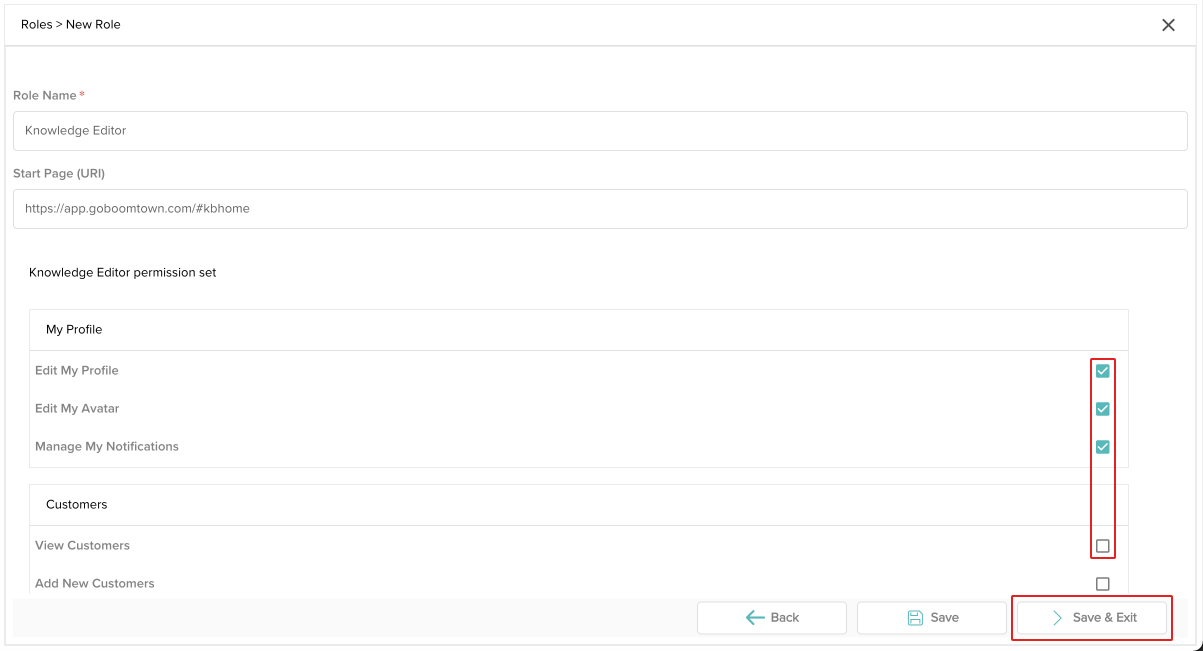
- Click in the box next to each permission you want to enable for this particular role. When you are done, click the Save & Exit button.
Some permissions require others to be enabled. Enabling some permissions will automatically enable other permissions as needed.
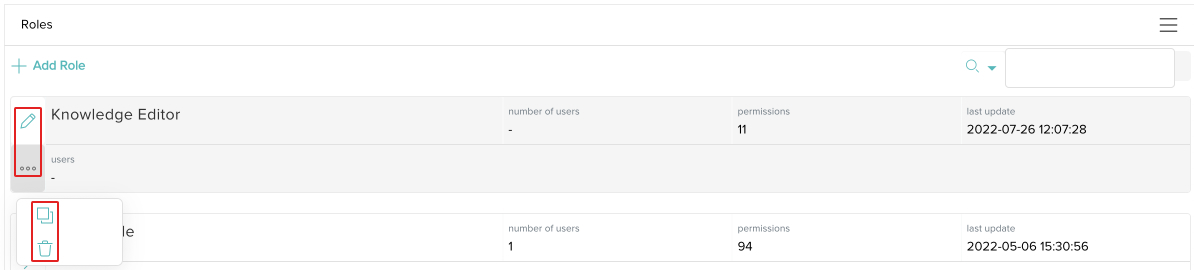
- Your new role has been created! You can update the role by clicking the Edit icon. You can also clone or delete the role by clicking the three-dot menu, then clicking on the Clone or Delete icons.
Any User assigned to a role that gets deleted will default to the Minimal Permissions role.
Assign Users to a Role
Now that you have roles created, you will need to assign Users to them. Let's check it out!
- Click on your avatar at the top right, then click on Settings.
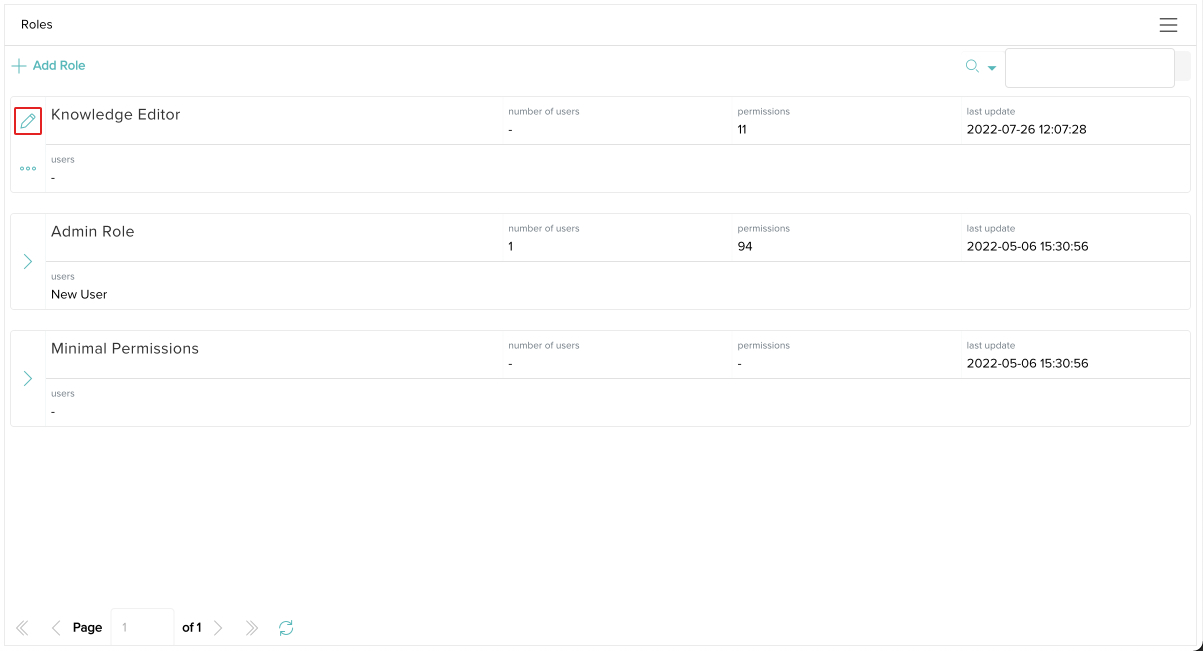
- Click on Roles & Permissions under Customization.
- Click the Edit icon next to the role you wish to assign Users to.
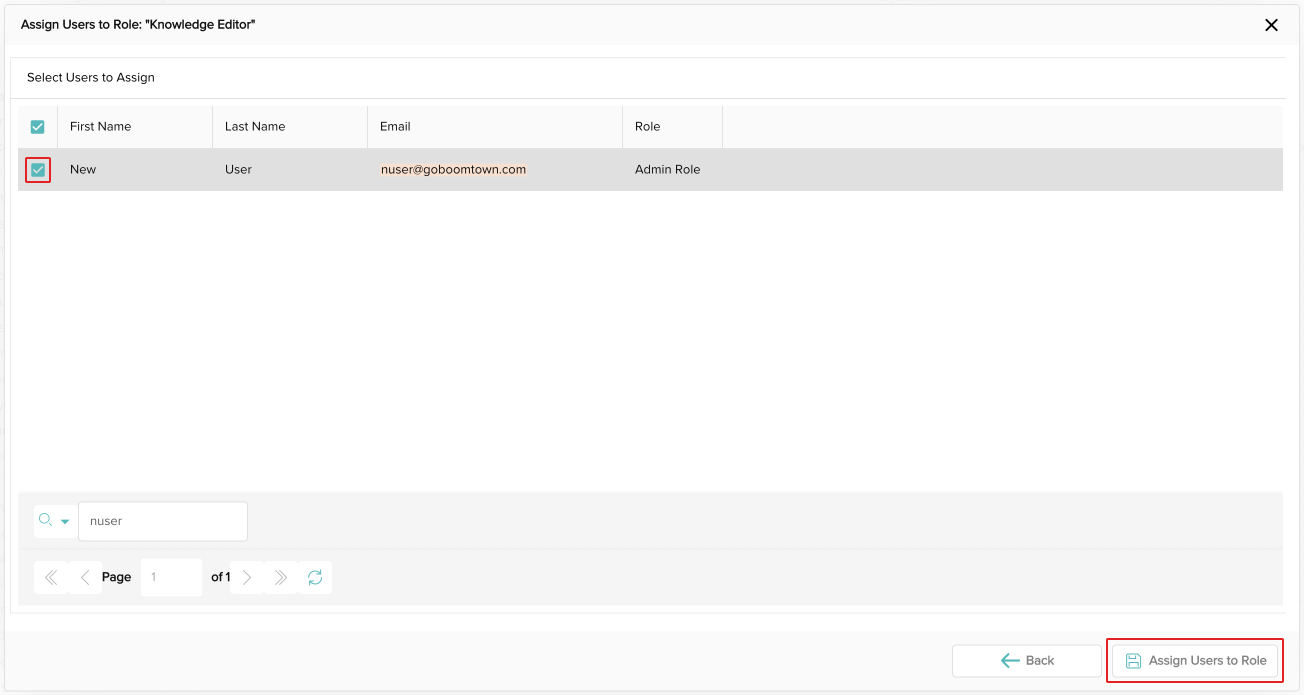
- Click the Assign Users to Role button.

- Click the box next to each User you wish to assign this role to or click the box at the top to select all Users. You can also use the search bar at the bottom to search for specific Users. When you are done, click the Assign Users to Role button.
- Your Users have been assigned to a role! You can easily switch their role by clicking the Switch Role button.
Users can also be individually assigned to roles by updating their profiles in the Users section of the Settings view.
