
Set Up Alert Templates
Create automated emails to send to Customers and Users.
Last Updated:What's in this article?
Create a New Alert Template
You can create custom emails that automatically get sent from CXME after certain events take place. These can be set up to send to Customers or Users and Teams in your organization. You can easily add and manage these emails in the Alert Templates section of the Settings view. Let's learn how!
Your ability to set up alert templates depends on your Role & Permissions.
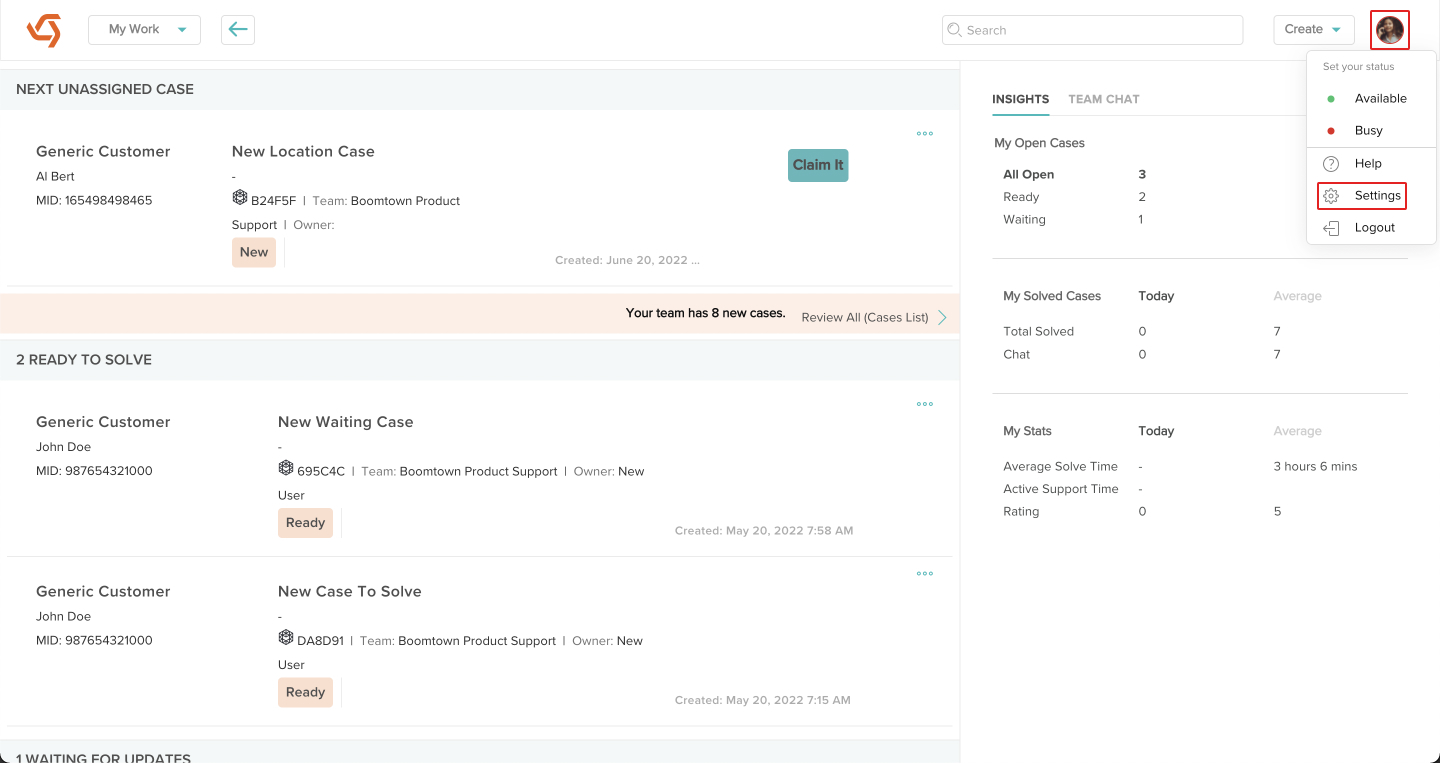
- Click on your avatar at the top right, then click on Settings.
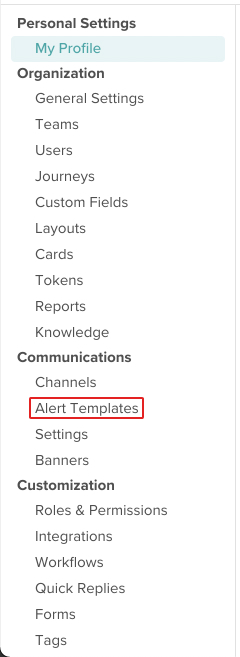
- Click on Alert Templates under Communications.
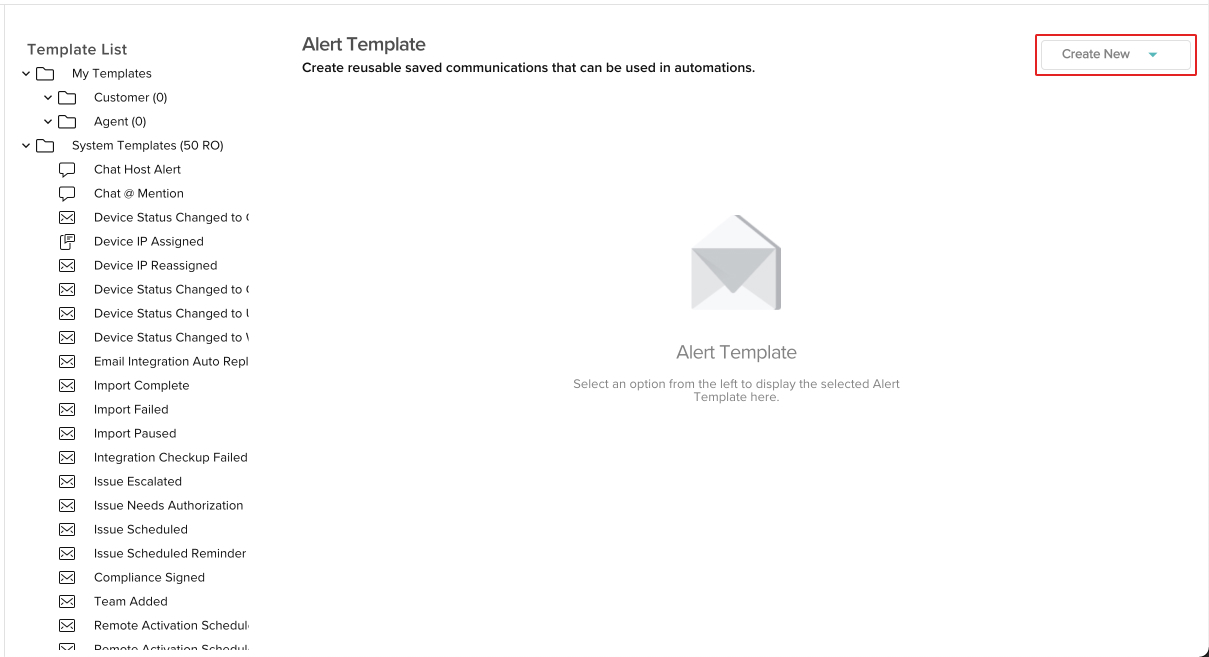
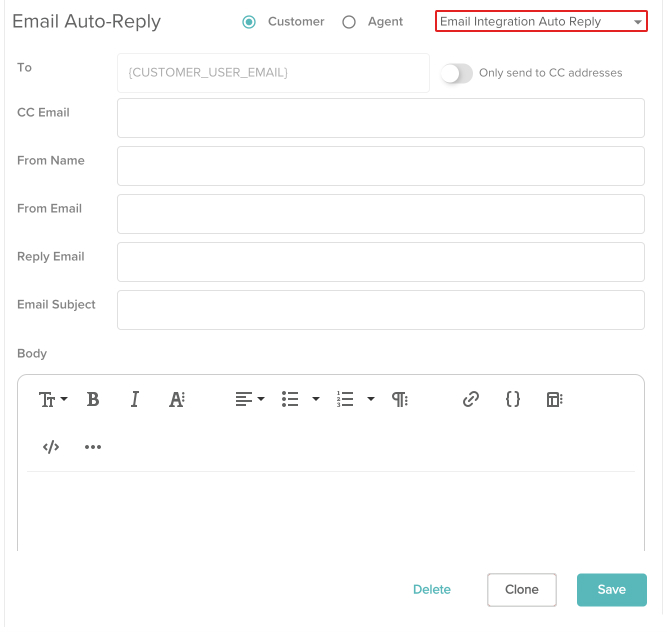
- CXME comes with a variety of System Templates you can choose from to get you started. You can click on any of them, then click the Clone button to create a copy you can customize. You can also start with a blank template by clicking on the Customer or Agent folder, then choose an option from the Create New picklist.
You can change whether it is an Agent or Customer alert later so either option is fine.
- Update the Name of the template to differentiate it from the others, then select whether you want the email to go to the email address listed in your Contacts (Customers), or to Users in your organization (Agent).
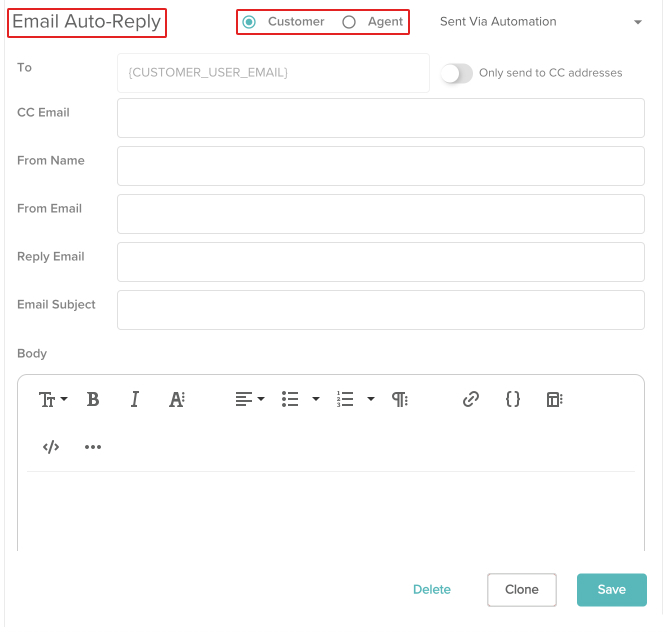
- Choose an event trigger from the picklist. This will be what causes the email to get sent (e.g. Customer Support Survey after a Case is resolved, Email Integration Auto Reply when a new email Case gets created, etc.)
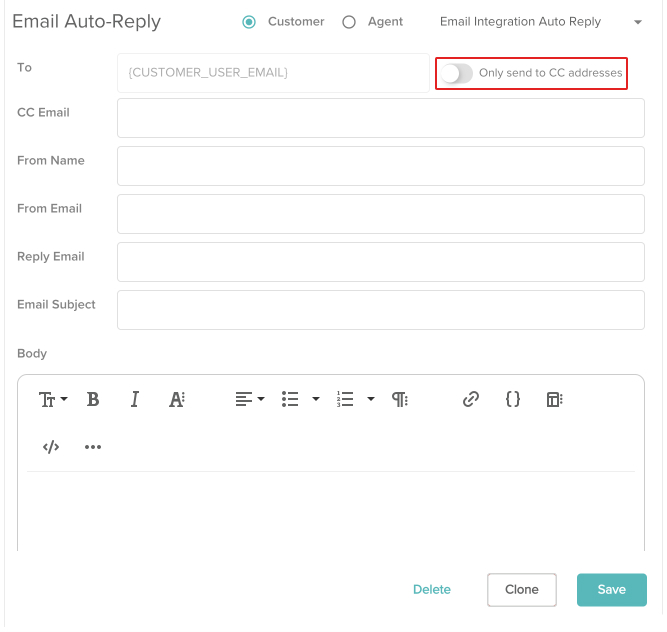
- Click the toggle switch next to Only send to CC addresses if you want to bypass sending alerts directly to Customers or Users. Emails will only get sent to addresses listed in the CC Email field.
- Update as many of the fields as you like and enter your message into the Body section. You can use the editor options at the top to format your text, add lists, hyperlinks, and more. You can also insert the tokens on the right to automate specific text from your database. When you are done, click the Save button.
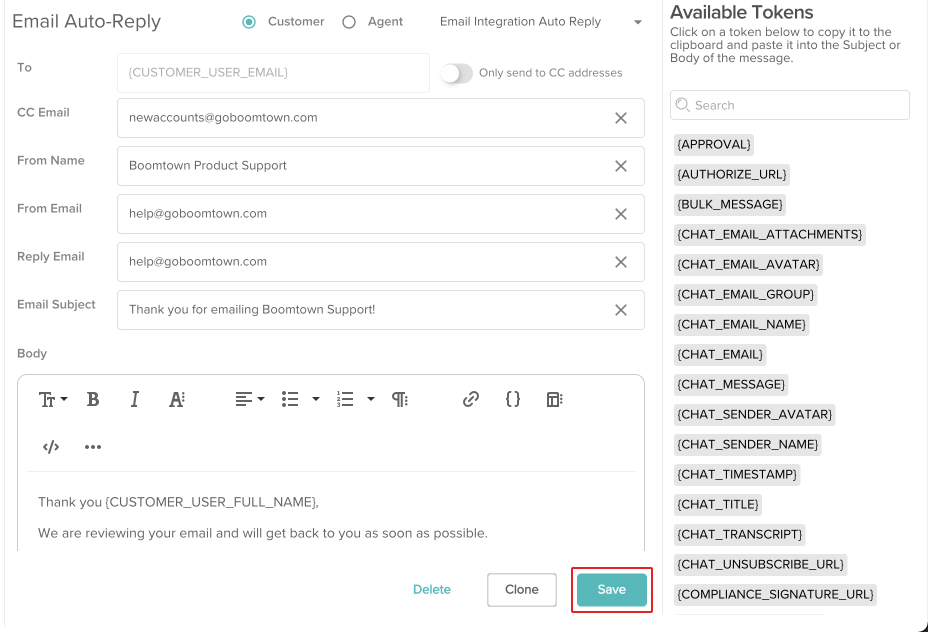
- Your alert template has been created! You can edit any template by clicking on it in the list. You can duplicate them by clicking the Clone button. You can delete templates by clicking on Delete.
Enable Alert Templates for Teams
Now that you have alert templates created, you will need to enable them for the Teams you want them to work with. Let's check it out!
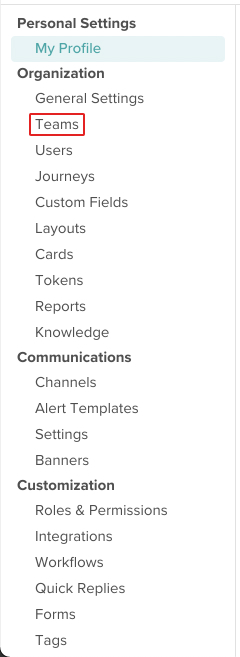
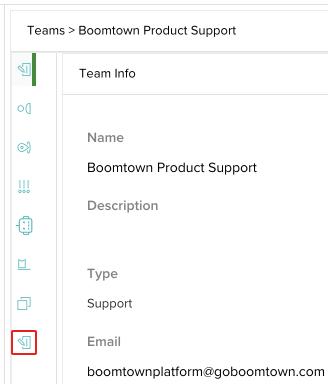
- Click on your avatar at the top right, then click on Settings.
- Click on Teams under Organizations.
- Click the Edit icon next to the Team you want to enable alert templates for.

- Click the Alert Templates icon.
- Click the toggle switch next to the alert templates you wish to enable.

- Your alert templates are now enabled for this Team! Whenever the event is triggered for this Team, the email set up in the alert template will get sent out.