Set Up a Salesforce v2 Integration
Sync your Salesforce database with CXME.
Last Updated:What's in this article?
Salesforce Integration
Boomtown has an application in the Salesforce AppExchange that can be downloaded and installed in both sandbox and production environments of Salesforce. The application is built to sync data between CXME and Salesforce. Setting up this integration is easiest if you are already logged into CXME and Salesforce in separate tabs of the same browser. You will need to install the app in Salesforce, configure the integration in CXME, then configure the app in Salesforce. Let's learn how!
Your ability to set up a Salesforce integration will depend on your Role & Permissions.
Install the Boomtown App in Salesforce
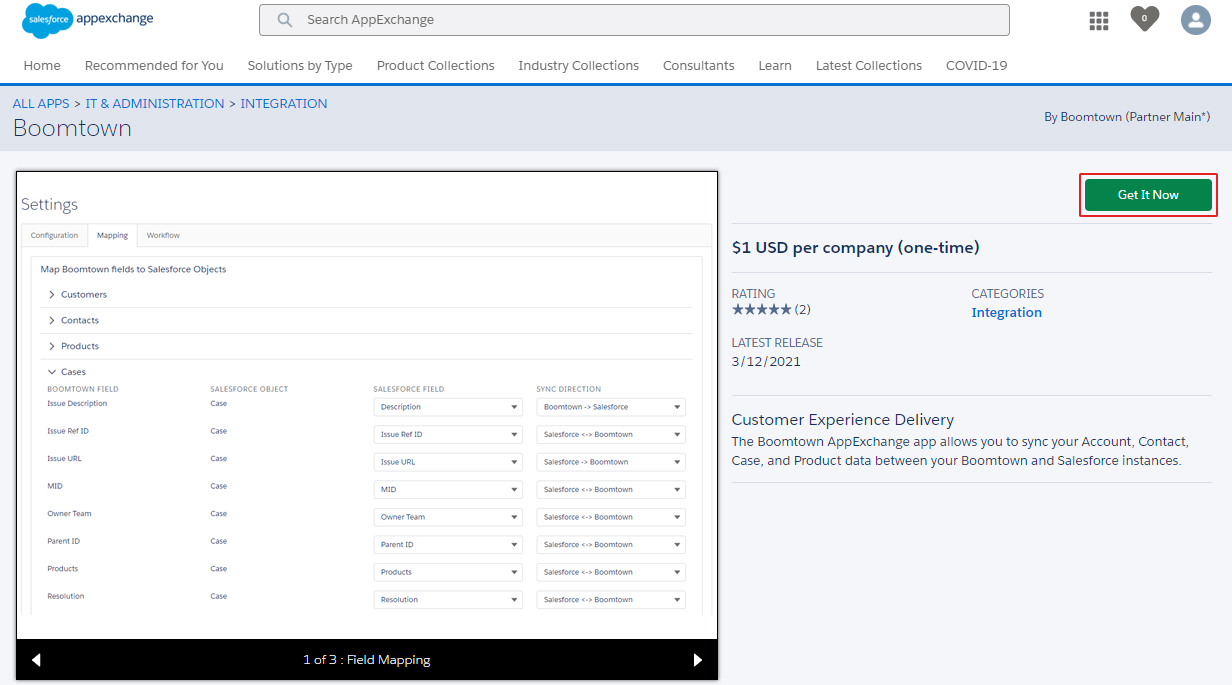
You can find the Boomtown App in the Salesforce AppExchange or by clicking this link: https://appexchange.salesforce.com/appxListingDetail?listingId=a0N3u00000ON263EAD
Due to Salesforce requirements, there is a nominal $1 fee to install the app.
- Click Get It Now to begin installing the app.
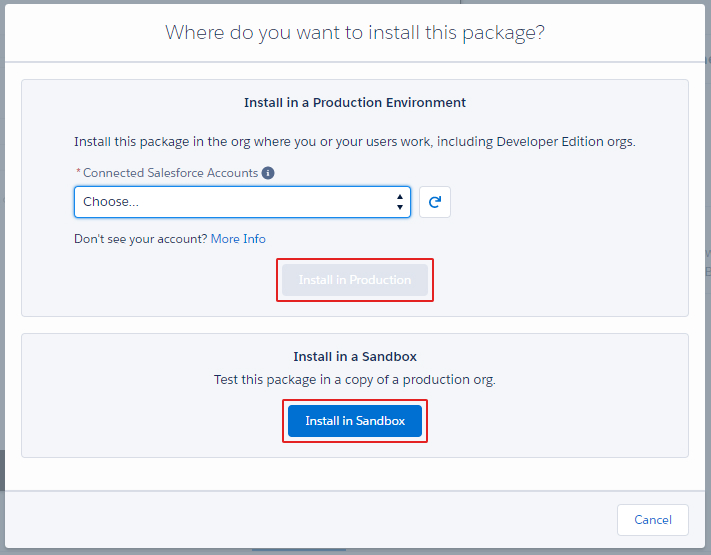
If you wish to install the app in a Salesforce production environment, select the Salesforce account then click the Install in Production button. If you wish to install the app in your sandbox environment, click the Install in Sandbox button.
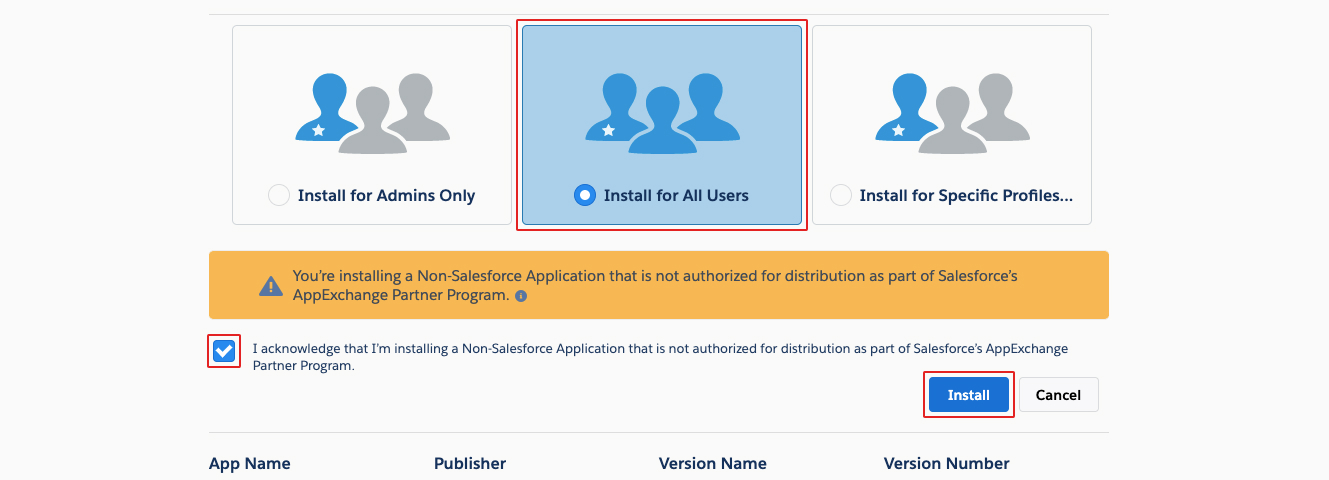
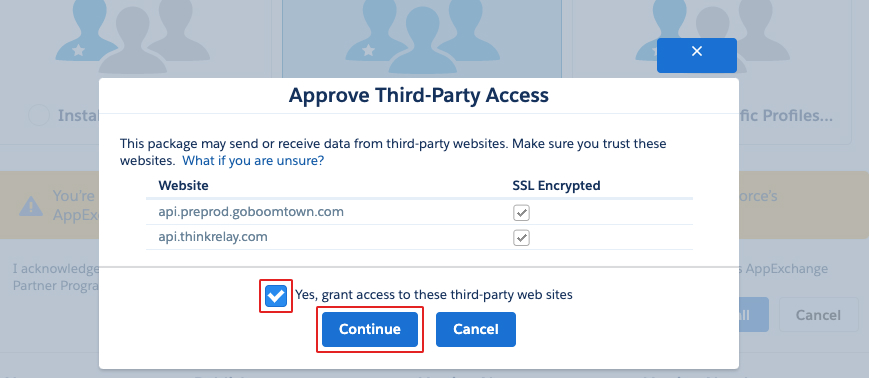
Select Install for All Users, check the box to acknowledge you are installing a third-party app, then click the Install button.
Check the box to grant third-party access, then click the Continue button. After a few minutes, the app will be installed and you should receive an email from Salesforce saying it was installed successfully.
Configure the Salesforce v2 Integration in CXME
After you install the Boomtown App in Salesforce, you will need to set up and configure the integration in the CXME platform.
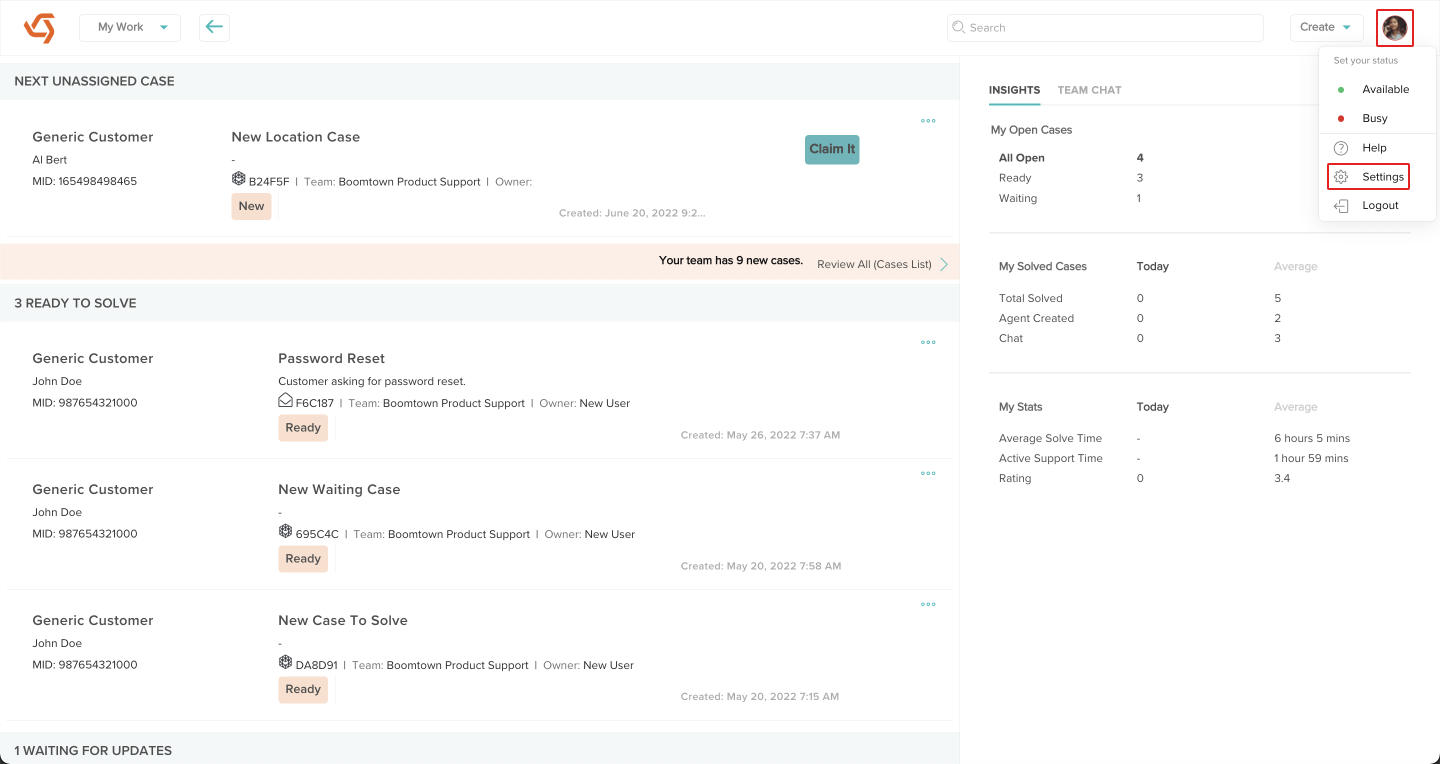
- Click on your avatar at the top right, then click on Settings.
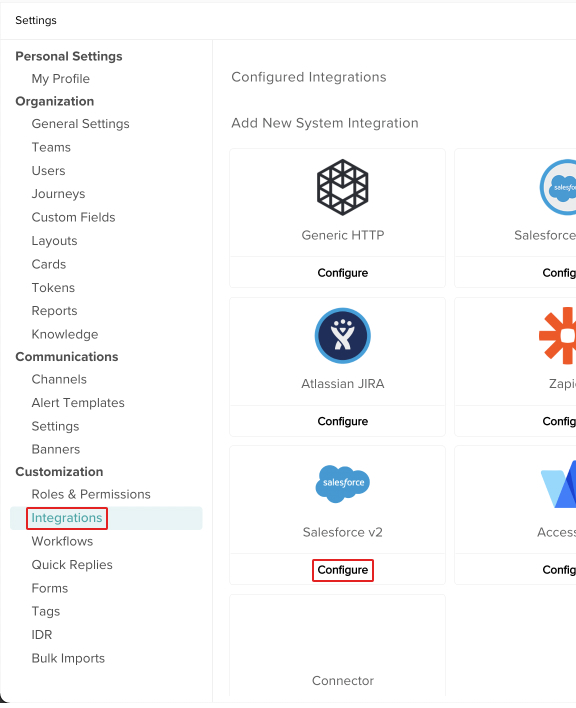
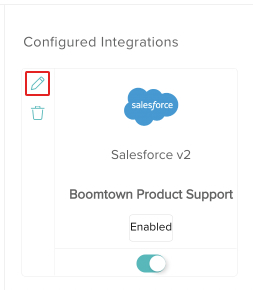
- Click on Integrations, then click on Configure under the Salesforce v2 integration.
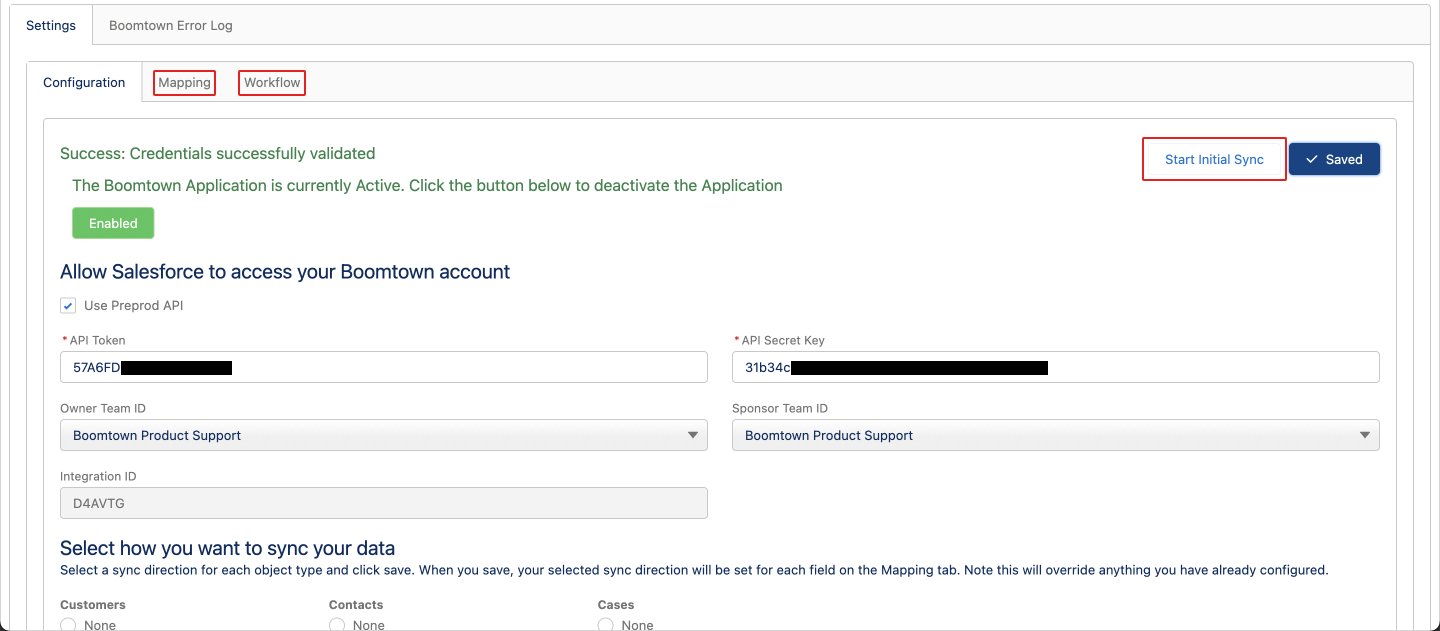
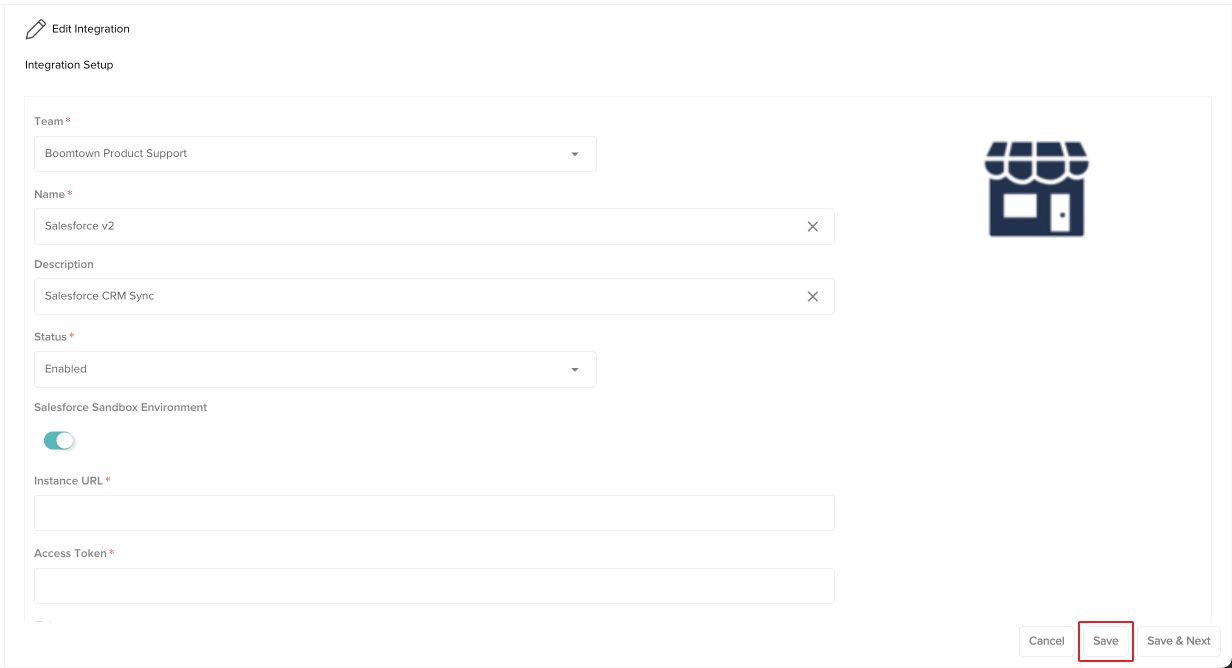
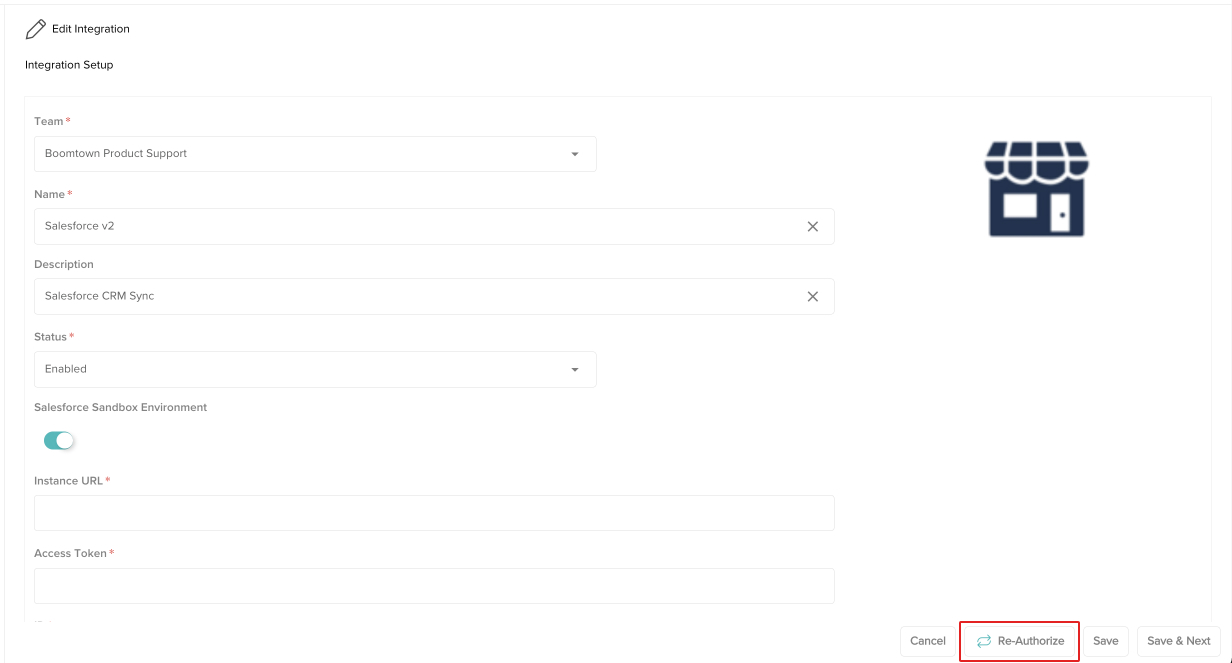
- You can give the integration a unique name and description if you wish. Make sure the Status is set to Enabled. If you installed the Boomtown app in a Salesforce sandbox environment, click the toggle switch below Salesforce Sandbox Environment to turn it on. When you are done, click the Save button.
Even though they are required fields, it's ok to leave Instance URL and Access Token blank for now.
- You'll be taken back to the Integrations display. Click the edit icon next to the configured integration you just saved.
- Click the Re-Authorize button and a new tab or window should open in your browser with a message saying the app has been authorized.
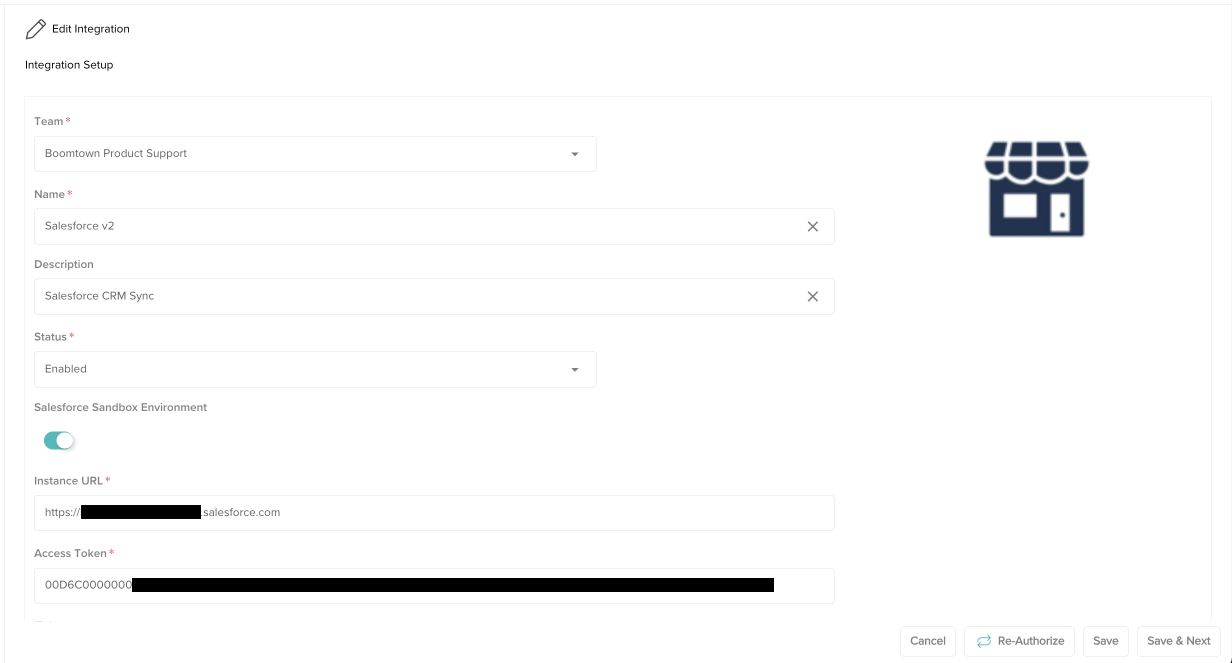
- You can close that confirmation tab or window. The next time you edit the integration in CXME, you will see the Instance URL and Access Token fields are now populated.
Configure the App in Salesforce
Now that you have the app installed in Salesforce and configured in CXME, it's time to finish setting up the app in Salesforce.
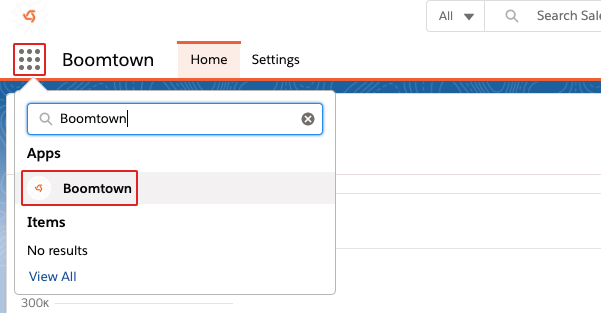
- Click on the App Launcher in Salesforce to search for and access the Boomtown app.
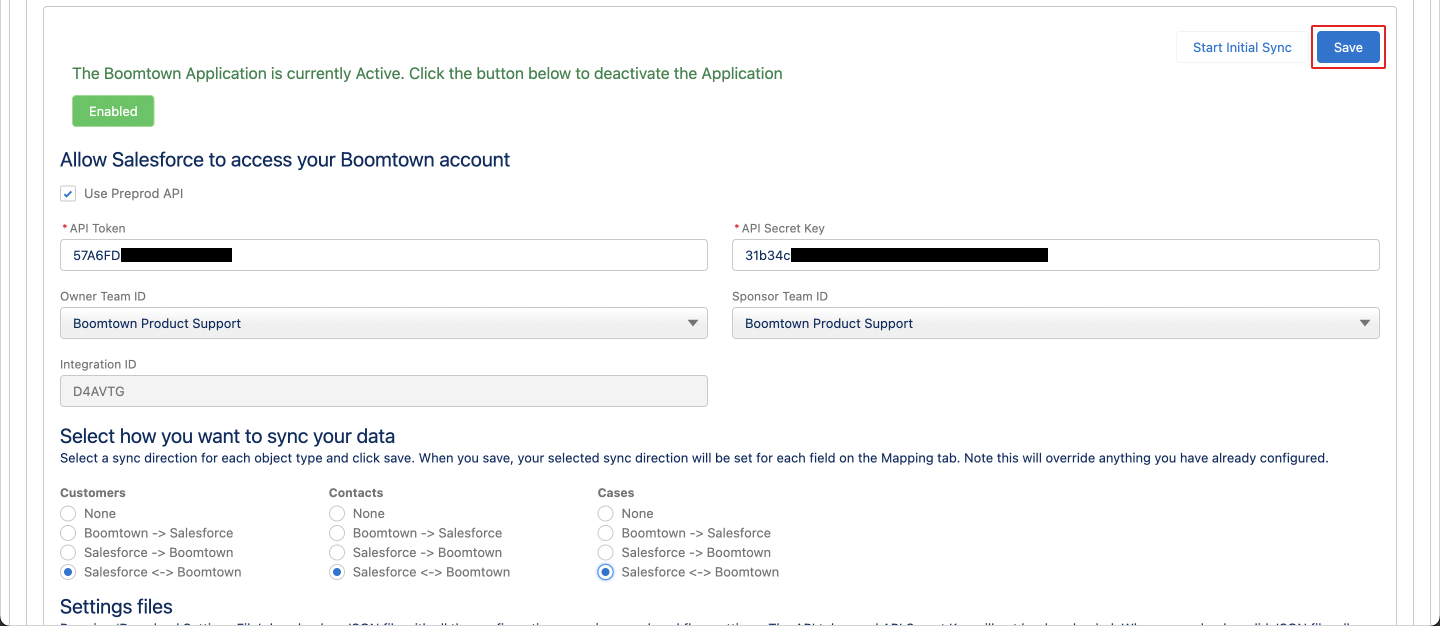
- Enter in your API Token and API Secret Key generated from CXME, then click the Save button.
If you do not know your API Token or Secret Key, send an email to help@goboomtown.com.

- Select the default Owner Team and Sponsor Team for any Cases that get created in Salesforce. You can also choose how you want data to sync between Salesforce and CXME. These options act like master switches for the Mapping tab so you can easily turn specific data syncs on or off. When you are done, click the Save button again.
- Your integration is now set up! You can adjust how individual fields are mapped in the Mapping tab, create specific scenarios to trigger when data will sync in the Workflow tab, or sync all your data between CXME and Salesforce by clicking the Start Initial Sync button.