
Jira Connector setup guide
Connect Jira Cloud or Jira Service Management to OvationCXM so issues become cases, updates flow both ways, and every case carries the right customer context.
Last Updated:What's in this article?
Jira Connector setup guide
Connect Jira Cloud or Jira Service Management to OvationCXM so issues become cases, updates flow both ways, and every case carries the right customer context.
| Works with | Jira Cloud, Jira Service Management |
| Sync direction | Jira to OvationCXM, OvationCXM to Jira |
| Typical setup time | 30 to 45 minutes |
| Access required | OvationCXM admin, plus a Jira user |
What the connector does
Issues raised in Jira create or update OvationCXM cases, case activity can flow back to Jira, and each record is associated with the customer, location, and contact it belongs to.
With the connector in place, you can:
- Create and update OvationCXM cases from Jira issues, and optionally write updates back to Jira
- Associate every synced issue with the correct customer, location, and contact
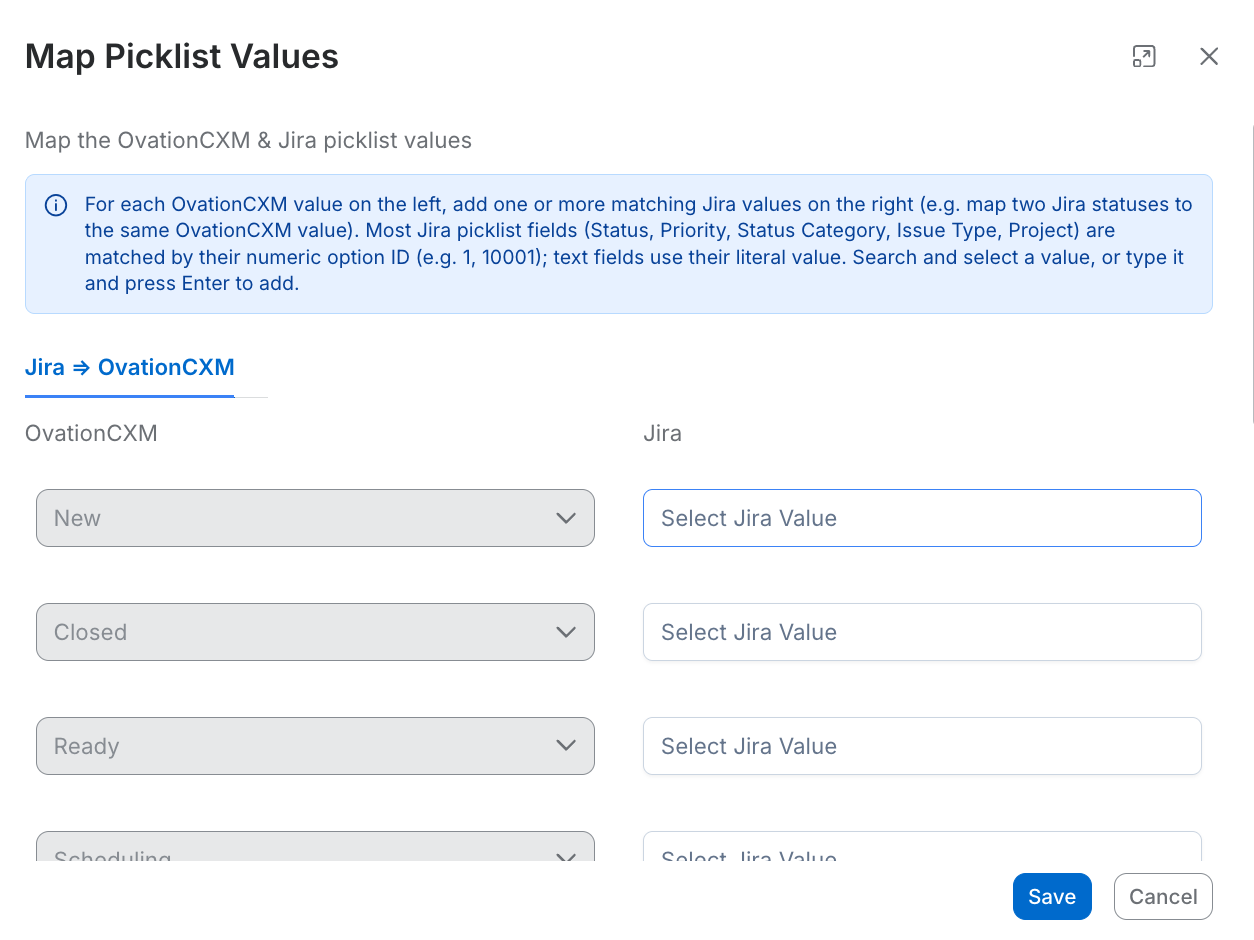
- Map standard and custom fields, including picklists such as status and resolution
- Control which Jira events are sent by adding a JQL filter to the webhook
- Pass identifiers such as Customer ID and Location ID through the webhook URL when those values do not exist in the Jira payload
How the sync works
Jira sends event payloads to a webhook address that the connector generates for your instance. In the other direction, OvationCXM calls the Jira REST API using the OAuth connection you authorize during setup. Your field mappings decide what each side writes, and the webhook filter decides what Jira sends in the first place.
Before you begin
Gather the following before you start. Missing permissions are the most common reason a setup stalls halfway through.
| Requirement | What you need |
|---|---|
| OvationCXM access | Admin, or a role that includes Manage Integrations |
| Jira site | The site address for your Jira Cloud or Jira Service Management instance |
| Jira user for OAuth | Browse Issues, Edit Issues, Add Comments, and Transition Issues. Add Create Issues if OvationCXM will create Jira issues. |
| Jira Service Management | The same user needs an active agent seat |
| Webhook registration | Jira admin permission to let OvationCXM register the webhook for you. Without it, a Jira admin creates the webhook manually. |
Recommended: Authorize the connection with a dedicated Jira service account rather than an individual's login. The integration then survives role changes and staff departures without an unplanned reconnection.
Set up the connector
Step 1. Install from the Marketplace
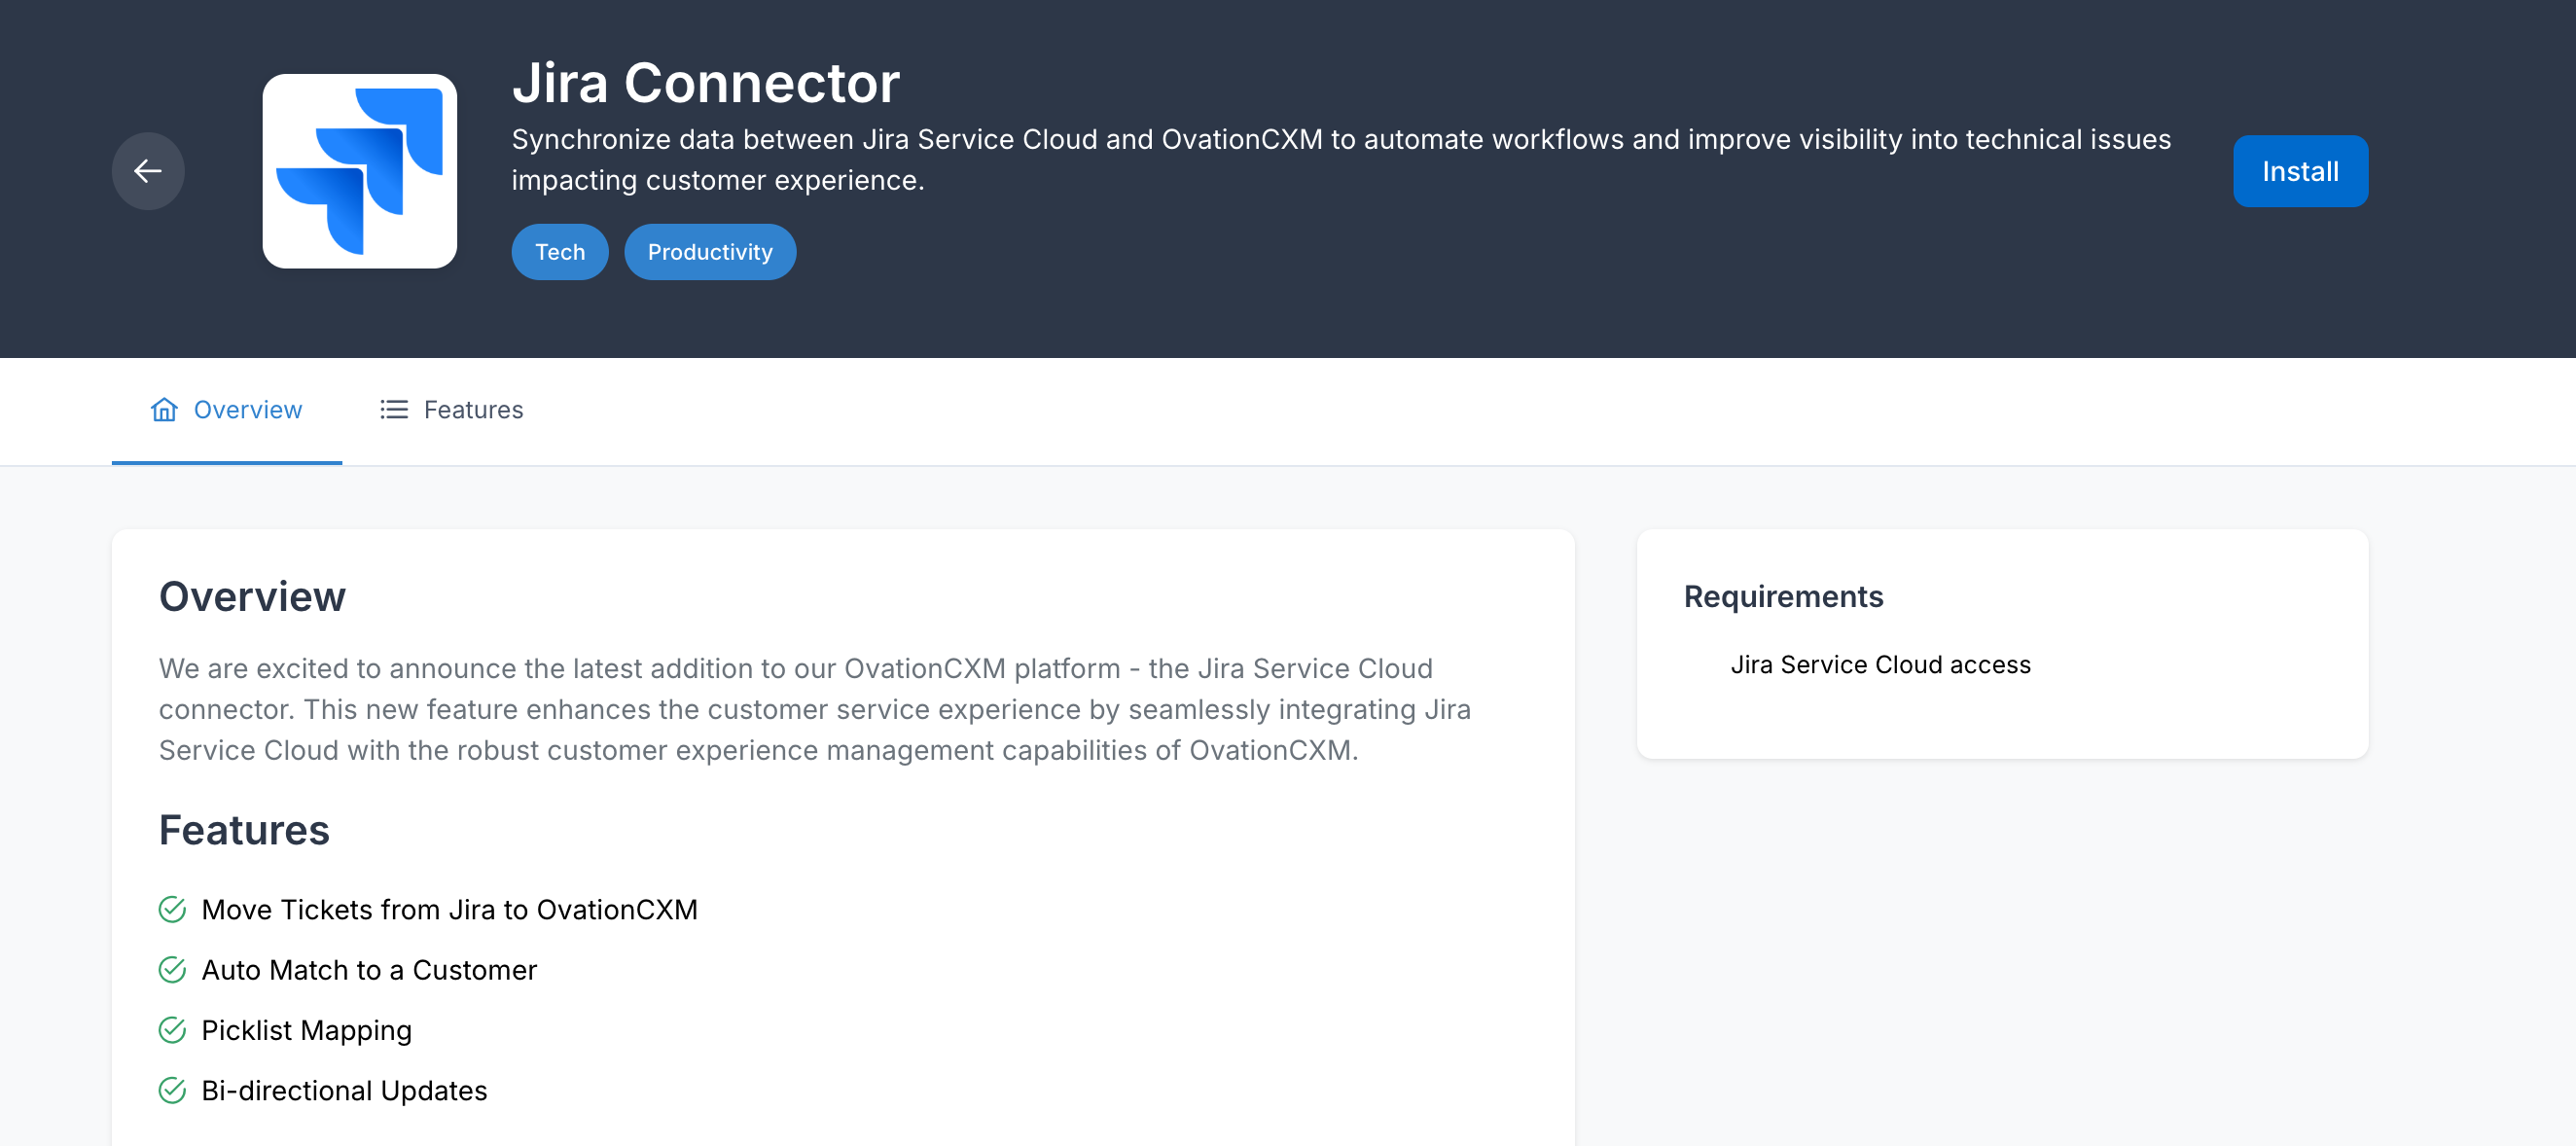
In OvationCXM, go to Settings > Marketplace, search for Jira, open the Jira Connector card, and select Install.
Step 2. Choose the installation scope
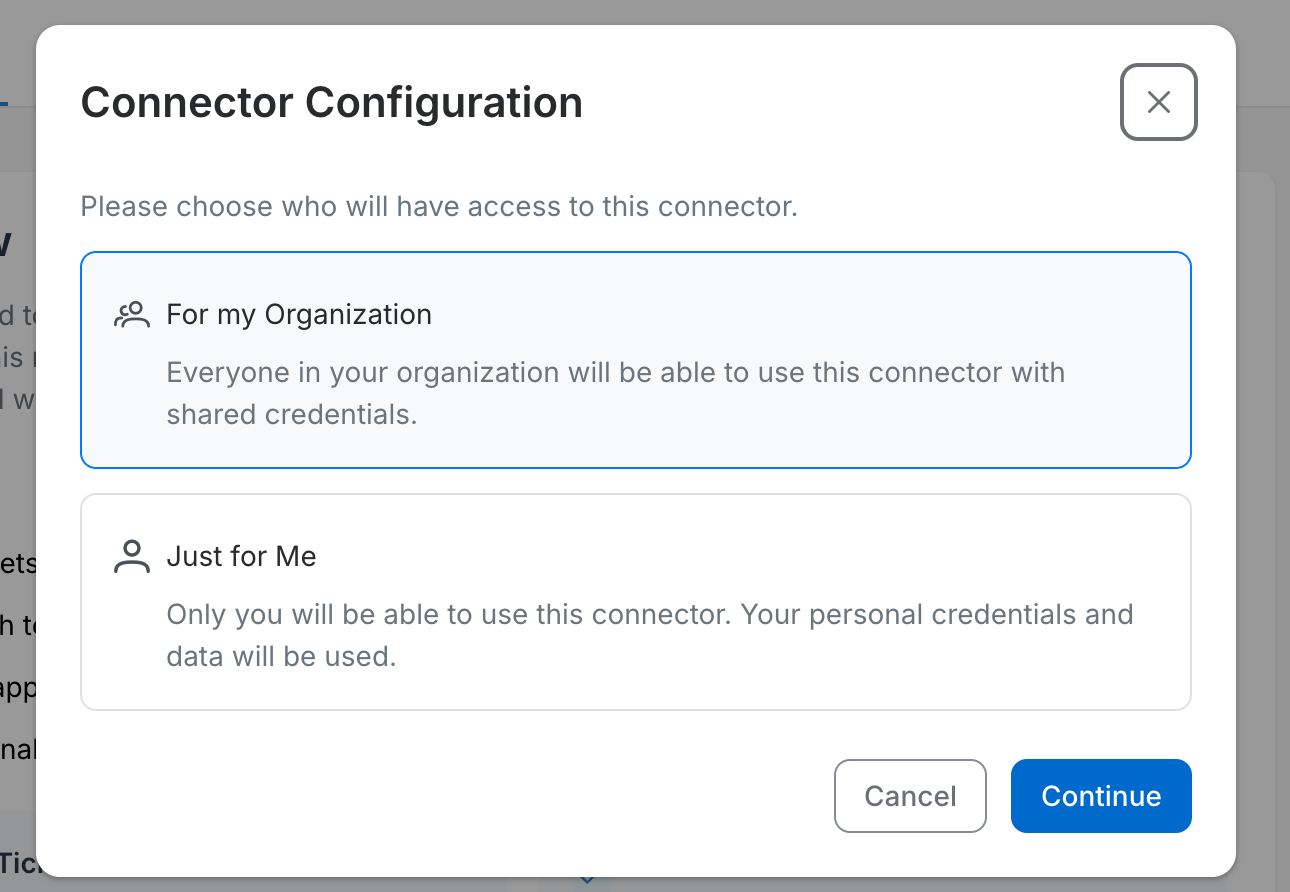
- For my Organization uses shared credentials and makes the connection available across your organization. Choose this for production.
- Just for Me creates a personal connection, which suits sandbox testing.
Select Continue.
Step 3. Name the connection
Give the connection a name that identifies the environment, such as Jira Production or Jira Sandbox, add an optional description, and select Next. Teams that run more than one Jira site rely on this name later, so keep it specific.
Step 4. Connect your Jira account
Complete the OAuth flow for your Jira site. When you are asked for the Jira site address, enter the site root only.
Use this
https://yourcompany.atlassian.net
Not this
https://yourcompany.atlassian.net/jira/servicedesk/projects/DEV/
Any project, board, or issue address will fail in the same way.
Why the site root mattersThe connector uses this address to resolve your Atlassian cloud ID, which every Jira REST call depends on. A project path breaks that lookup quietly. The connection still shows as authorized, because token refresh runs through
auth.atlassian.com, but create, update, and field metadata calls return404 Not Found. If you ever edit the authorization or the CRM URL, check the site root again.
Record these values
After the connection succeeds, note the following. You need some of them in later steps and all of them if you contact support.
- Jira CRM URL, confirmed as the site root
- OvationCXM API key and secret
- Instance ID
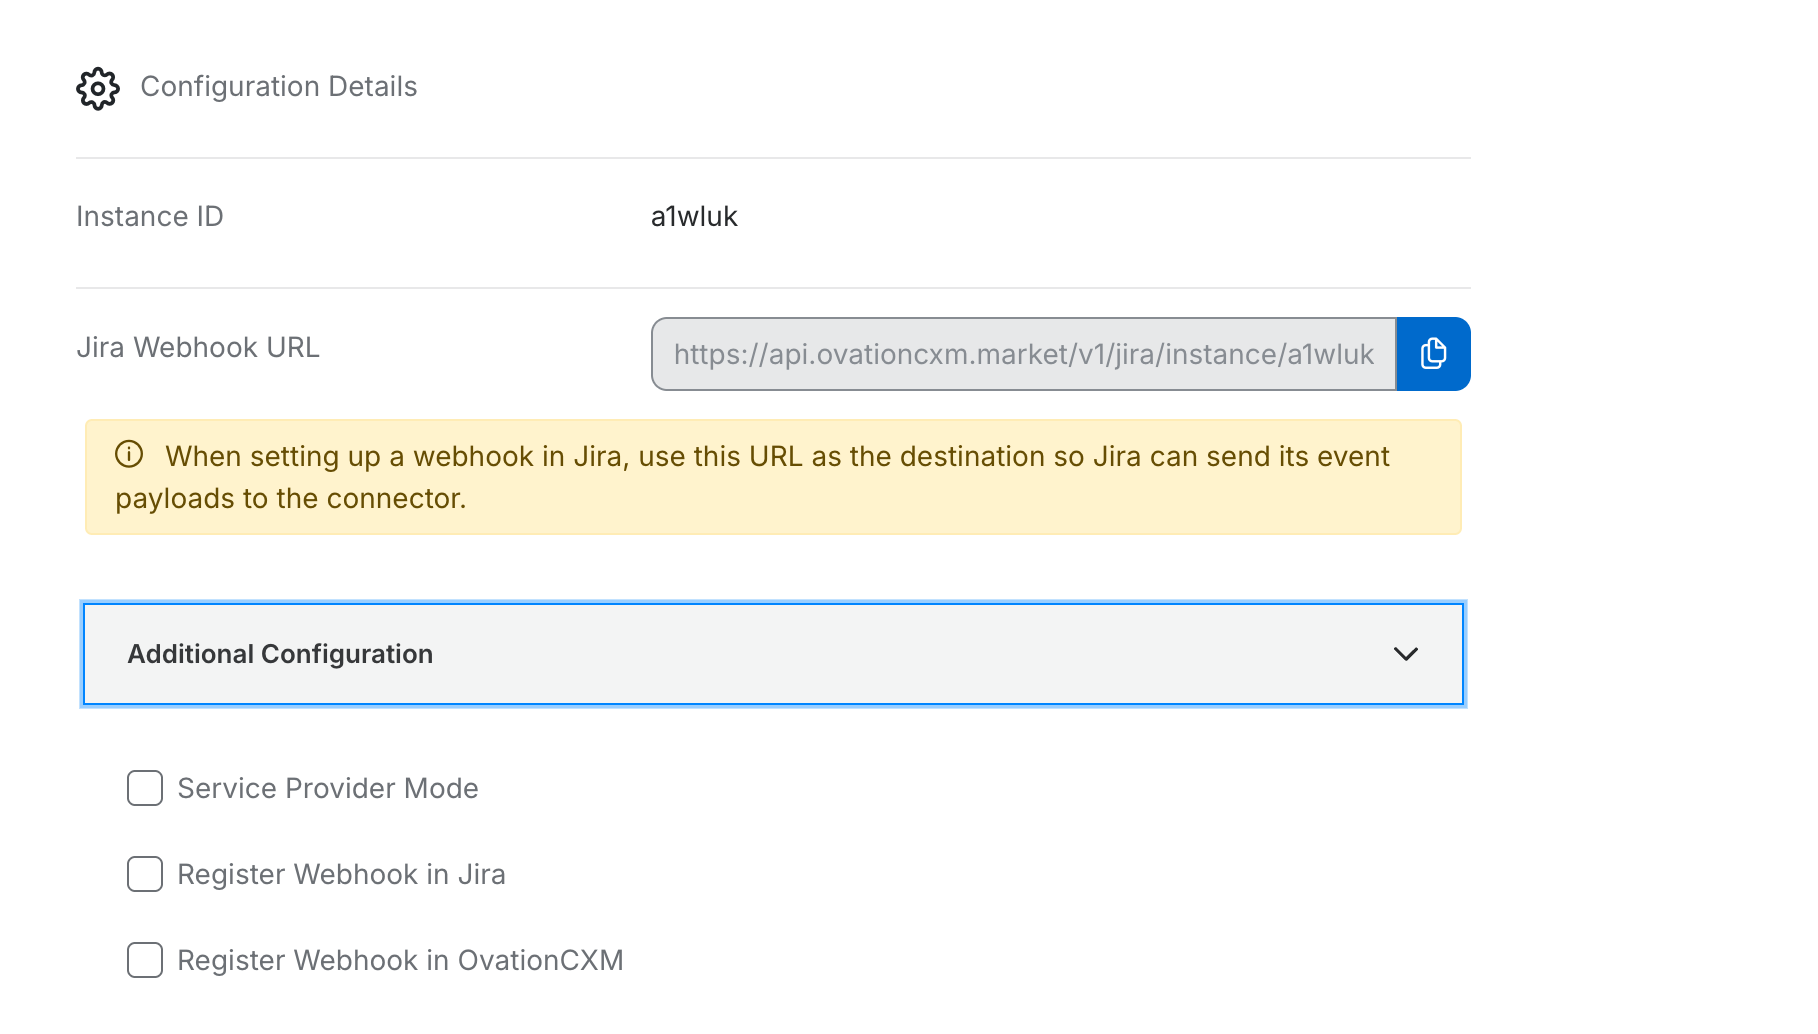
- Jira Webhook URL, required if you register the webhook manually
- OvationCXM Webhook URL, used for connector callbacks where applicable
Webhook address format
The Jira to OvationCXM webhook always follows this pattern:
https://api.ovationcxm.market/v1/jira/instance/<instanceId>/webhook/jira
Copy the address exactly as the connector displays it. Hand-built variations return errors such as 415 Unsupported Media Type.
Step 5. Set up the webhook
Use automatic registration if the connected Jira user is a Jira admin. Otherwise, register the webhook manually in Jira.
Option A: automatic registration
- Expand Additional Configuration.
- Select Register Webhook in Jira.
- Select Register Webhook in OvationCXM as well if your configuration requires it.
Selecting the checkbox does not finish the jobWebhooks are created and finalized when you select Save Mapping in step 6. If you leave the wizard before saving your mappings, no webhook exists and nothing syncs.
Option B: manual registration
- Copy the Jira Webhook URL from the connector.
- In Jira, create a webhook and paste that address as the destination.
- Add a JQL filter so Jira only sends the issues you care about.
- Save the webhook in Jira, then return to OvationCXM.
JQL filter examples
| Send only | JQL |
|---|---|
| Open high priority issues | priority = High AND status != Done |
| Unassigned issues | assignee IS EMPTY |
| Issues updated in the last day | updated >= -1d |
| Issues with a specific label | labels = "customer-complaint" |
Step 6. Configure sync and field mappings
Configure each OvationCXM entity you plan to use: Cases, Customer, Customer Location, Contact, and Case Log. Each entity has its own tabs. Choose one mapping method per entity on Sync To CXM, and configure Sync To CRM, meaning OvationCXM to Jira, separately.
Mapping methods
| Method | Use it when |
|---|---|
| Field Mapping | The value already exists in the Jira webhook body, such as summary, status, or a custom field |
| Custom Value | You want the same fixed value on every event, for example Source = Jira |
| Lookup Mapping | You want to find an existing OvationCXM record by identifier and update it. Lookup never creates a record when there is no match. |
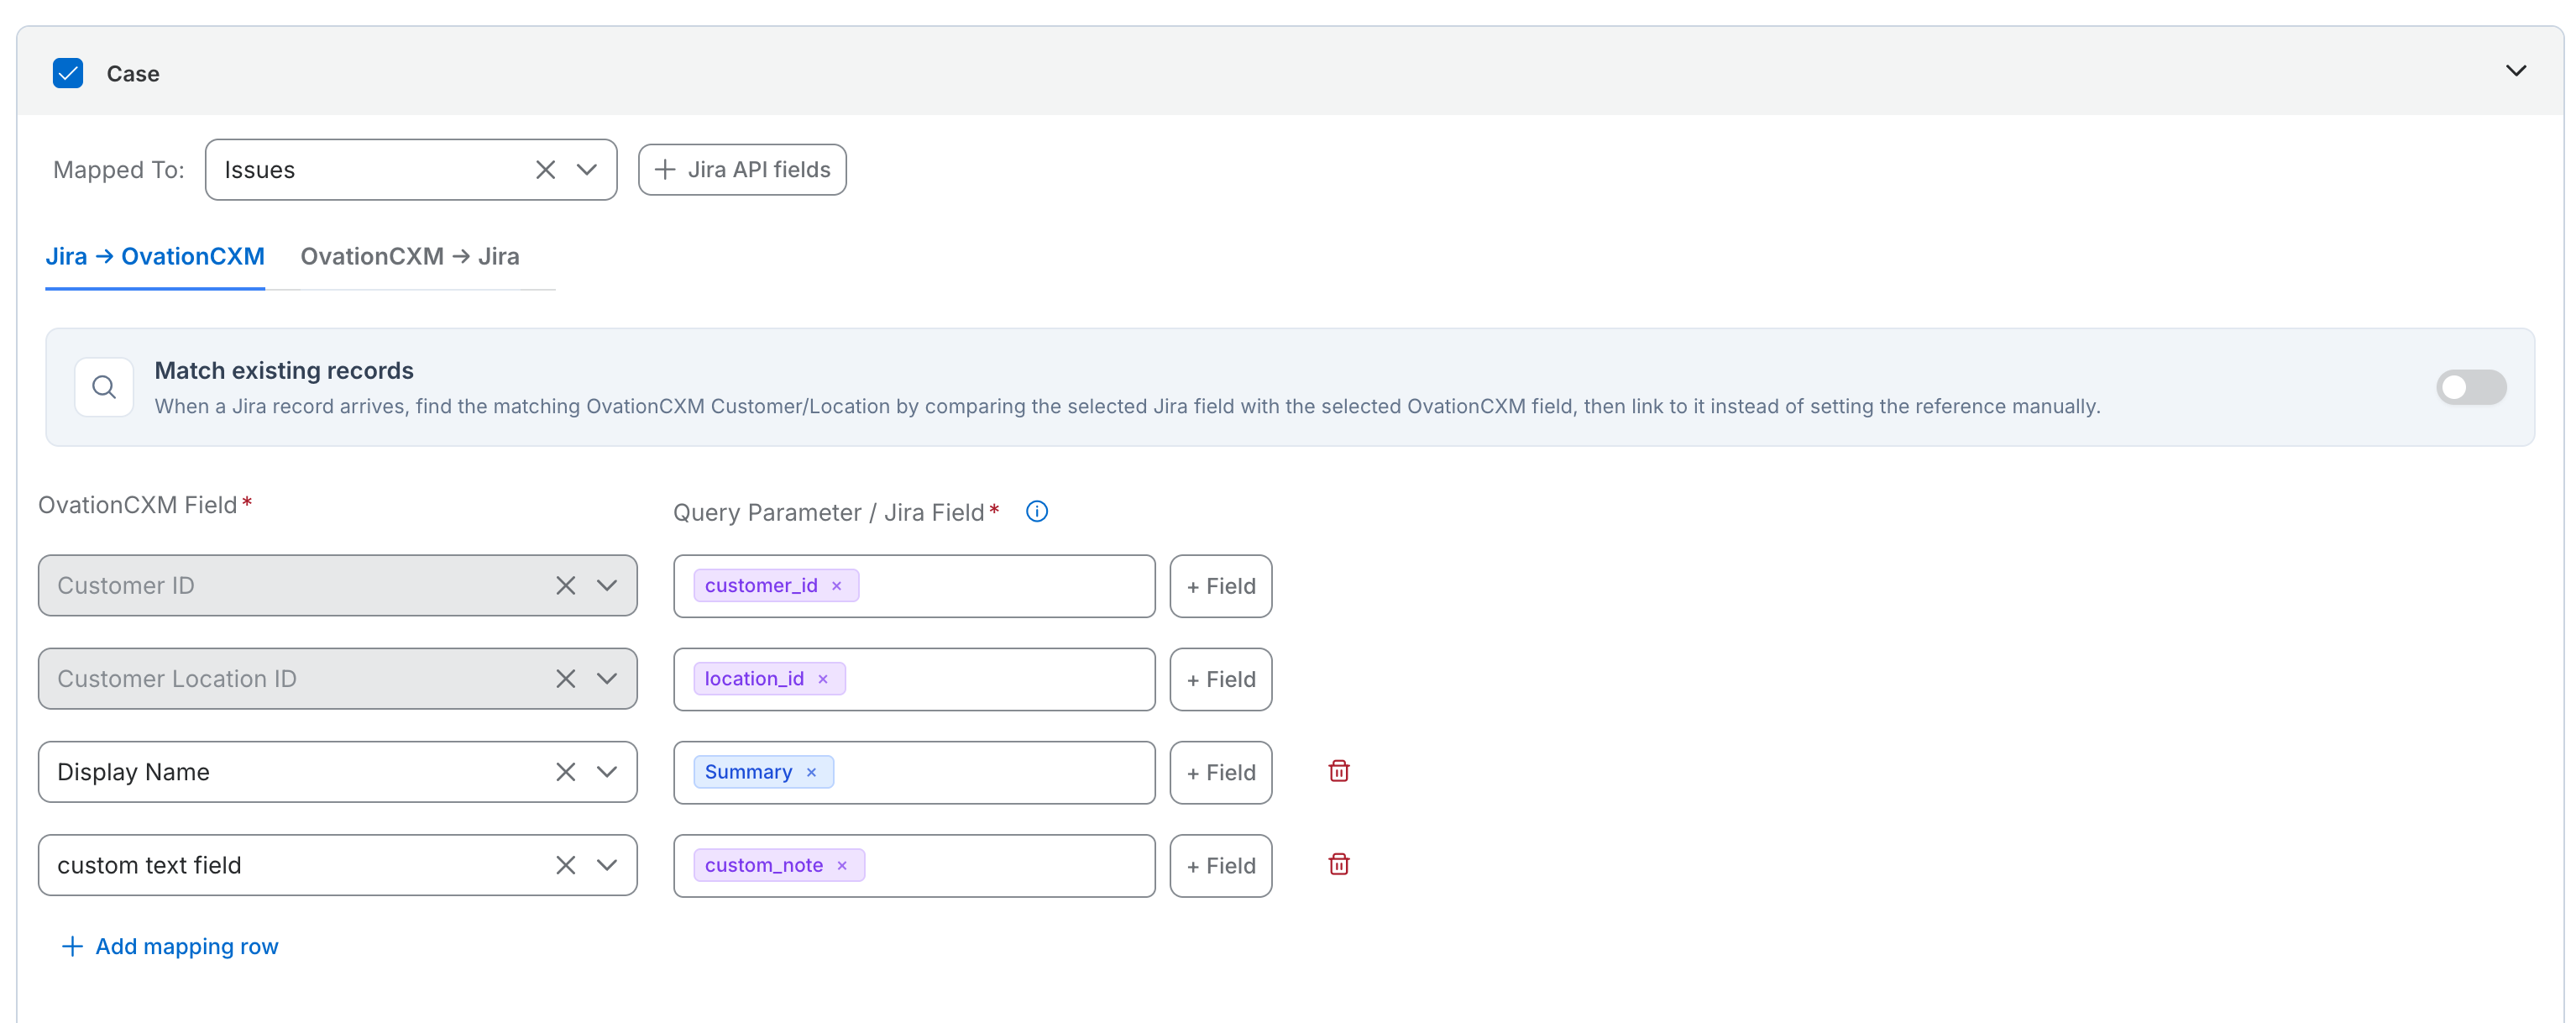
| Query Parameter Mapping | Customer, location, or contact IDs travel on the webhook URL rather than in the Jira payload. You can still map other rows from the payload. |
Required OvationCXM identifier fields, such as Customer ID and Customer Location ID on Cases, stay locked in the left column. Supply a value on the right before you save.
Map Project and Issue Type to numeric IDs
When OvationCXM creates or updates issues in Jira, the Project and Issue Type mappings must use Jira's numeric IDs. Display names are rejected.
- Use this: issue type
10006, project10104. IDs are specific to each Jira site. - Not this:
Support,Bug. Jira usually returns400 Bad Request.
To find the IDs, open a sample issue's JSON or webhook payload and read fields.project.id and fields.issuetype.id. You can also call GET /rest/api/3/project/ and the create metadata endpoint for that project, or ask your Jira admin.
Confirm as well that the OAuth user holds Create Issues on that project. Browse and Edit permissions alone are not enough for OvationCXM to create issues.
Status sync works differently Status updates use Jira's transitions API together with your picklist to status mapping. You do not need Project or Issue Type IDs to sync status alone.
Query parameter mapping
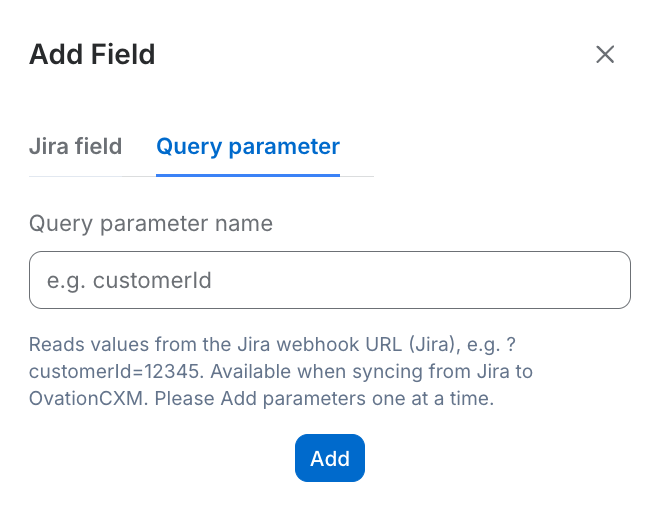
Use this method when the identifiers you need are not in the Jira payload. Append them to the webhook address:
https://api.ovationcxm.market/v1/jira/instance/<instanceId>/webhook/jira?customerId=12345&locationId=67890
- Add the parameters to the Jira webhook URL.
- In Sync & Mappings, open the entity, then Sync To CXM, and choose Query Parameter Mapping.
- For identifier rows, type the exact parameter name on the right. Parameter names are case sensitive.
- For all other rows, select a Jira field from the dropdown as usual.
- Select Save Mapping.
A missing parameter leaves that field empty. Do not combine a typed parameter name and a selected Jira field in the same row.
Before you save
- Review both Sync To CXM and Sync To CRM, since each tab saves its own configuration
- Map every required field before you continue
- Use picklist mapping for statuses and resolutions wherever it is offered
- Map rich text custom fields as ordinary strings. The connector handles Atlassian Document Format for you.
- Mappings will auto save with each change.
Step 7. Test and enable
Open Test & Enable Connection, select Enable Connector, then select Save & Finish. The connector starts processing events as soon as it is enabled.
Validation checklist
Work through these checks before you hand the integration to your team.
- [ ] The connected Jira CRM URL is the site root, with no project path.
- [ ] Jira to OvationCXM: create or update a test issue, then confirm the case and its customer, location, and contact associations in OvationCXM.
- [ ] OvationCXM to Jira: update a mapped case and confirm the change reaches the Jira issue.
- [ ] If OvationCXM creates issues, Project and Issue Type are numeric IDs and the OAuth user holds Create Issues on that project.
- [ ] For manual setups, the Jira webhook is active and points at the exact address shown in the connector.
- [ ] Status changes move the Jira issue through the expected transition.
Troubleshooting
| Symptom | Likely cause | Resolution |
|---|---|---|
| Connector installed but nothing syncs | The setup was not completed end to end | Confirm the connector is enabled, mappings are saved, the webhook is active at the exact address, and the sync direction matches what you expect. |
| Every Jira call returns Not Found, yet OAuth looks connected | The saved site address is not the site root | Edit the authorization, enter the site root only, and save the auth configuration again. |
OvationCXM to Jira returns 400 | Project or Issue Type mapped as display names | Replace the names with the numeric IDs from your Jira site. |
OvationCXM to Jira returns 404 when creating an issue | Site address, permissions, or Project ID | Check the site root, confirm the OAuth user holds Create Issues and Browse on that project, and verify the Project ID belongs to this site. |
OvationCXM to Jira returns 404 when updating an issue | The OAuth user cannot reach the issue | Grant Browse and Edit on the issue, and for Jira Service Management confirm the user has an active agent seat. |
Webhook returns 415 | The webhook address was altered | Replace it with the exact address the connector generated for your instance. |
| Automatic webhook registration fails | The connected Jira user is not a Jira admin | Register the webhook manually, or reconnect with an account that holds Jira admin permission. |
| Webhook never appears in Jira | Mappings were never saved | Return to Sync & Mappings and select Save Mapping, which finalizes registration. |
| Cases land on the wrong customer or location | Identifier mapping | Review the field, custom value, lookup, or query parameter mapping for the identifier rows. Remember that Lookup Mapping updates existing records only. |
| Colleagues cannot see the connection | The connector was installed as Just for Me | Reinstall with the For my Organization scope for shared production use. |