Edit Cards
Customize the information displayed on various cards as well as the Location info in the Customer panel.
Last Updated:What's in this article?
Cards
You can add additional details to certain cards in CXME to customize and prioritize the information Users see. It is easy to edit cards in the Cards section of the Settings view. Let's learn how!
Your ability to edit cards depends on your Role & Permissions.
- Card Types
There are several different types of cards you can edit.
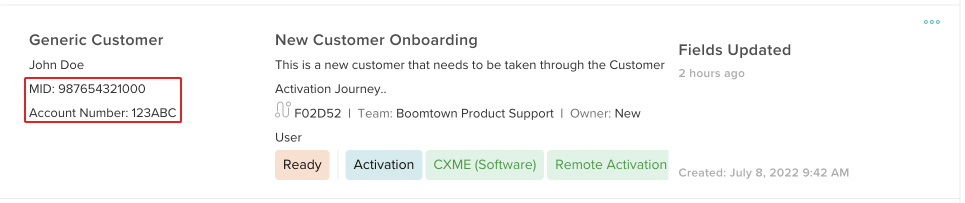
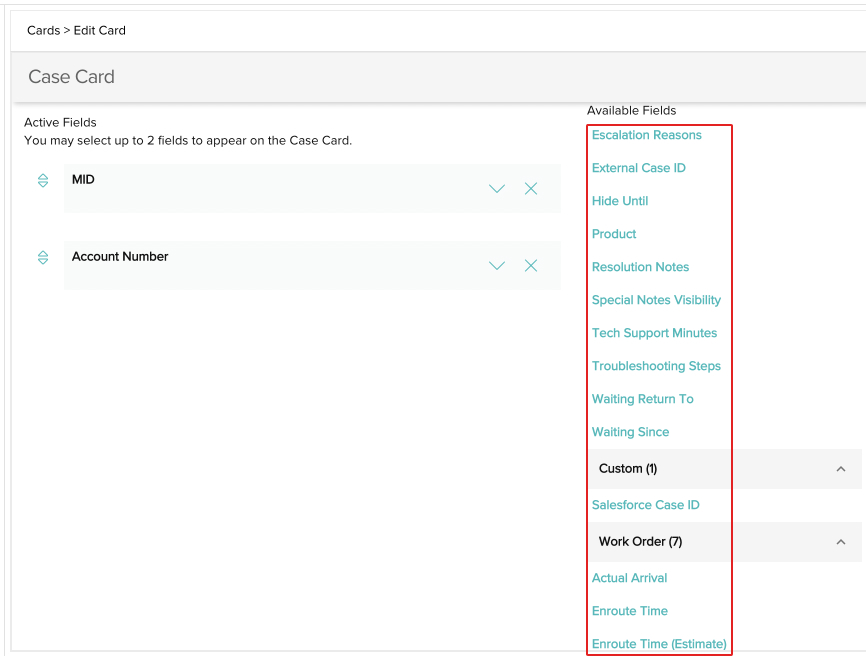
- Case Card- This is the card that is displayed in the My Work and Cases views by default. Up to 2 fields can be added underneath the Contact name field on the card.
- Case Workorder Card- The same as Case cards but specific to Work Order Cases. Up to 3 fields can be added underneath the Contact name field on the card.

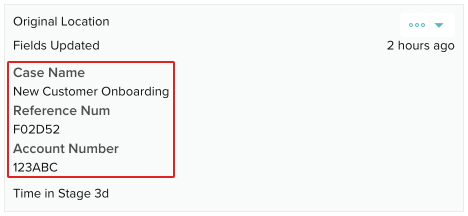
- Case Kanban Card- These are the Case cards that are shown if your organization has any custom Case views created that have Default Display set to kanban. Up to 10 fields can be added under the Case activity.
- Location Card- This is the card that is displayed in the Customers view by default. Up to 3 fields can be added to the middle section of the card.

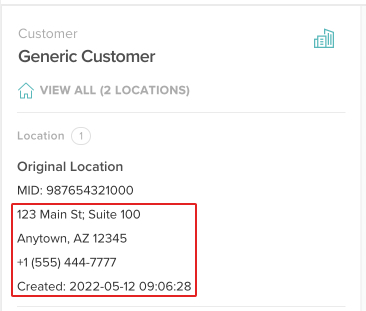
- Location Block- This is the Location information displayed in the Customer panel of the CX Manager. Up to 3 fields can be added to it under the Location Name and MID (Merchant Identification Number).
- Case Card- This is the card that is displayed in the My Work and Cases views by default. Up to 2 fields can be added underneath the Contact name field on the card.
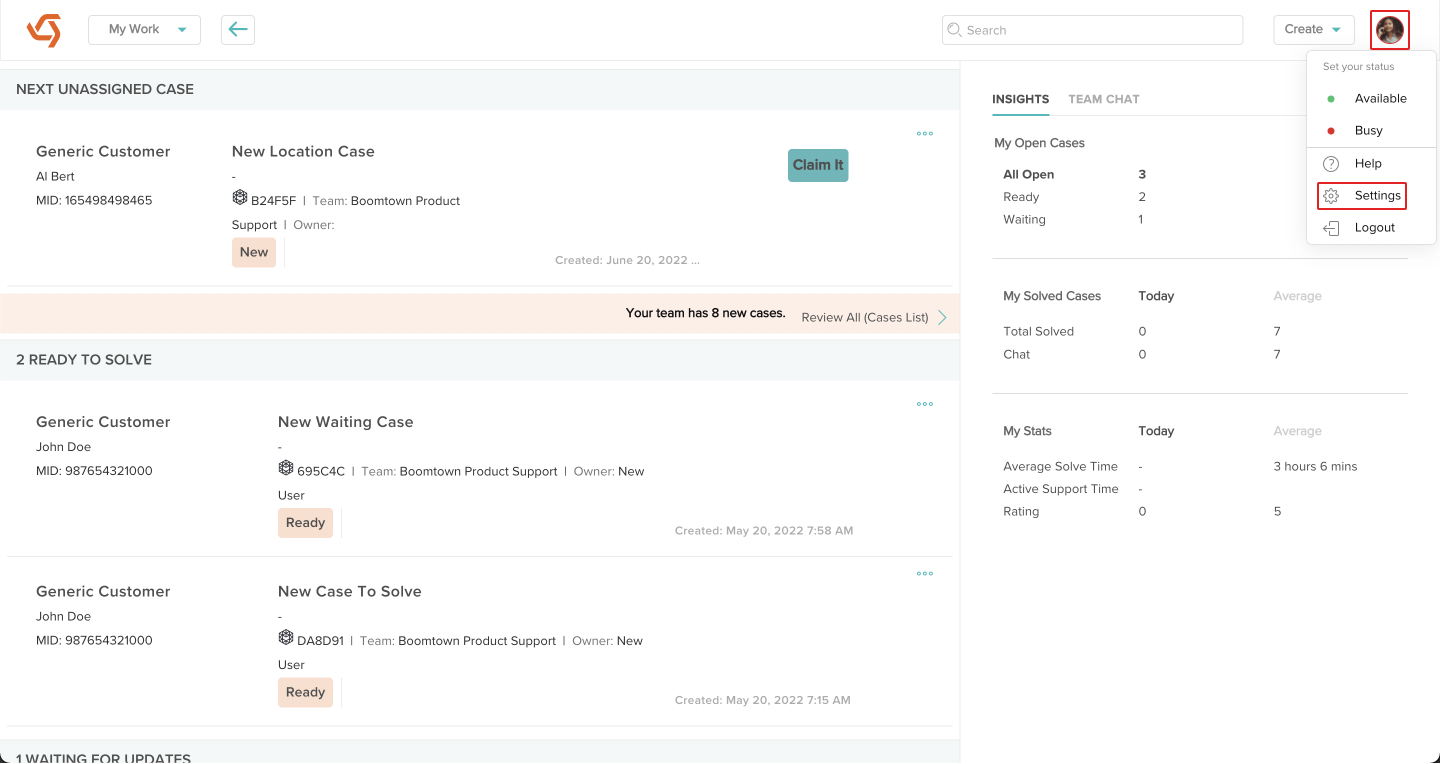
- Click on your avatar at the top right, then click on Settings.
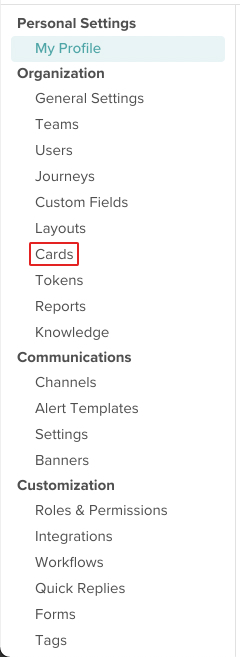
- Click on Cards under Organization.
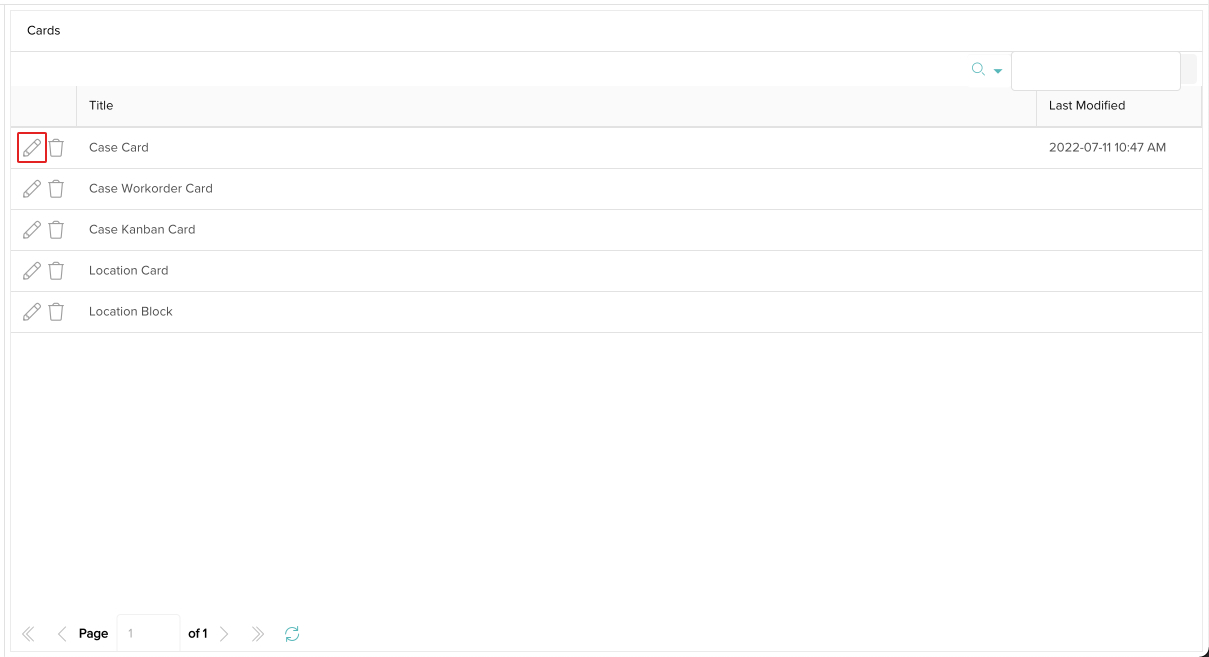
- Click the Edit icon next to the card you wish to update.
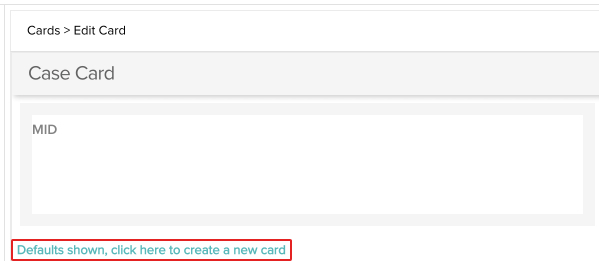
- If the card has not been updated yet, click on Defaults shown, click here to create a new card.
Otherwise, click the Edit button.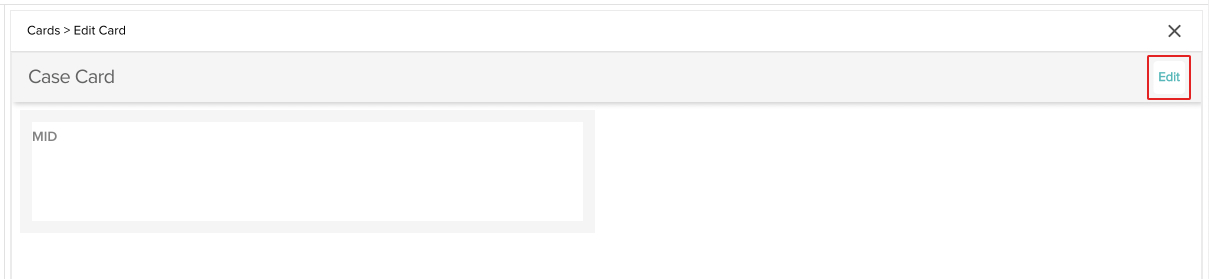
- You can add fields to the card by clicking on any of them in the list under Available Fields.
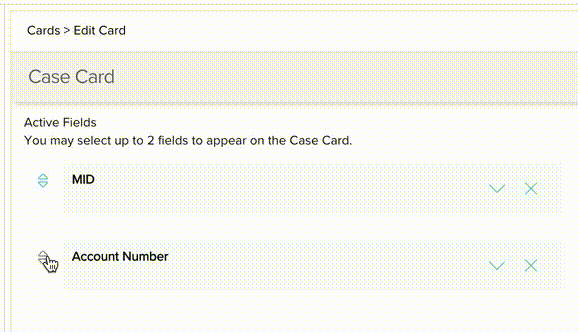
- You can drag and drop the fields to place them anywhere you would like in the list.
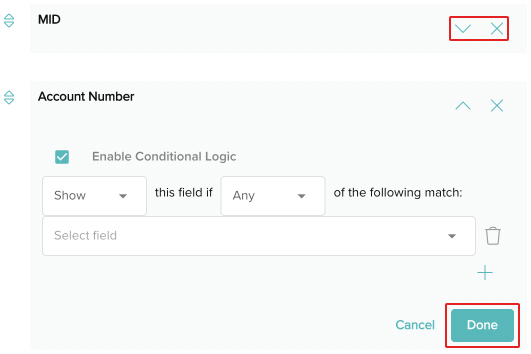
- Click the X next to a field to remove it from the card. Click the down arrow to optionally enable conditional logic for the field. This will allow you to only display the field when certain parameters are met. Whenever you are done, click the Done button.
- Your card has been updated! You will begin seeing the changes after you refresh your browser.
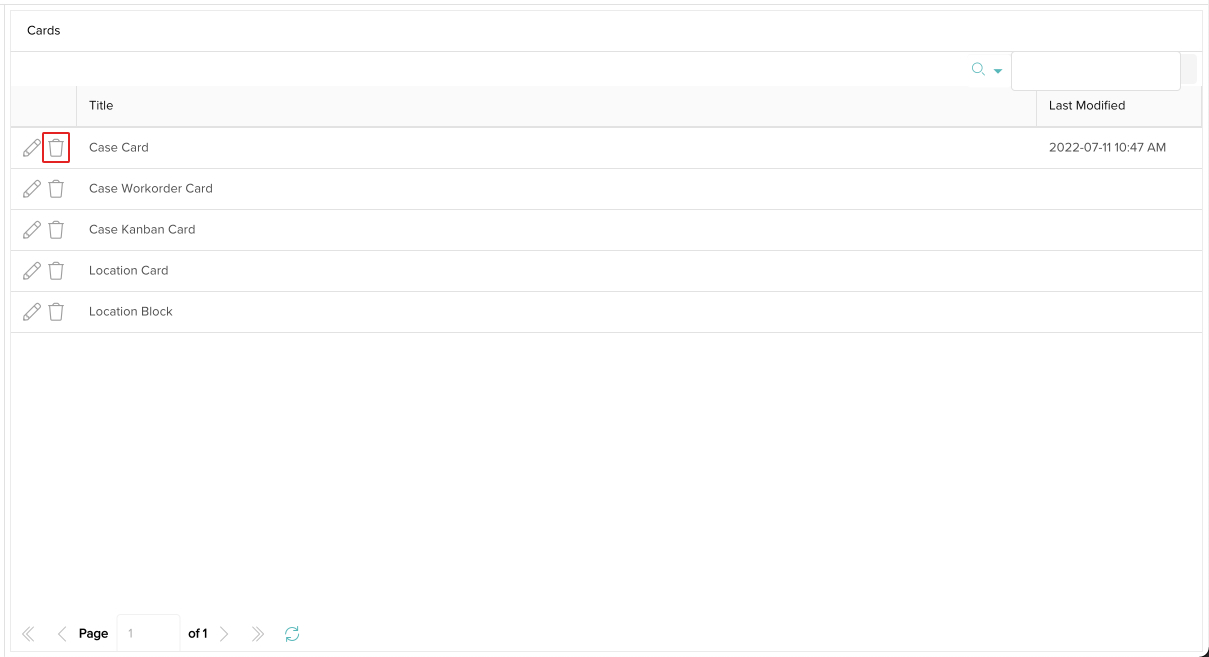
Reset Card to Defaults
You can reset any card to its default fields by clicking on the Delete icon next to it, click on Yes in the popup to confirm, then refresh your browser.