
Create a New Case
Learn about manually creating a new Case in CXME.
Last Updated:What's in this article?
Manually Create a New Case
There are a couple of different ways to create a new Case manually in the platform. Let's check them out!
Your ability to create new Cases depends on your Role & Permissions.
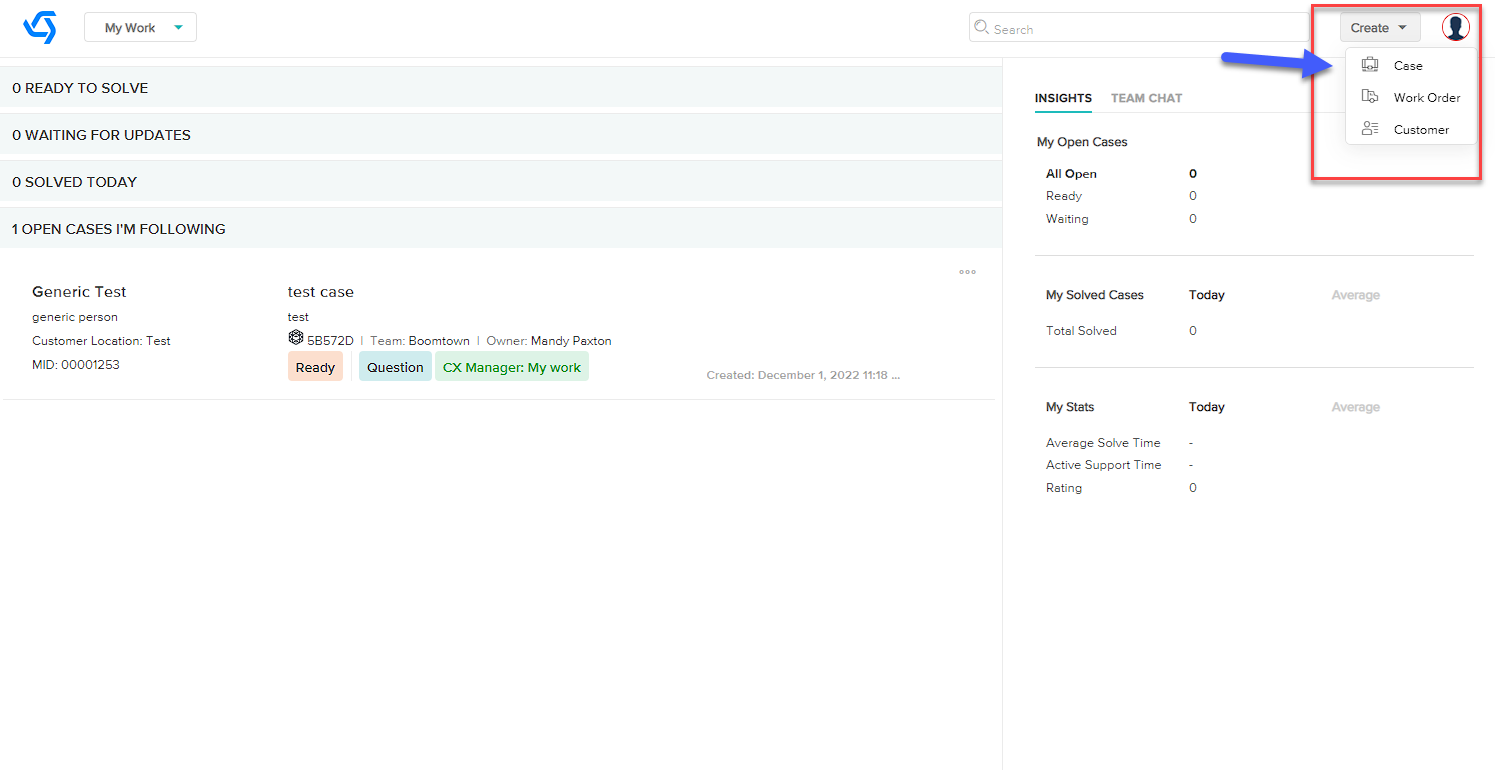
Create Button
You can create a new Case using the Create button at the top right as long as you are in any view besides Knowledge (/#kbhome).
- Click the Create button, then click on Case.
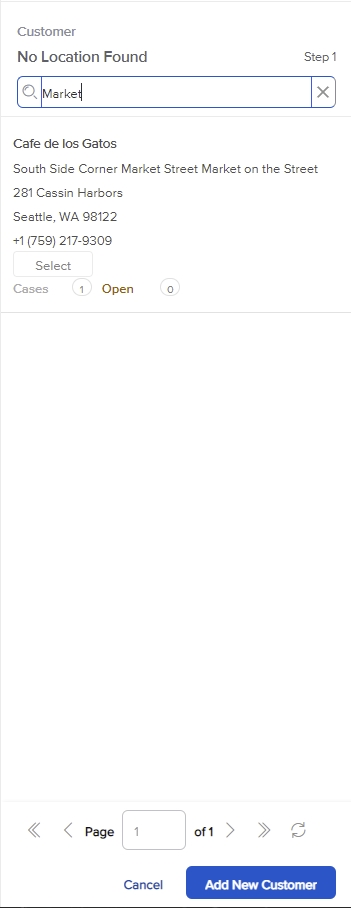
- If you know the Location you wish to create the Case for, you can use the Search Customers bar that appears in the Customer panel on the left side. A list of Locations will appear below the search bar as you type. You can search for a Customer Name, Location Name, City, or MID (Merchant Identification Number). Certain custom field types are also searchable. If the Customer you want to create this Case for is not in the platform yet, you can create a new one by clicking the Add New Customer button at the bottom right.
The Add New Customer button may not be visible depending on your Role & Permissions.
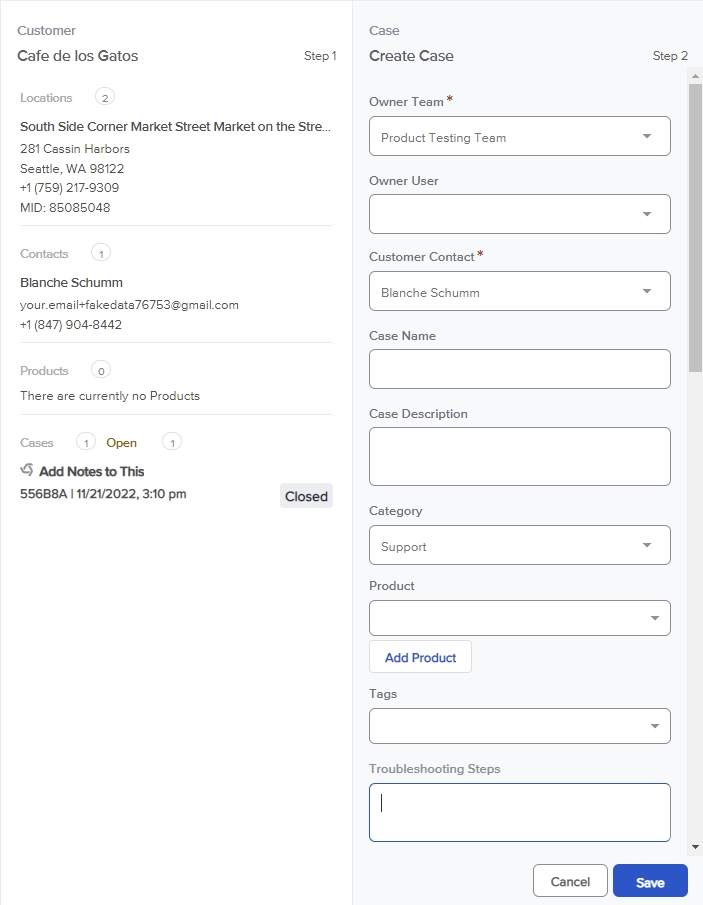
- Click "Select" on the Locationdesired and the Customer information will load in the Customer panel. Empty fields will be displayed for the Case on the right side. Fill out all the necessary information in the appropriate fields. Once done, click the Save button located at the bottom of the Case panel. This will save your inputs and create the new Case.
Required fields will have a red asterisk next to them. If you try to save a Case with empty required fields, they will be outlined in red.
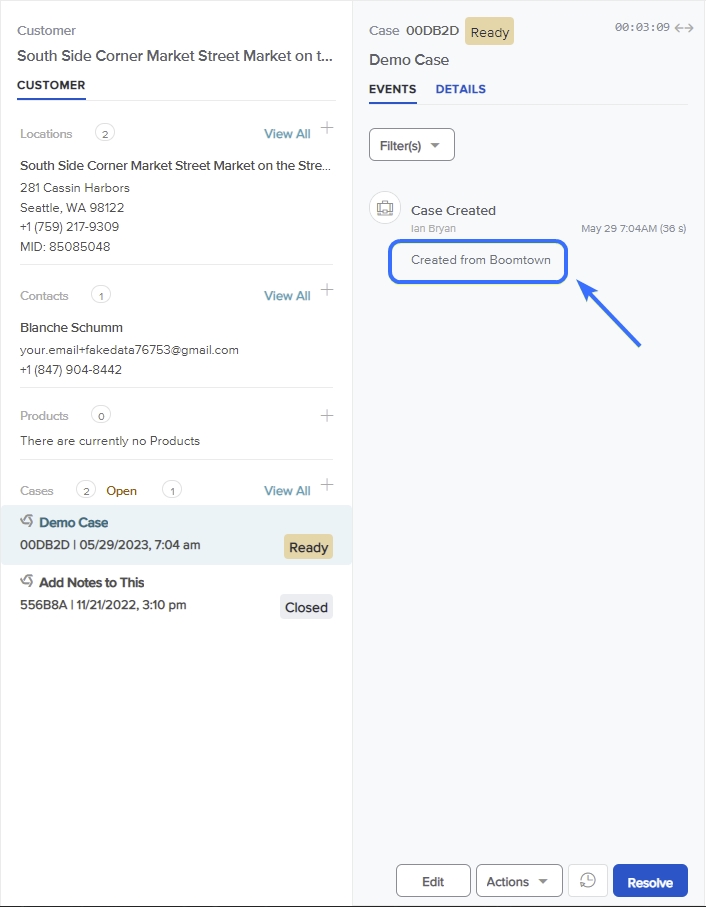
- Your new Case has been created! There should be an entry under the Events tab in the Case panel and your Case should be listed in the Customer panel.
Create a New Case from a Location
If you are already viewing a Case or a Location and want to create a new Case for that Location, you can easily do so.
- Click on the "+" icon in the Customer panel.
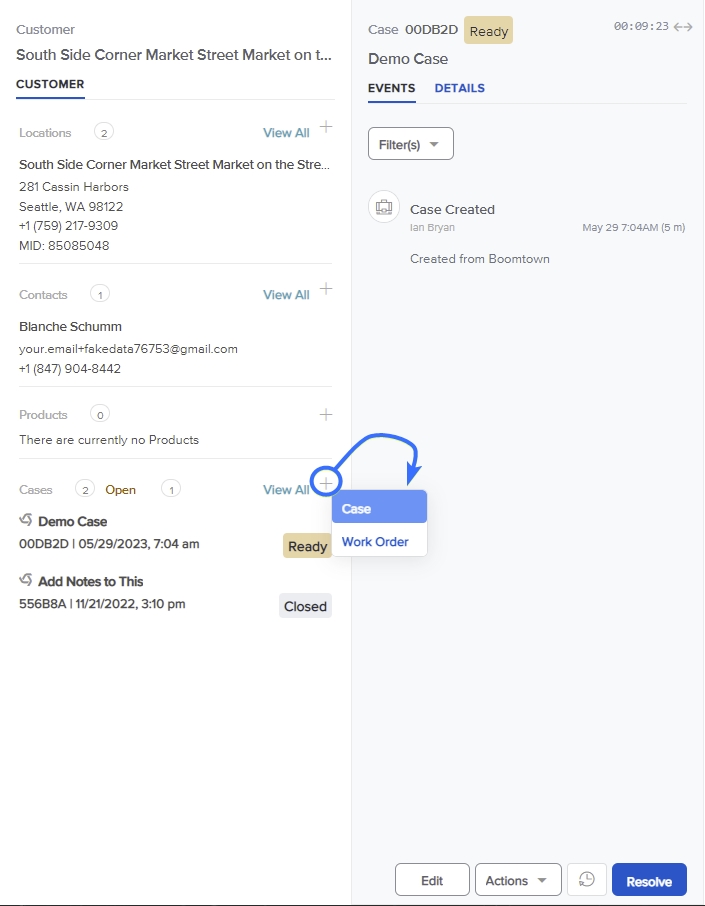
- Empty Case fields will load in the Case panel. Fill out all of the appropriate fields then click the Save button at the bottom of the Case panel to create your new Case.
Required fields will have a red asterisk next to them. If you try to save a Case with empty required fields, they will be outlined in red.
- Your new Case has been created! There should be an entry under the Events tab in the Case panel and your Case should be listed in the Customer panel.