
Add, Edit, or Delete a Location
Learn how to update your organization's Locations.
Last Updated:What's in this article?
Organize Your Locations
You can easily add, edit, or delete Locations all within the CX Manager. Let's learn how!
Your ability to add, edit, or delete a Location depends on your Role & Permissions.
Add a Location
You can add multiple Locations under the same Customer profile to keep things like franchises or business ownership organized.
- Access the Customer you would like to add another Location to. You can find Customers using the Site Search bar at the top or the individual search bar found in the Customers view.

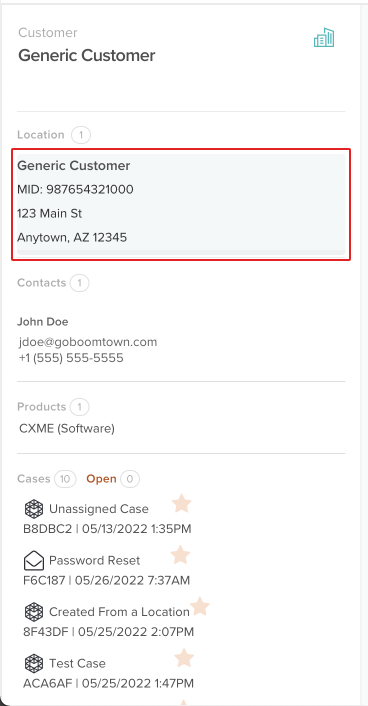
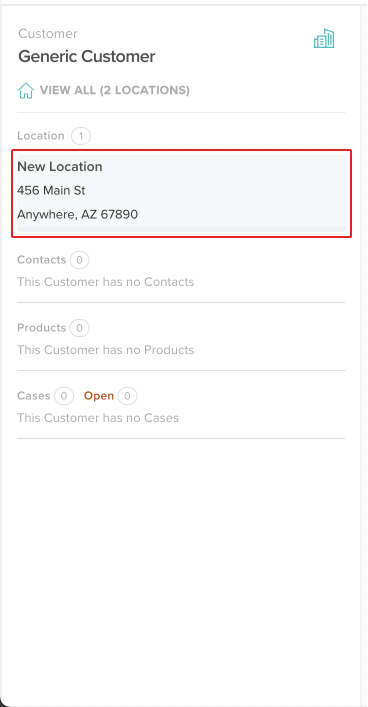
- Click on the Location in the Customer panel.
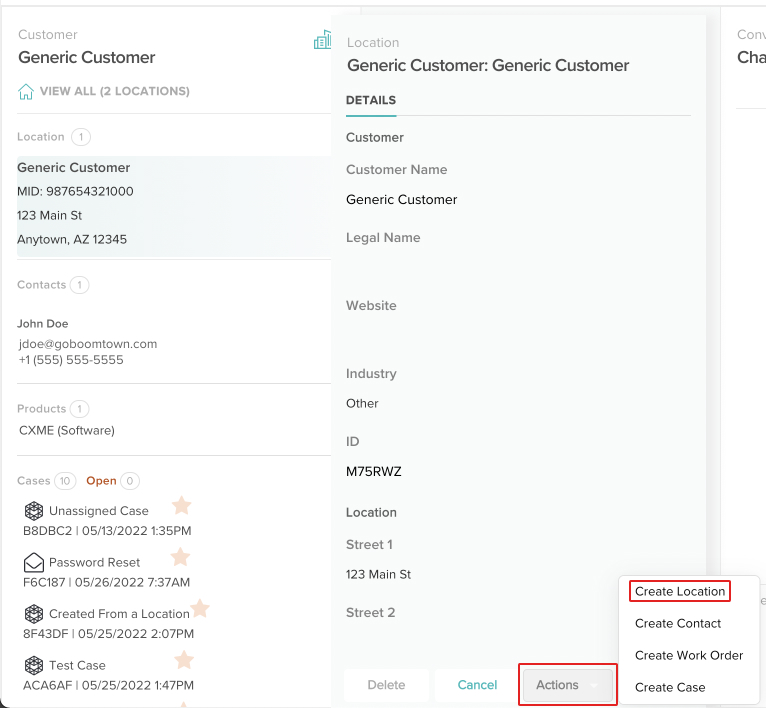
- At the bottom of the Location panel, click the Actions button, then click on Create Location.
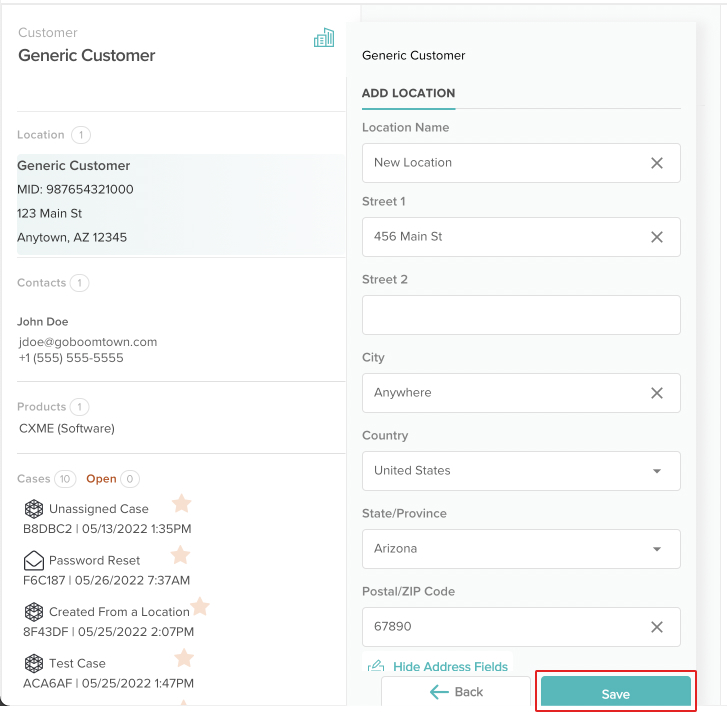
- Fill out all of the appropriate fields then click the Save button at the bottom of the Location panel.
Required fields will have a red asterisk next to them. If you try to save a Location with empty required fields, they will be outlined in red.
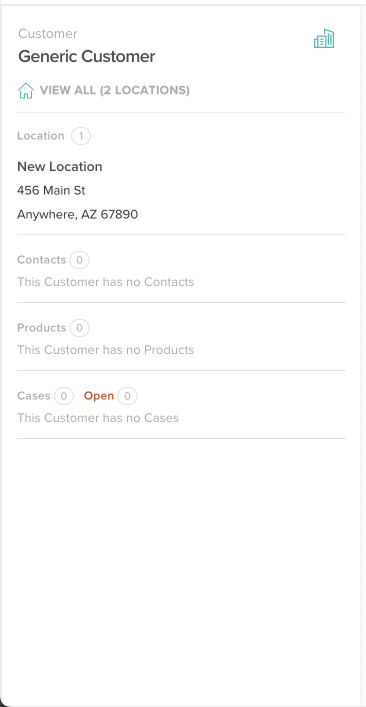
- Your new Location has now been created!
You can change the Location you are viewing by clicking on View All at the top of the Customer panel, then click the Select button under the Location you wish to view.
Edit a Location
Follow these simple steps if you ever need to update a Location's information.
- Access the Location you would like to edit. You can find Locations using the Site Search bar at the top or the individual search bar found in the Customers view.
- Click on the Location in the Customer panel.
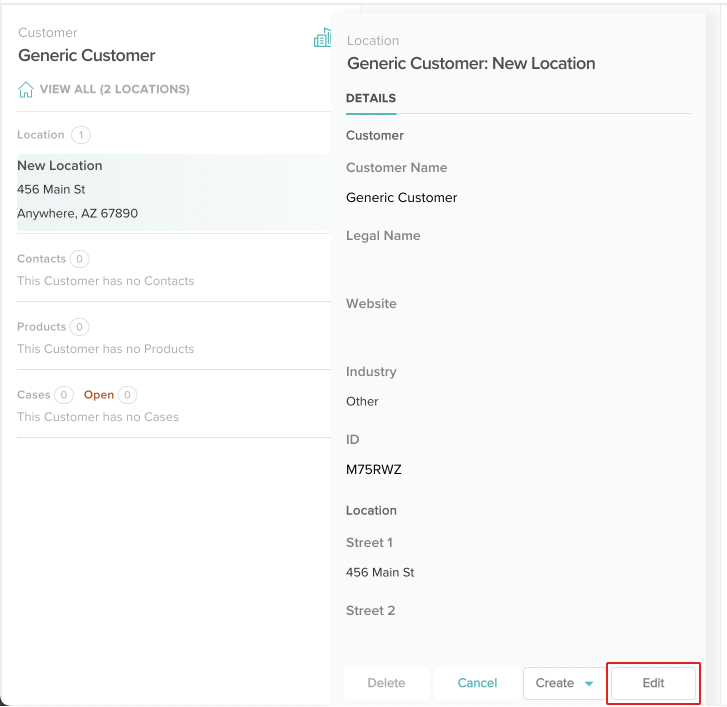
- At the bottom of the Location panel, click the Edit button.
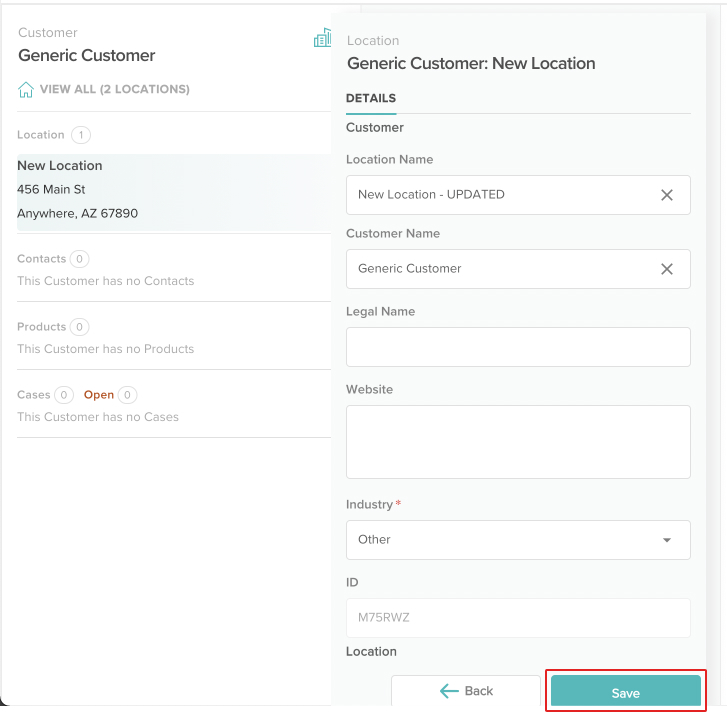
- Update any of the fields you want, then click the Save button.
Required fields will have a red asterisk next to them. If you try to save a Location with empty required fields, they will be outlined in red.
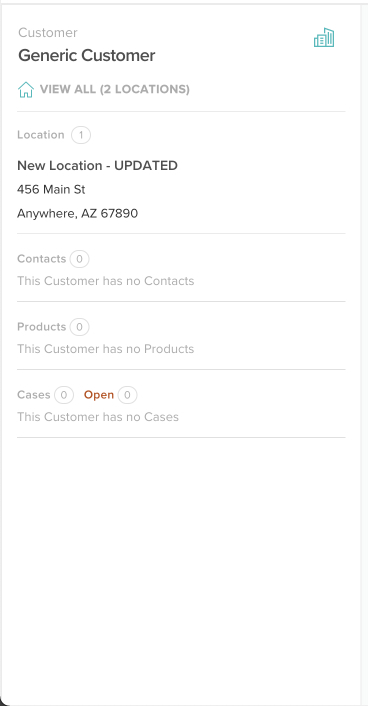
- Your Location now has up-to-date information!
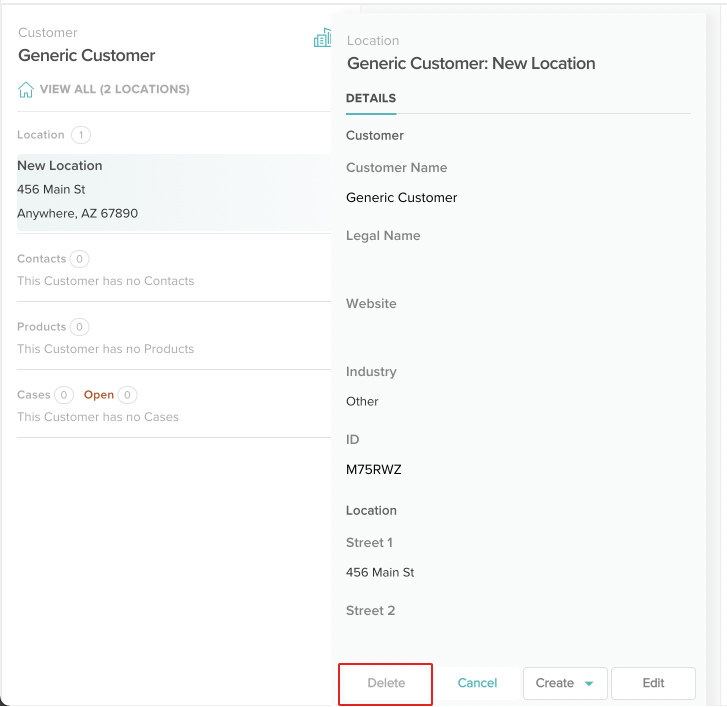
Delete a Location
If a Location profile is no longer needed by your organization, you can simply delete it.
Deleting a Location will also delete any Contacts, Products, and Cases associated with it. Deleting the sole Location under a Customer profile will delete the Customer profile as well.
- Access the Location you would like to delete. You can find Locations using the Site Search bar at the top or the individual search bar found in the Customers view.
- Click on the Locationin the Customer panel.
- At the bottom of the Location panel, click the Delete button.
- You will see a popup asking you for confirmation. Click the Delete button again.
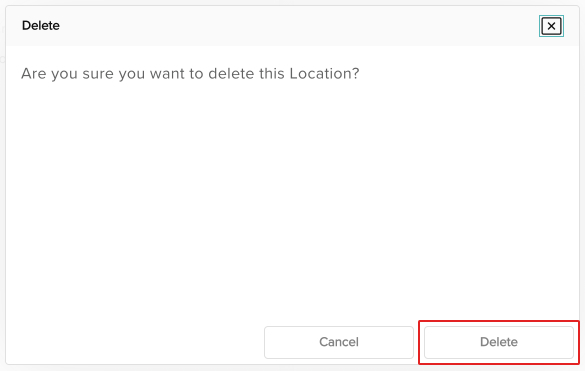
- Your Location has been deleted! You will be taken back to the Customers view.